User management
Users in connect app refer to the staff of your organisation. While consumers of your services or products are referred to as ‘Customers’
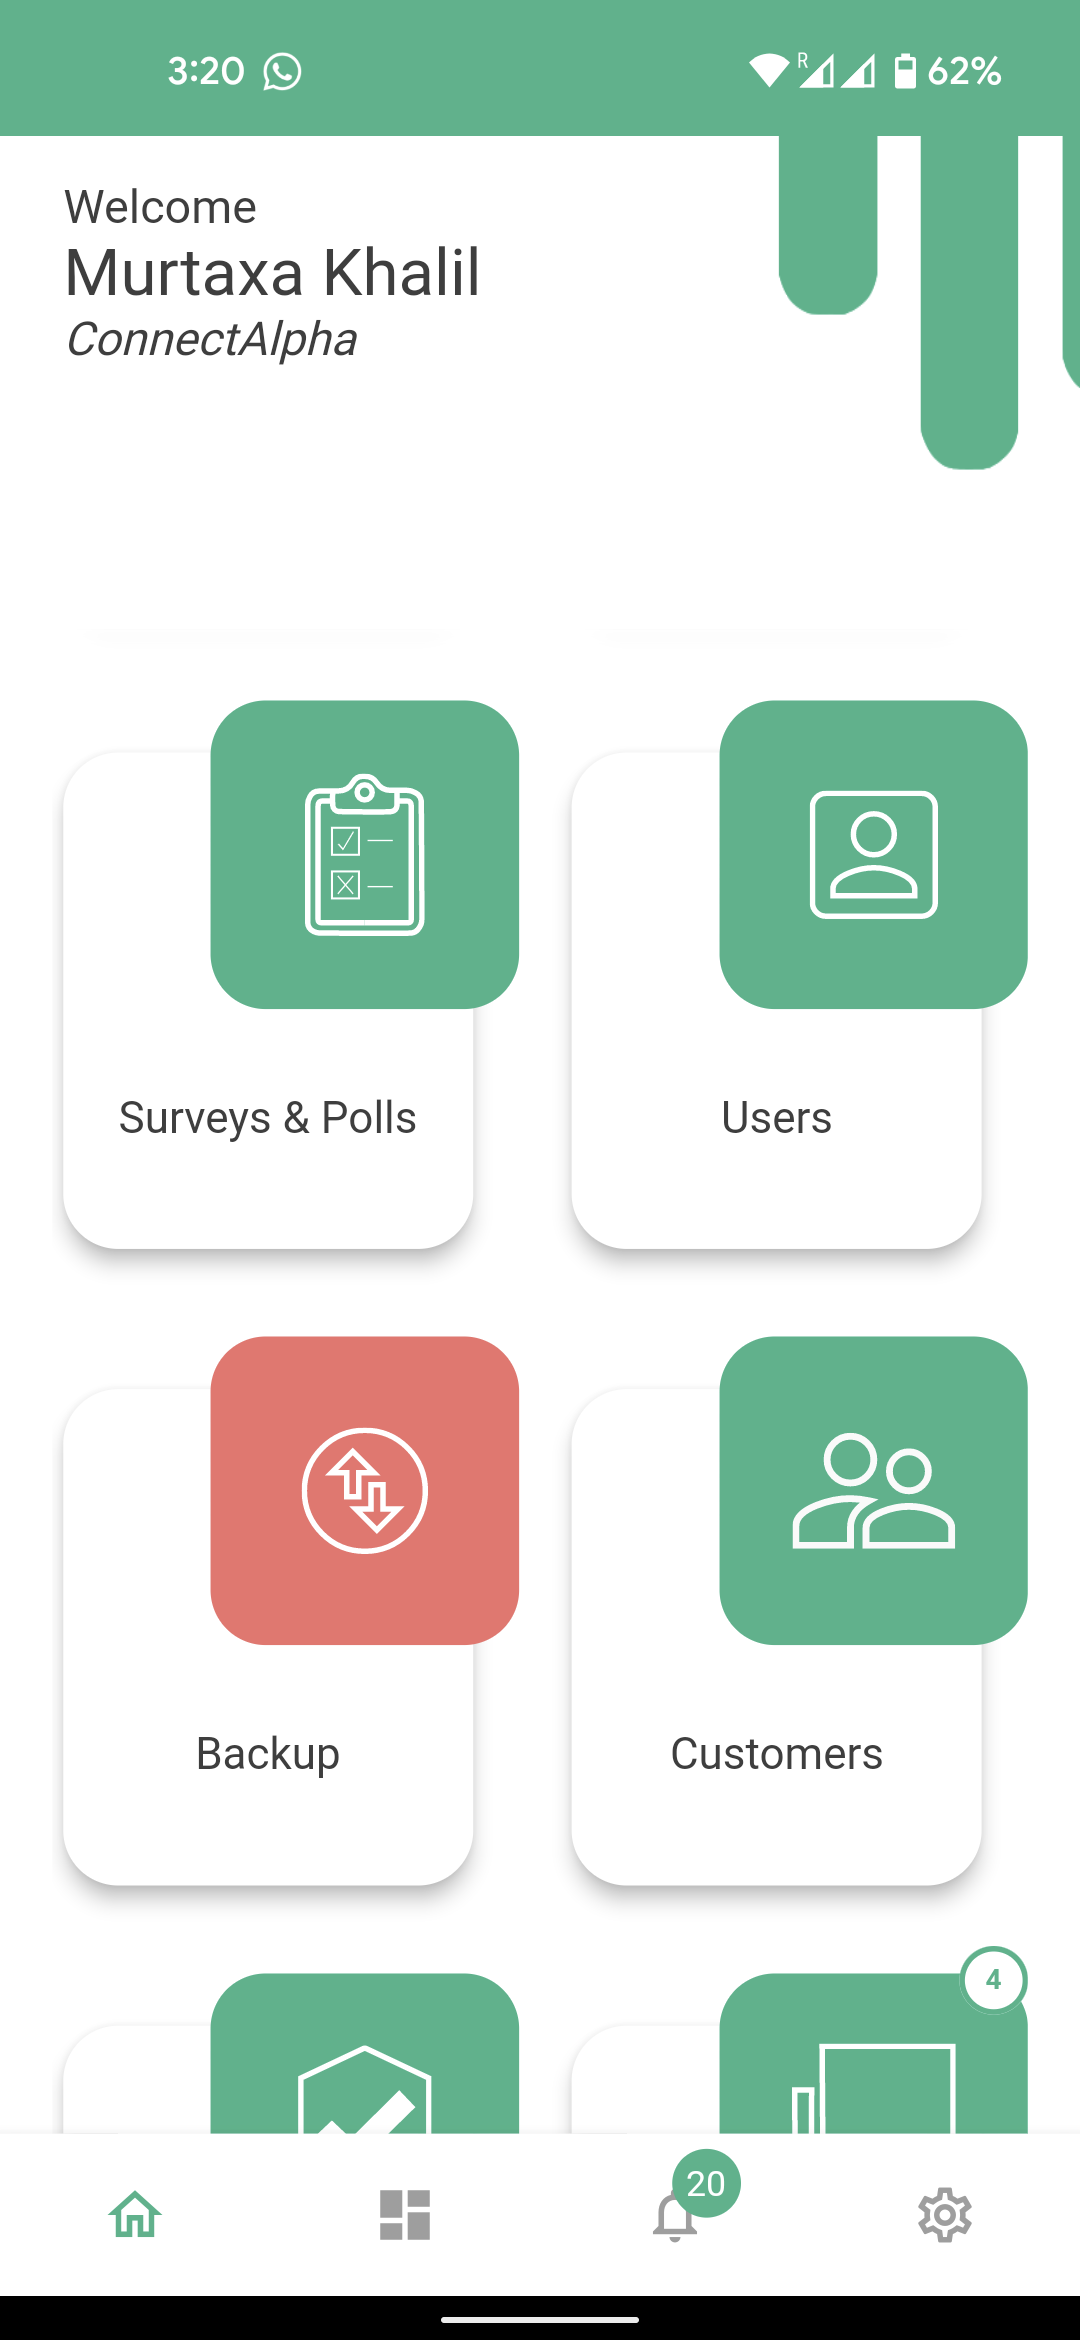
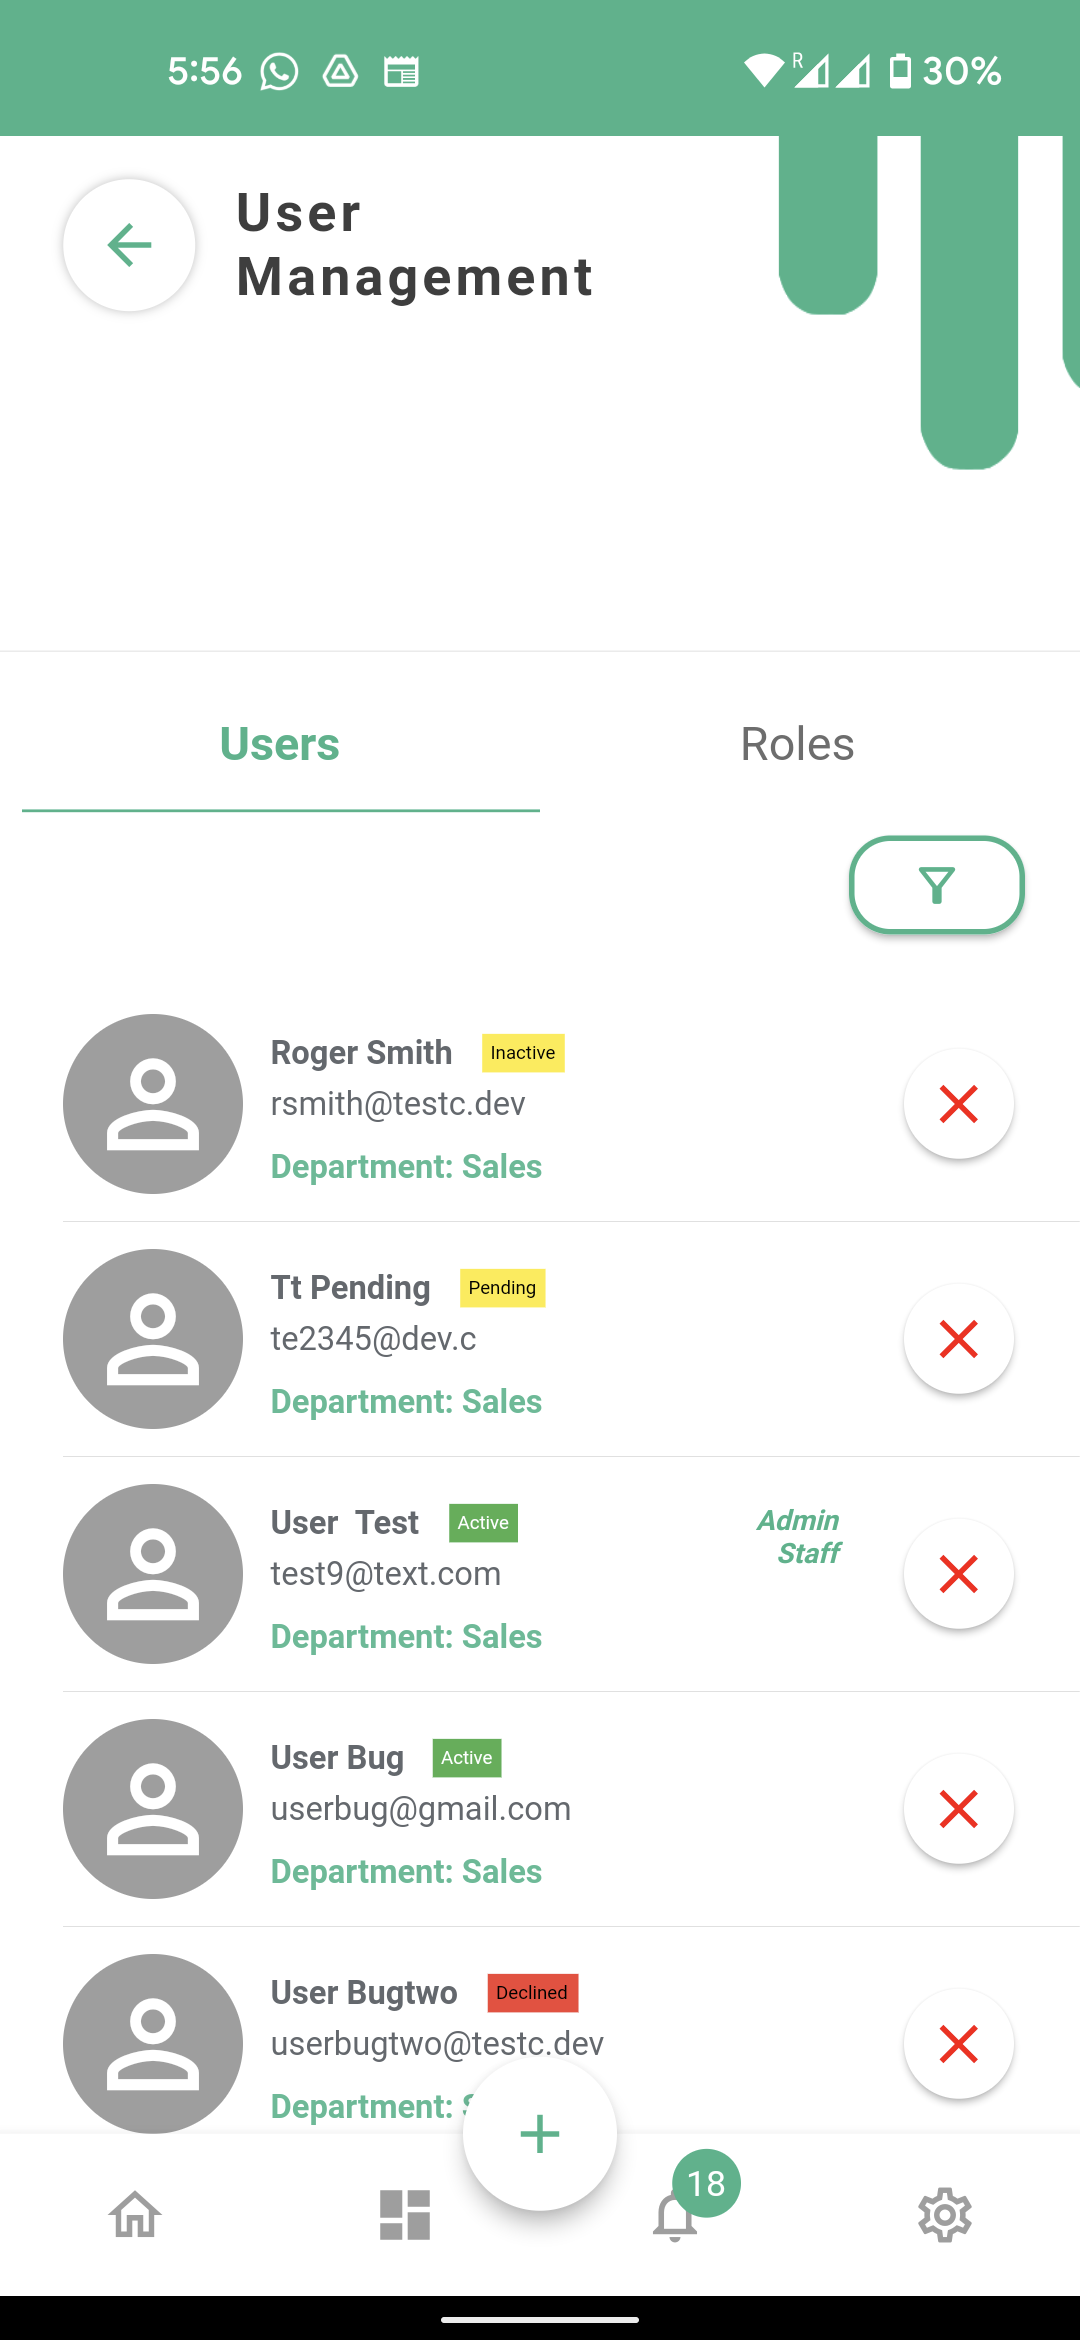
From your connect app home screen clicking users tab takes you to users Management home screen.

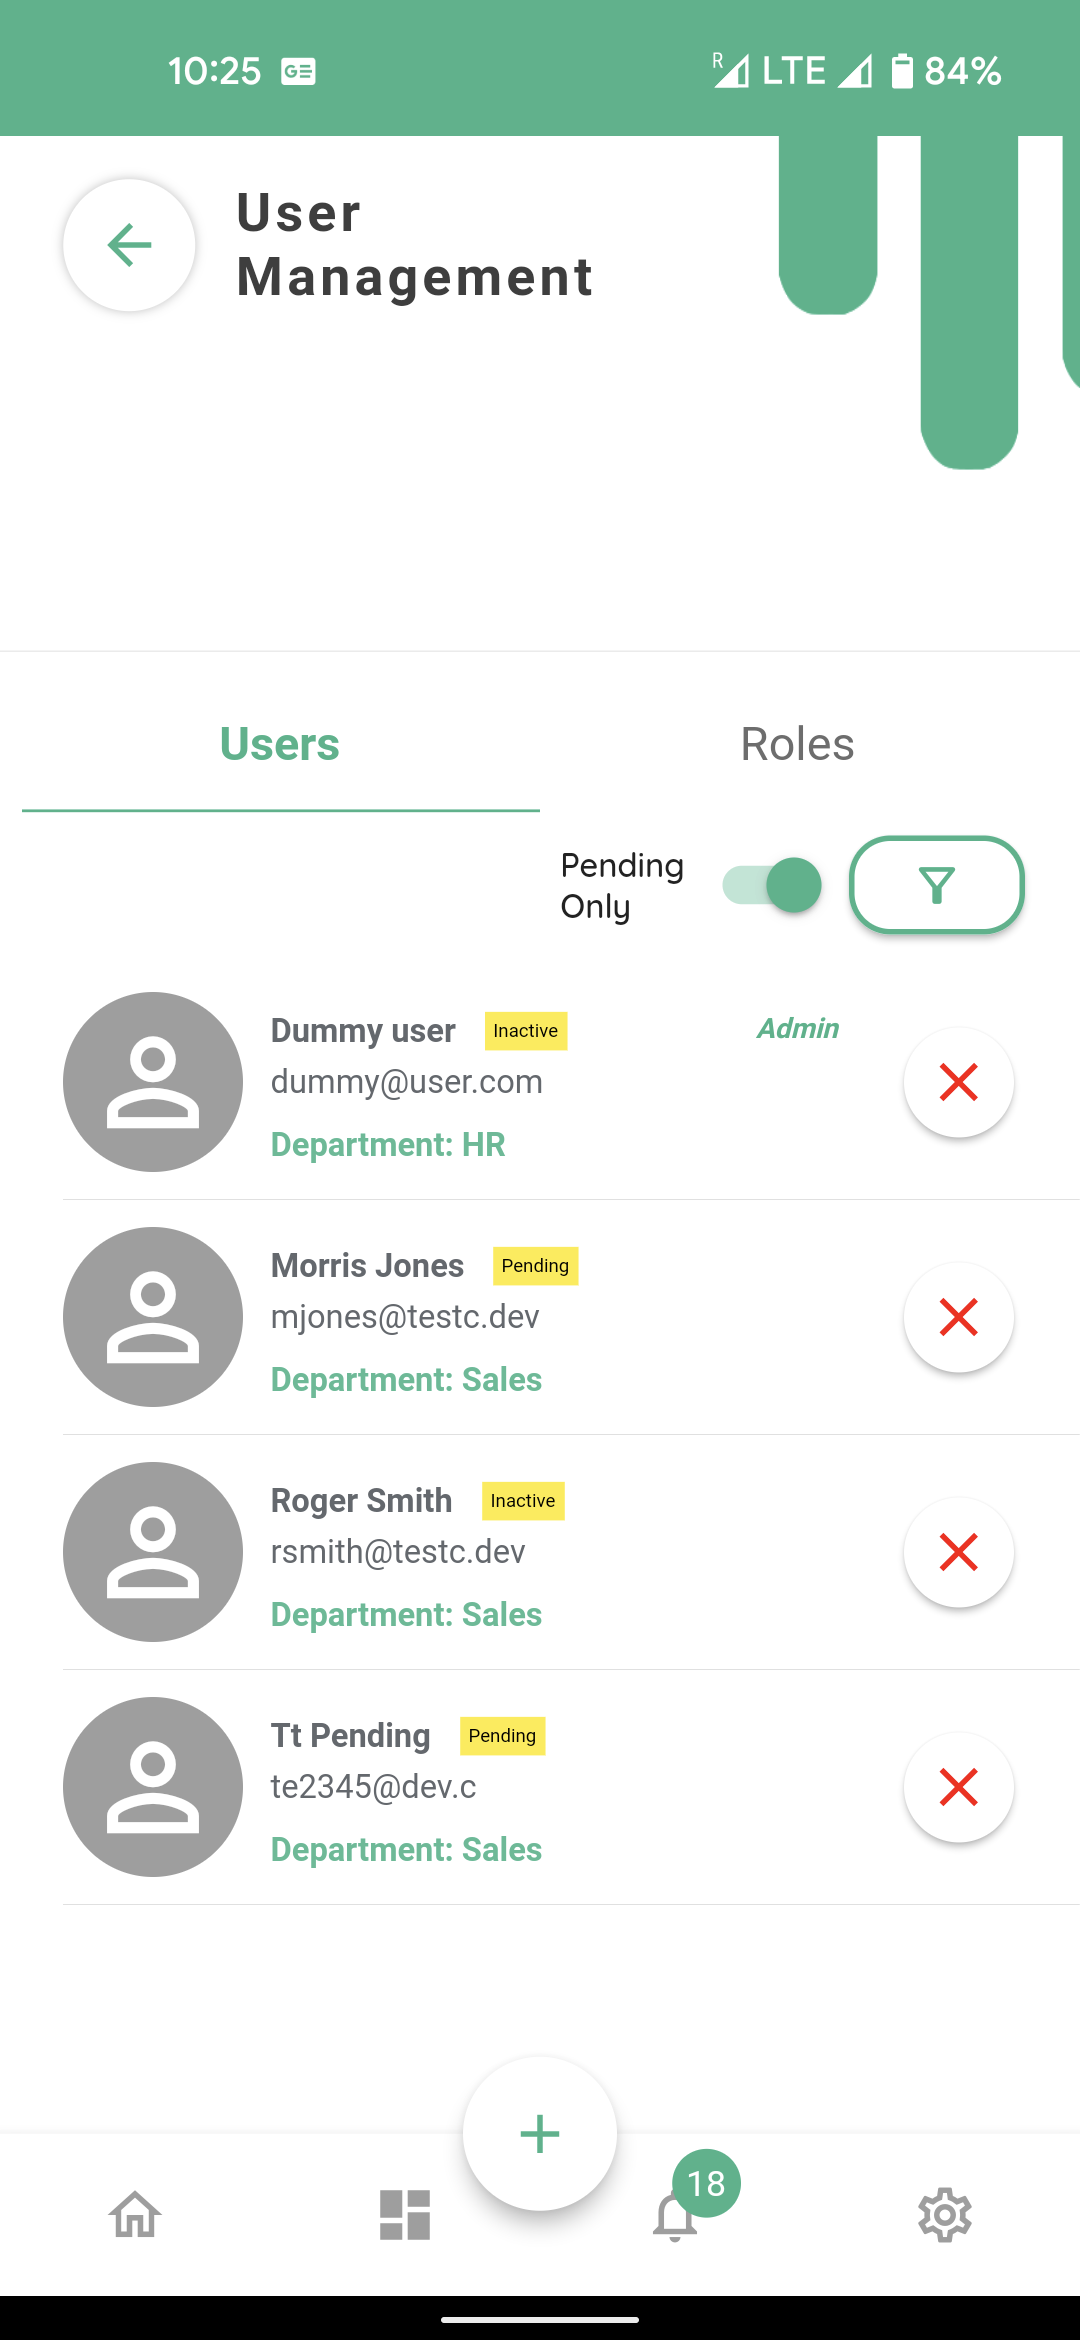
Here you will see two tabs Users and Roles.
This Tutorial focuses on the user management, there is going to be a separate tutorial on Roles and their assigned permissions.
Under the users tab you will have 4 possible statuses for any user with coloured tags.
Pending and Inactive with yellow tags
Declined in a red tag and
Active with a green tag.
Further any active user can have roles with respective permissions as Admin or Manager etc, shown across their name or have no permissions assigned to them.
We will explain about each of the statuses mentioned earlier, a bit later in this Tutorial.
Pending only toggle (show arrow) shows the users who are awaiting approval.
Going back to the user management home screen

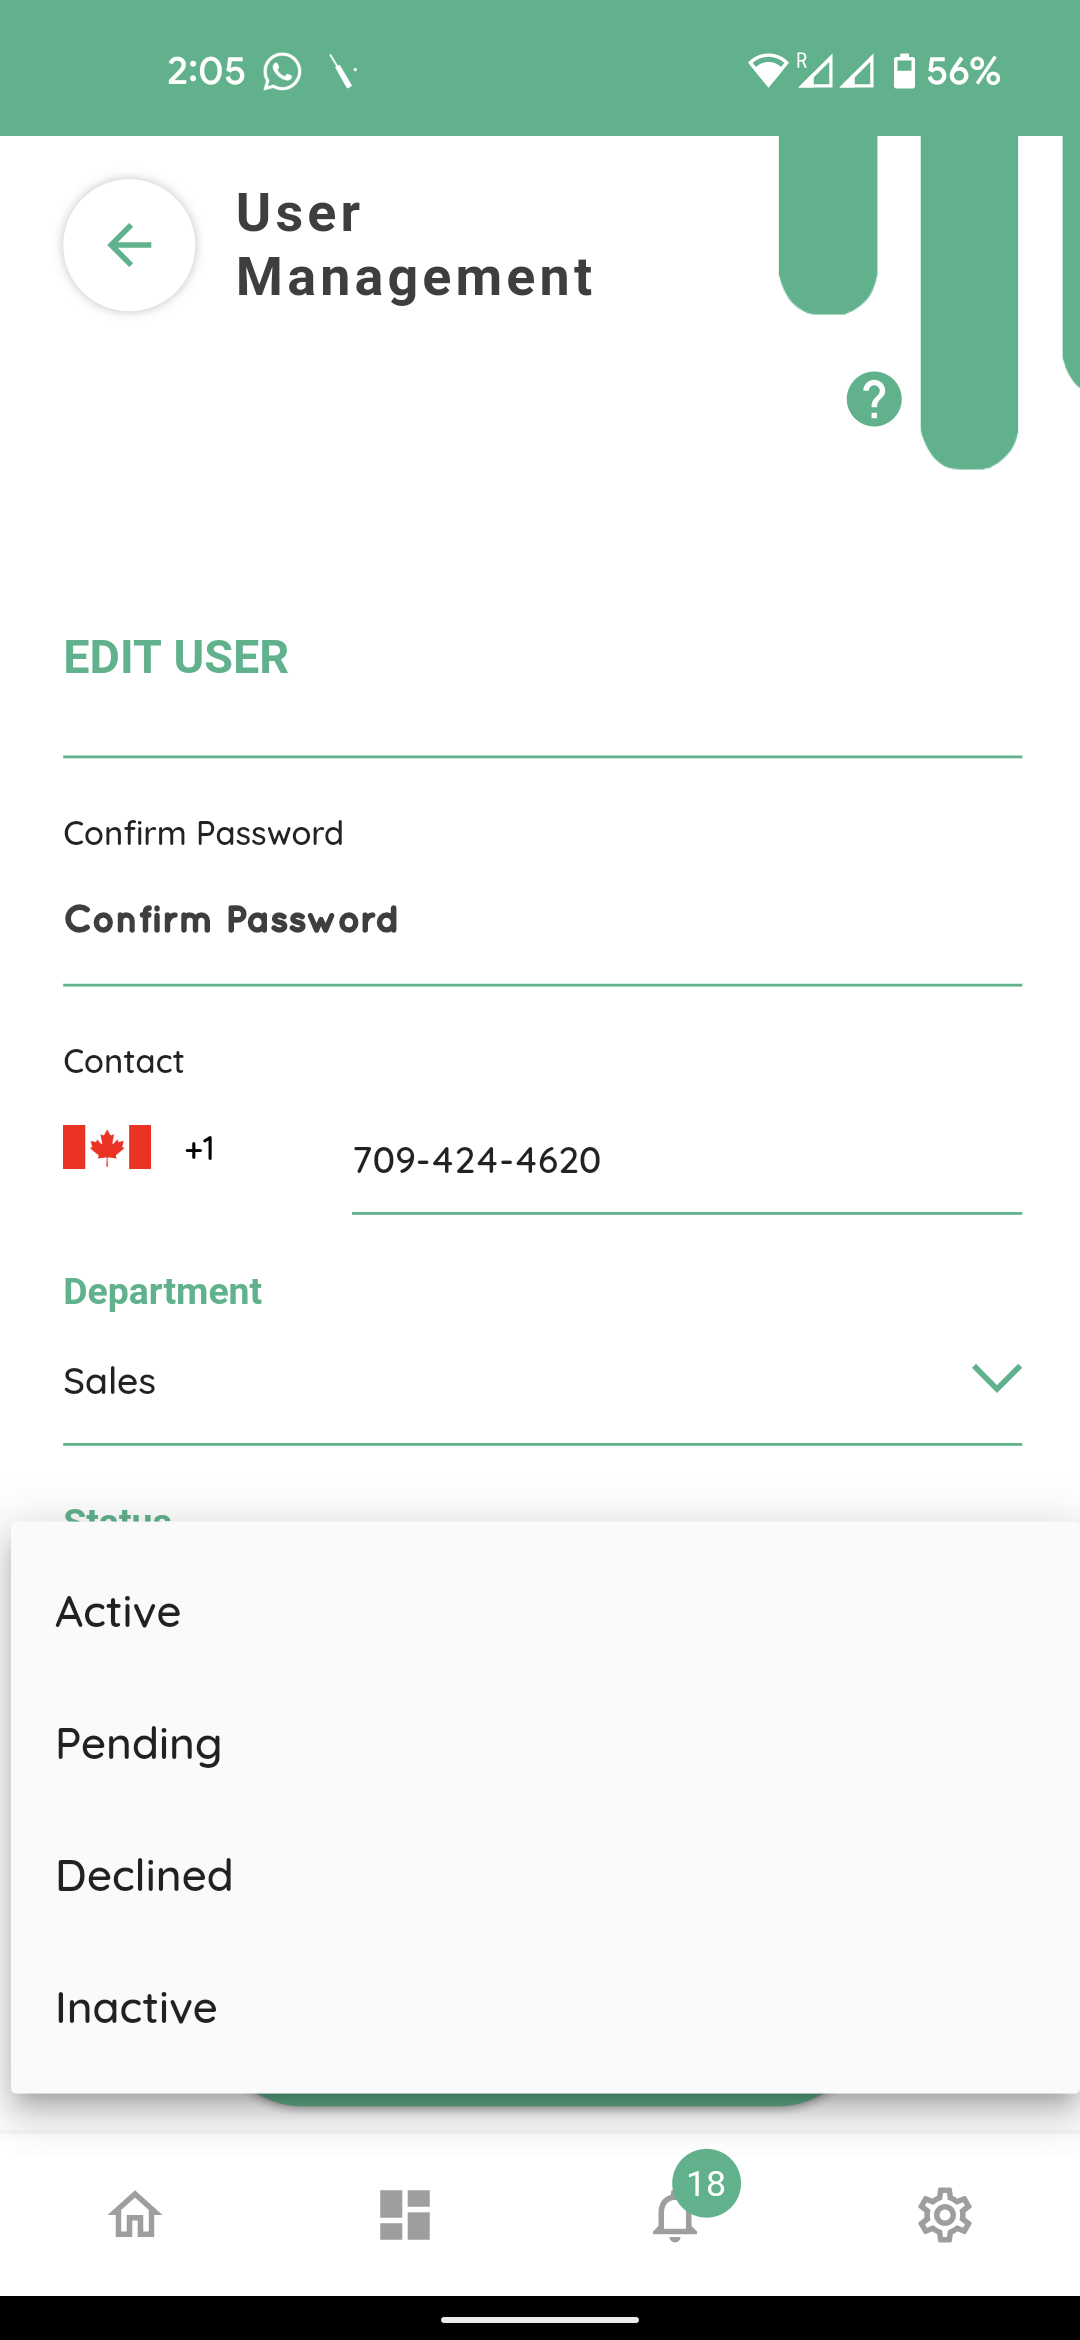
and selecting any user will take you to the user management menu.
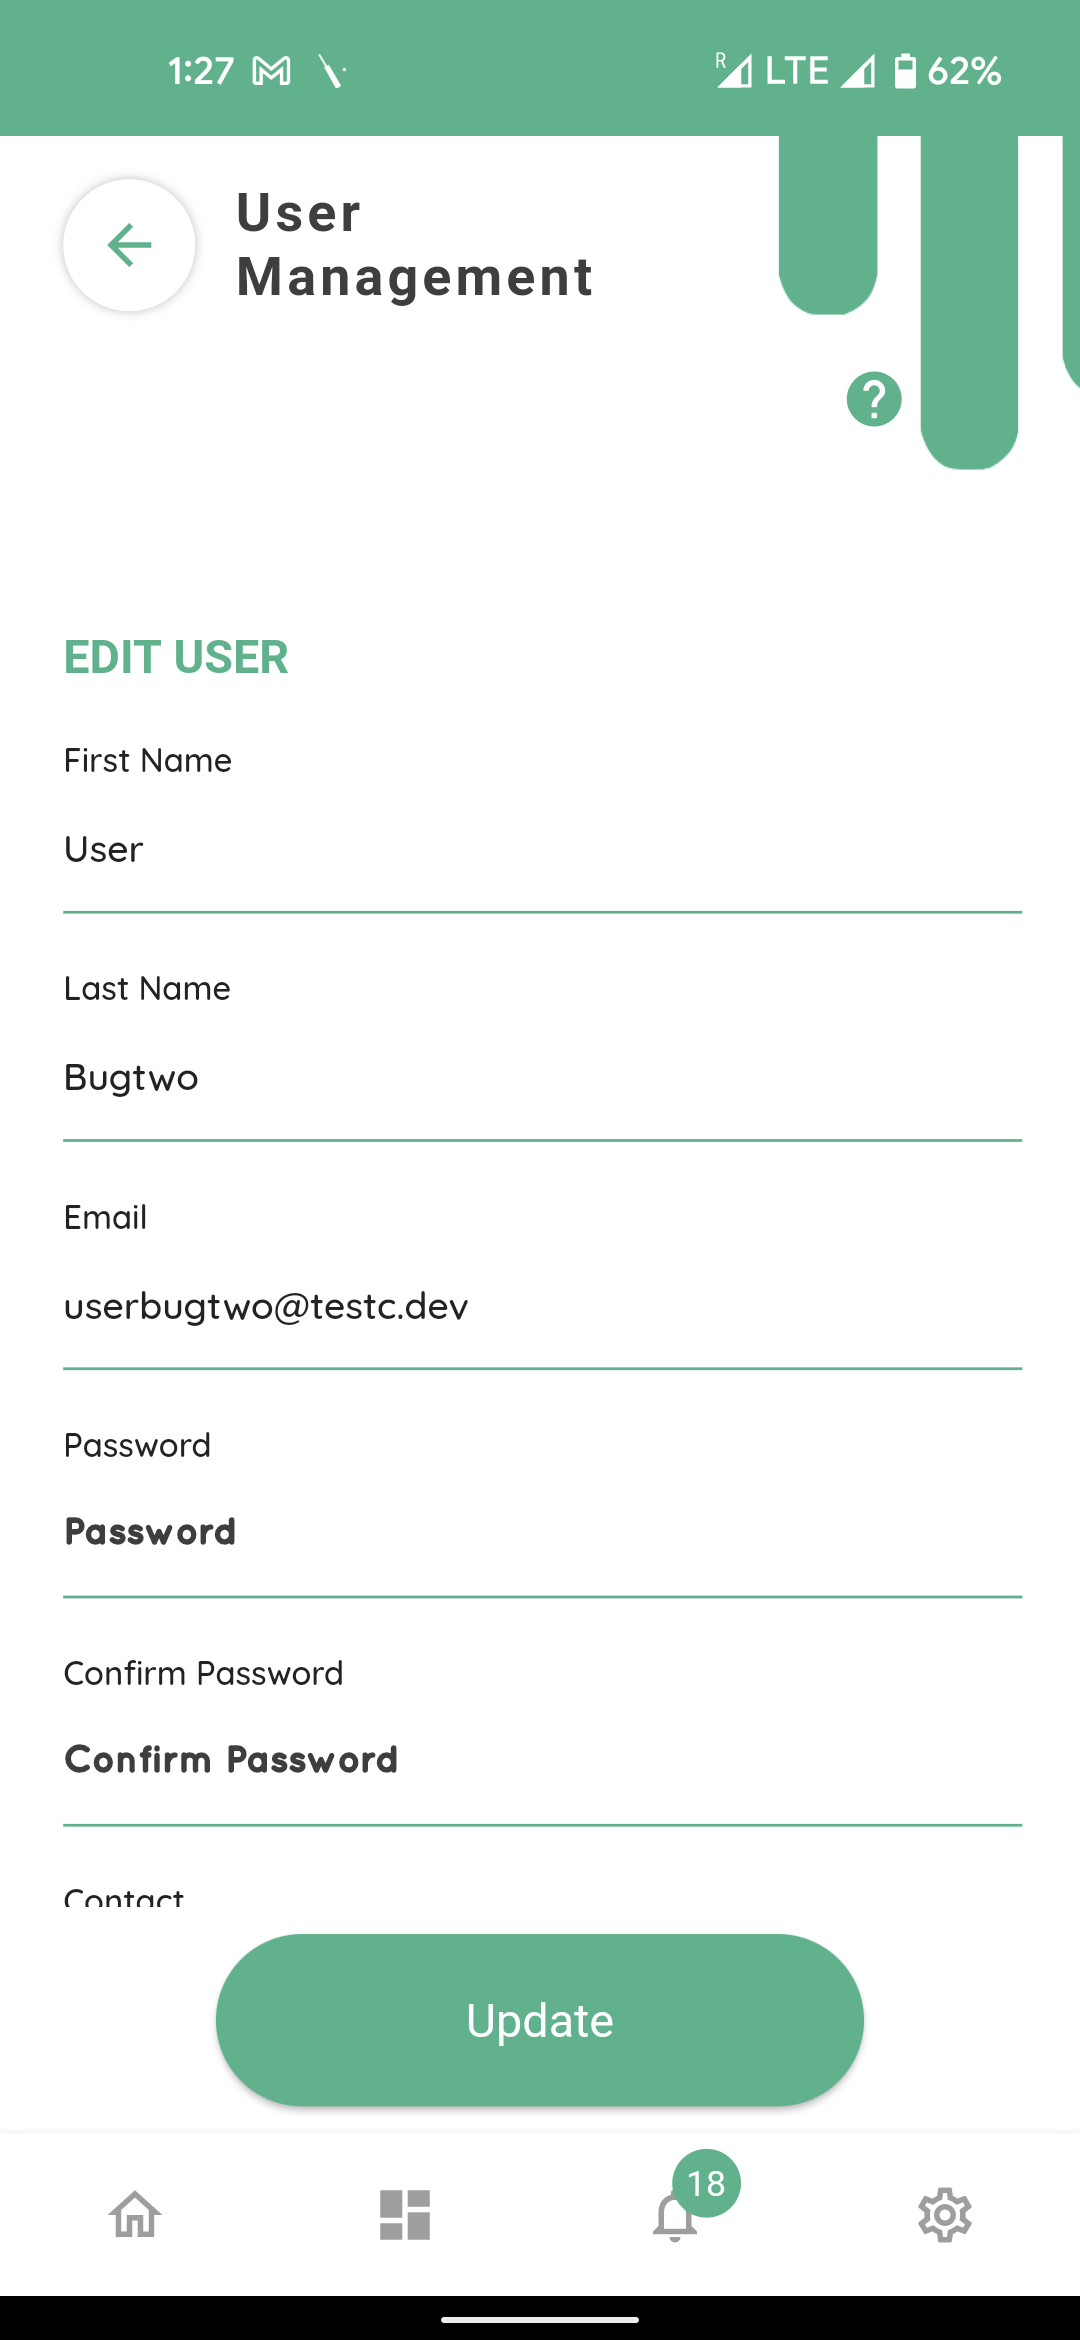
This menu allows you to edit User’s profile data, We anticipate you would not need to Edit user’s name or email, albeit this facility is available here.
This menu also allows you to reset any user’s password manually in case the user is unable to reset their password through the ‘forgotten password’ link at the login screen.
At the bottom of the screen,

You have the ability to Edit user’s phone number, their allocated department and status.
Selecting the department field

Will let you allocate the user a different department in your organization based on your organizational settings. Please note any user can have one department allocated to them at any one point in time.
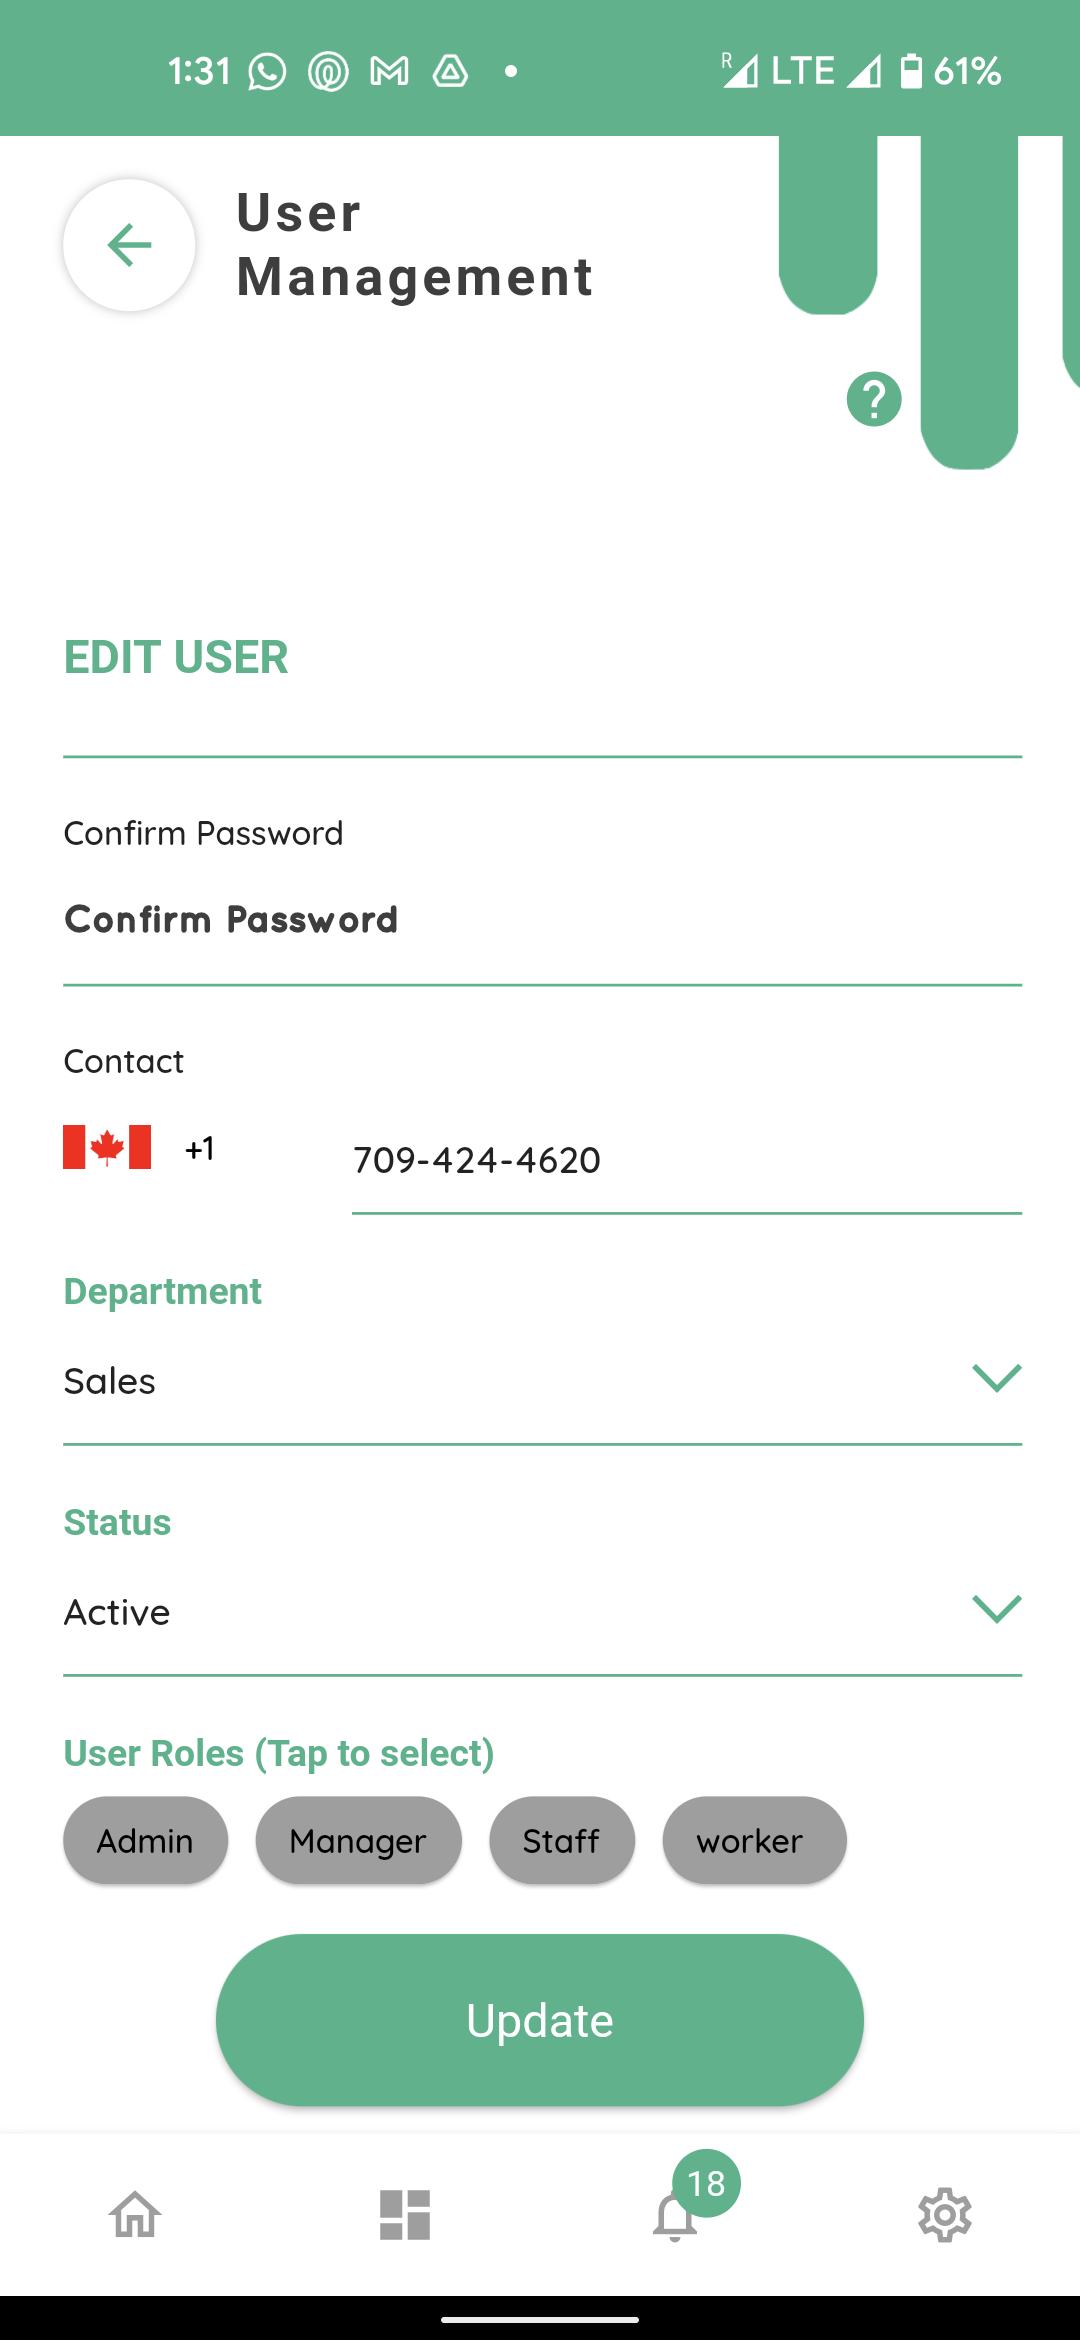
Selecting the status field

Will let you choose between the Active, Inactive, Declined and pending statuses.
Let us explain each one of these one by one.
An active status with a green tag allows the user to use the connect app as per the role assigned to them with the set of permissions for that role. These are the roles created by your company like Admin or Staff etc.
Any assigned roles are visible across users’ names on the users home screen.
We will explain how to assign roles and their respective permissions later in this Tutorial.
If the user has an active status but no roles are assigned to them, they will only be able to login to the app connected to your organisation but will not be able to use any modules of the app.
An Inactive user with a yellow status will not be able to login to their respective connect apps. You can temporarily change to a user to inactive status if they are on holidays or a career break and your would not want them to use the connect app for a duration of time. You will be able to change it to active status from the user profile menu at any time.
A Pending status also with a yellow tag for any user, implies that they have newly registered with your organization and they are still awaiting approval or status change to active and role allocation before they can start using the application. Please note that all newly registered staff will have pending status if the organisational settings under Settings
Organisation Settings
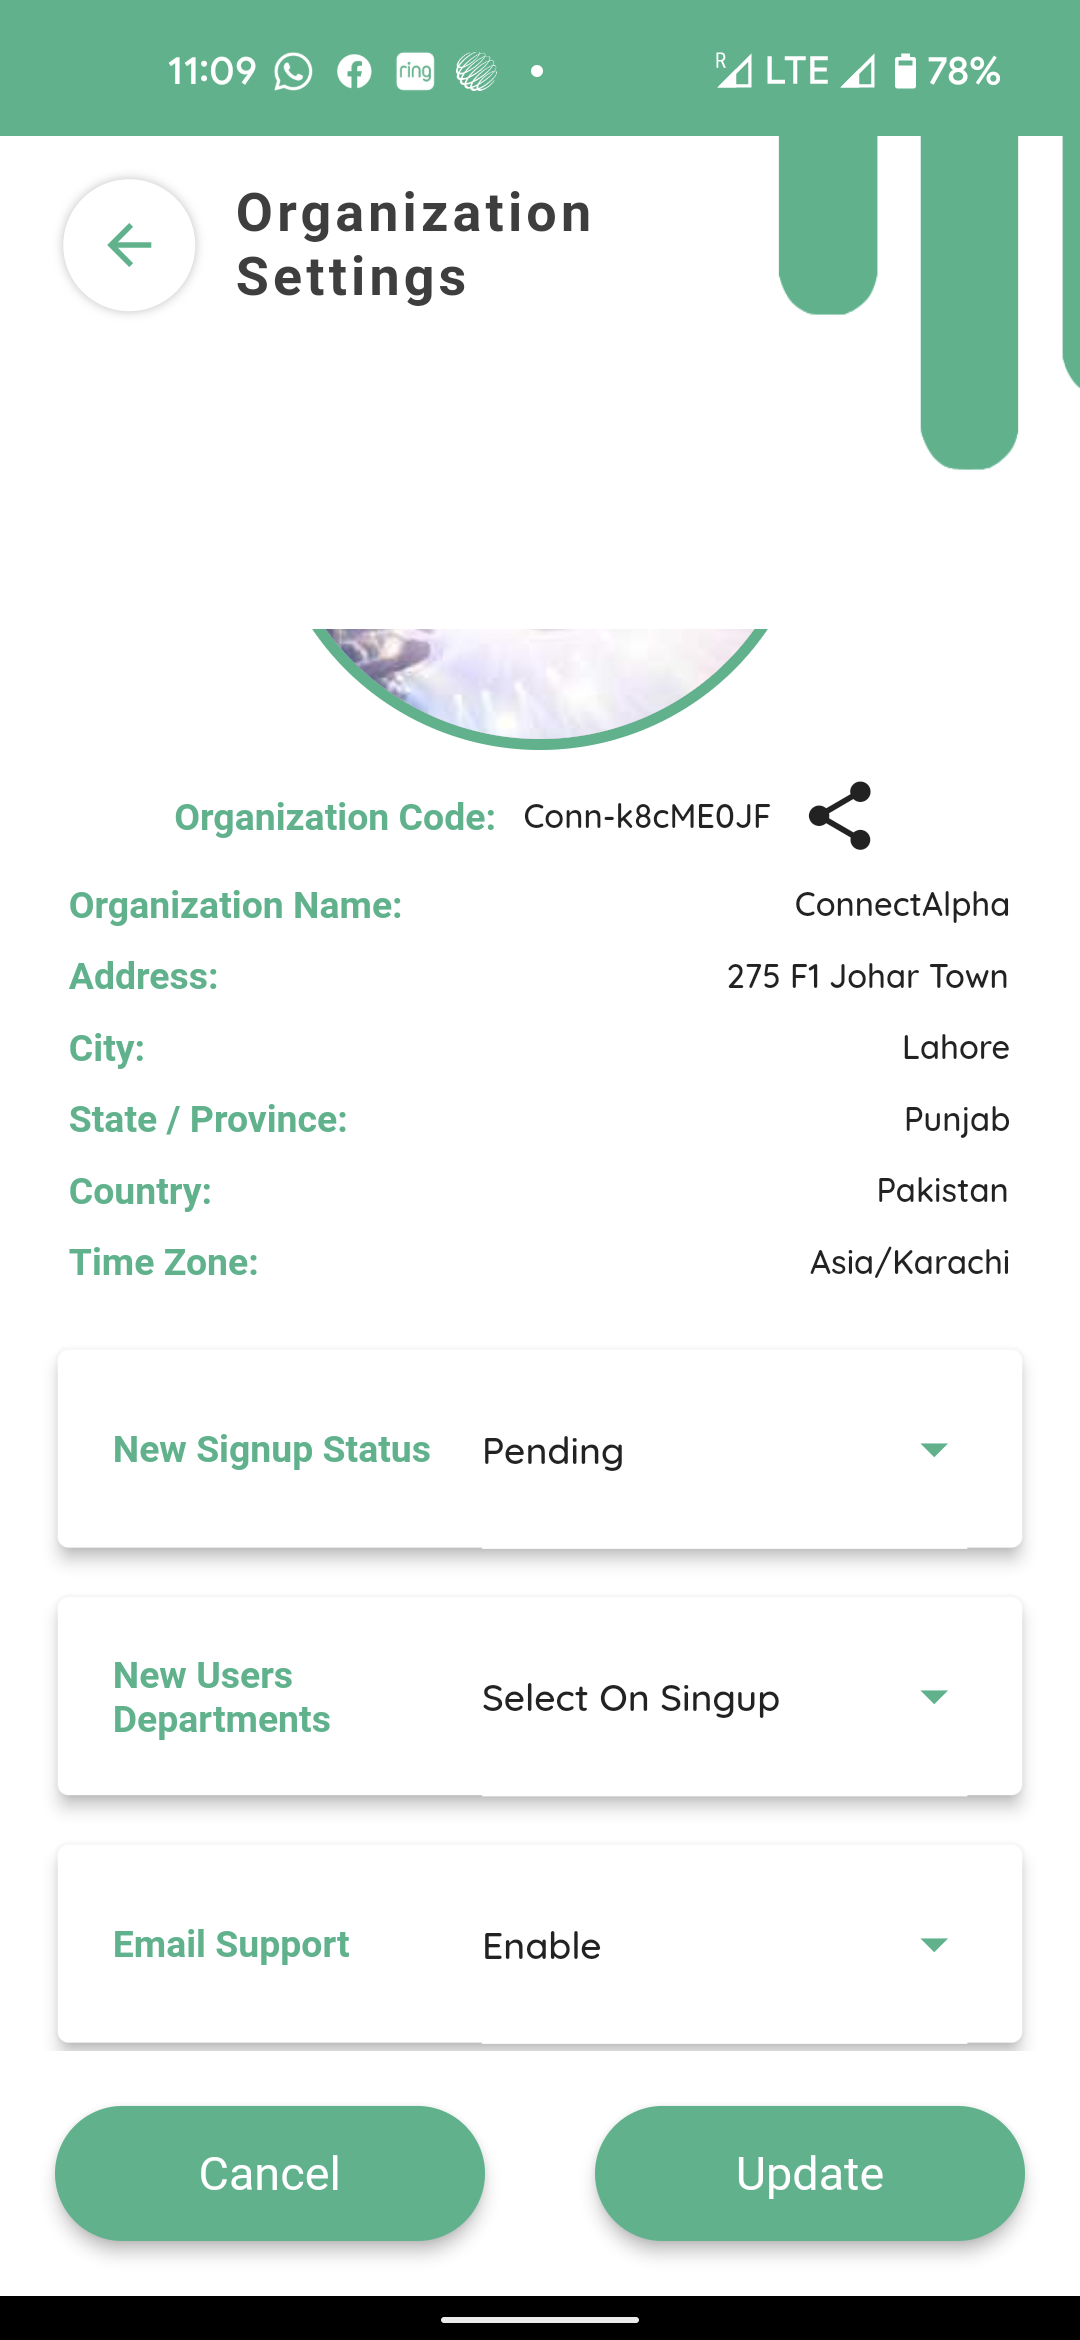
New Signup status is set as pending. If this is set as Active here the new users registering for the first time to your organisation will appear as Active but without any permissions to use any modules as explained above till they are assigned a role as well, which will be shown soon in this Tutorial.
The status field allows you to change the status from pending to active here.

A Declined status appears as a red tag. When any new user registers as a staff member of your organization using your organisational code their status appears as pending depending on the settings as explained earlier. If you do not recognize them as a member of your staff or choose not to give them access to your organization you can choose to decline their request here. They will not be able to login to the connect app linked to your organisation.
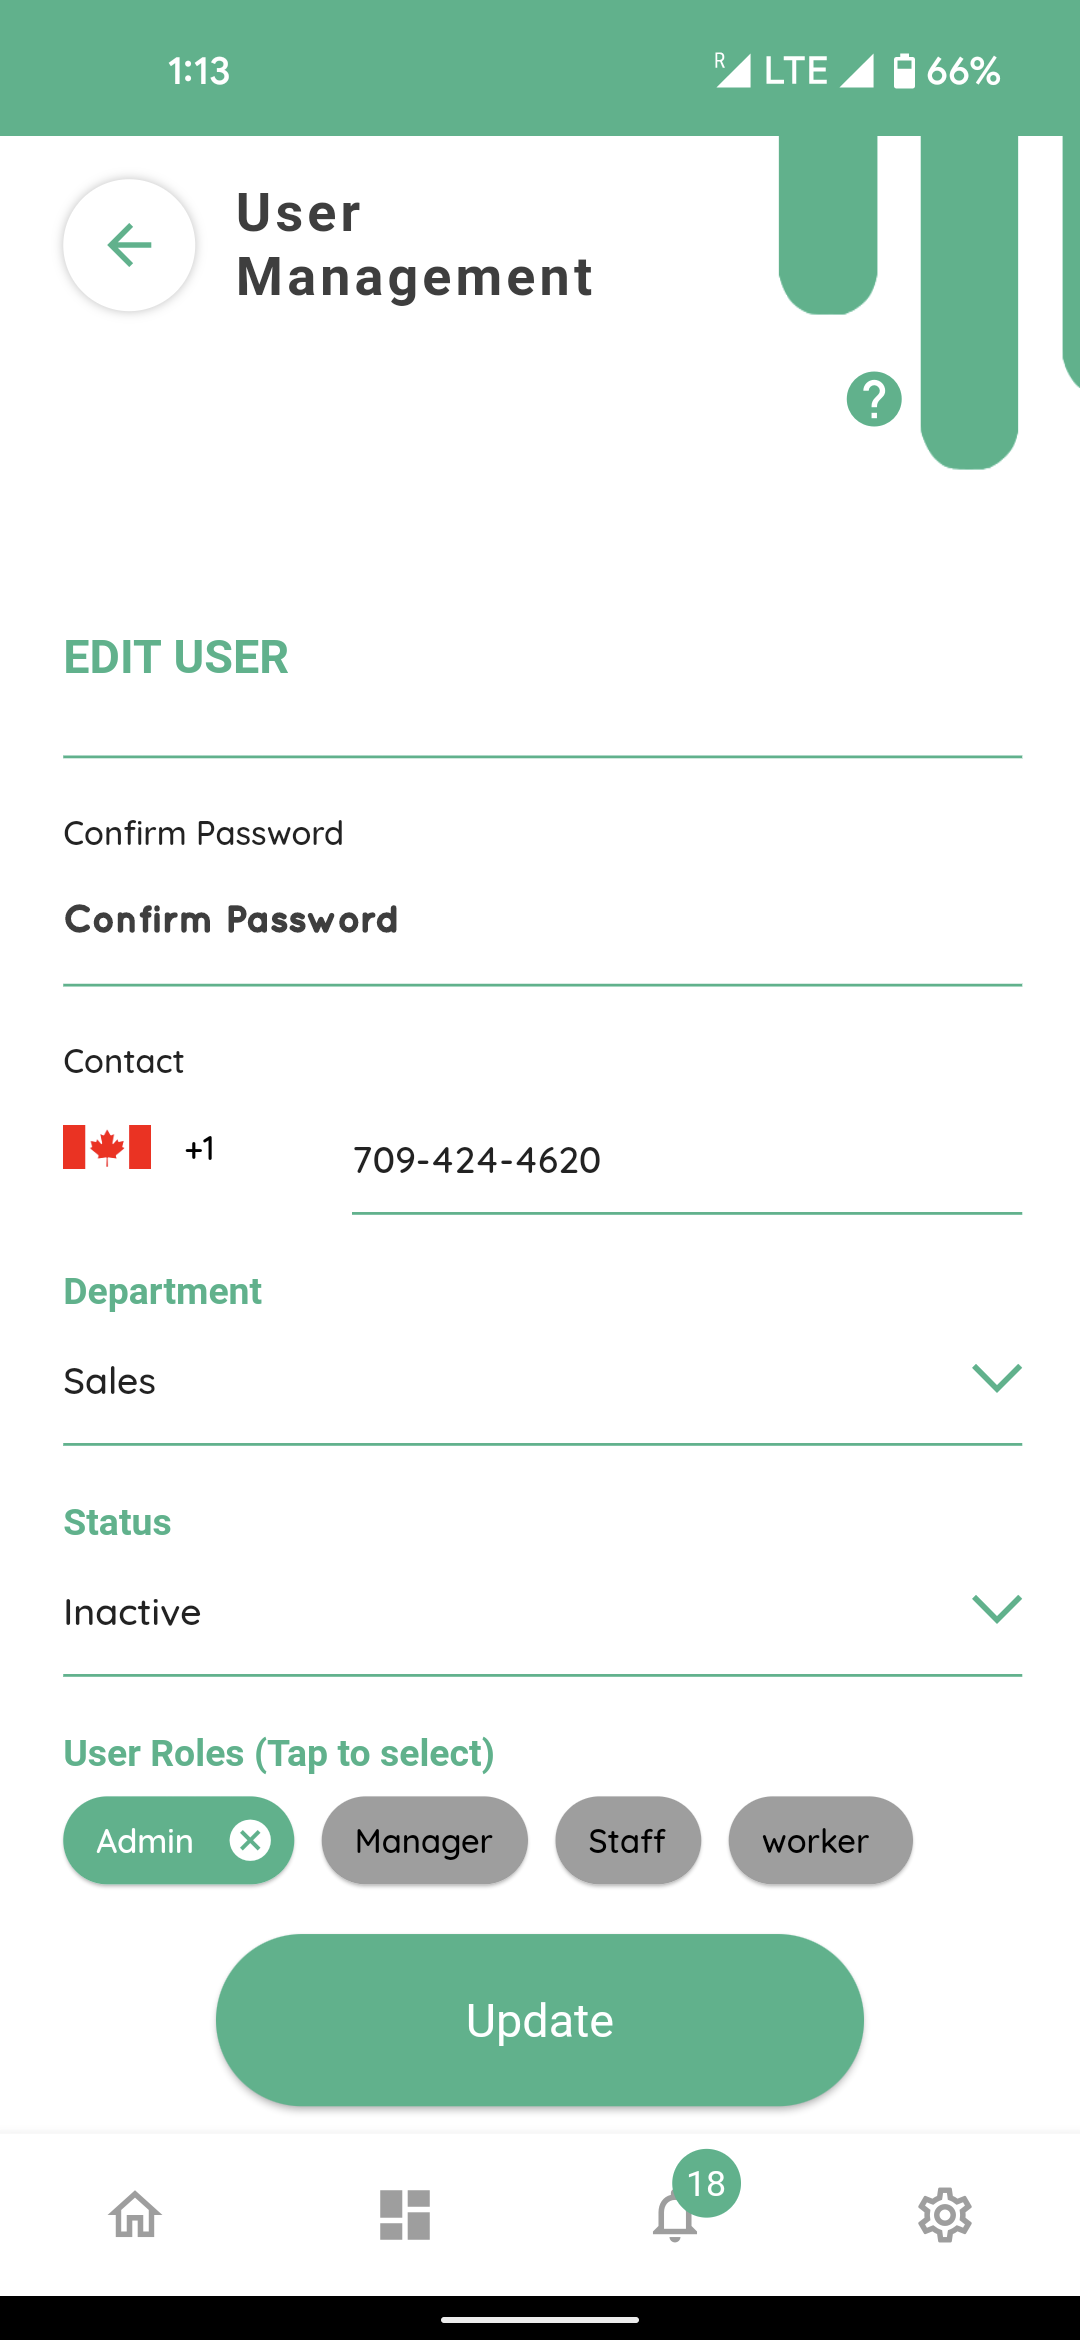
The last field at the bottom of this menu is user roles, the ones in green are assigned to this user. You can click on a green role to deselect it and a grey tile to select it. Any user may be assigned more than one roles. The permissions connected to each role are available as a tutorial on user roles.