Invoicing (organisation)
Connect App allows you to create and send invoices to any customer linked to your organization or business. Click the invoicing module on the connect app home screen.
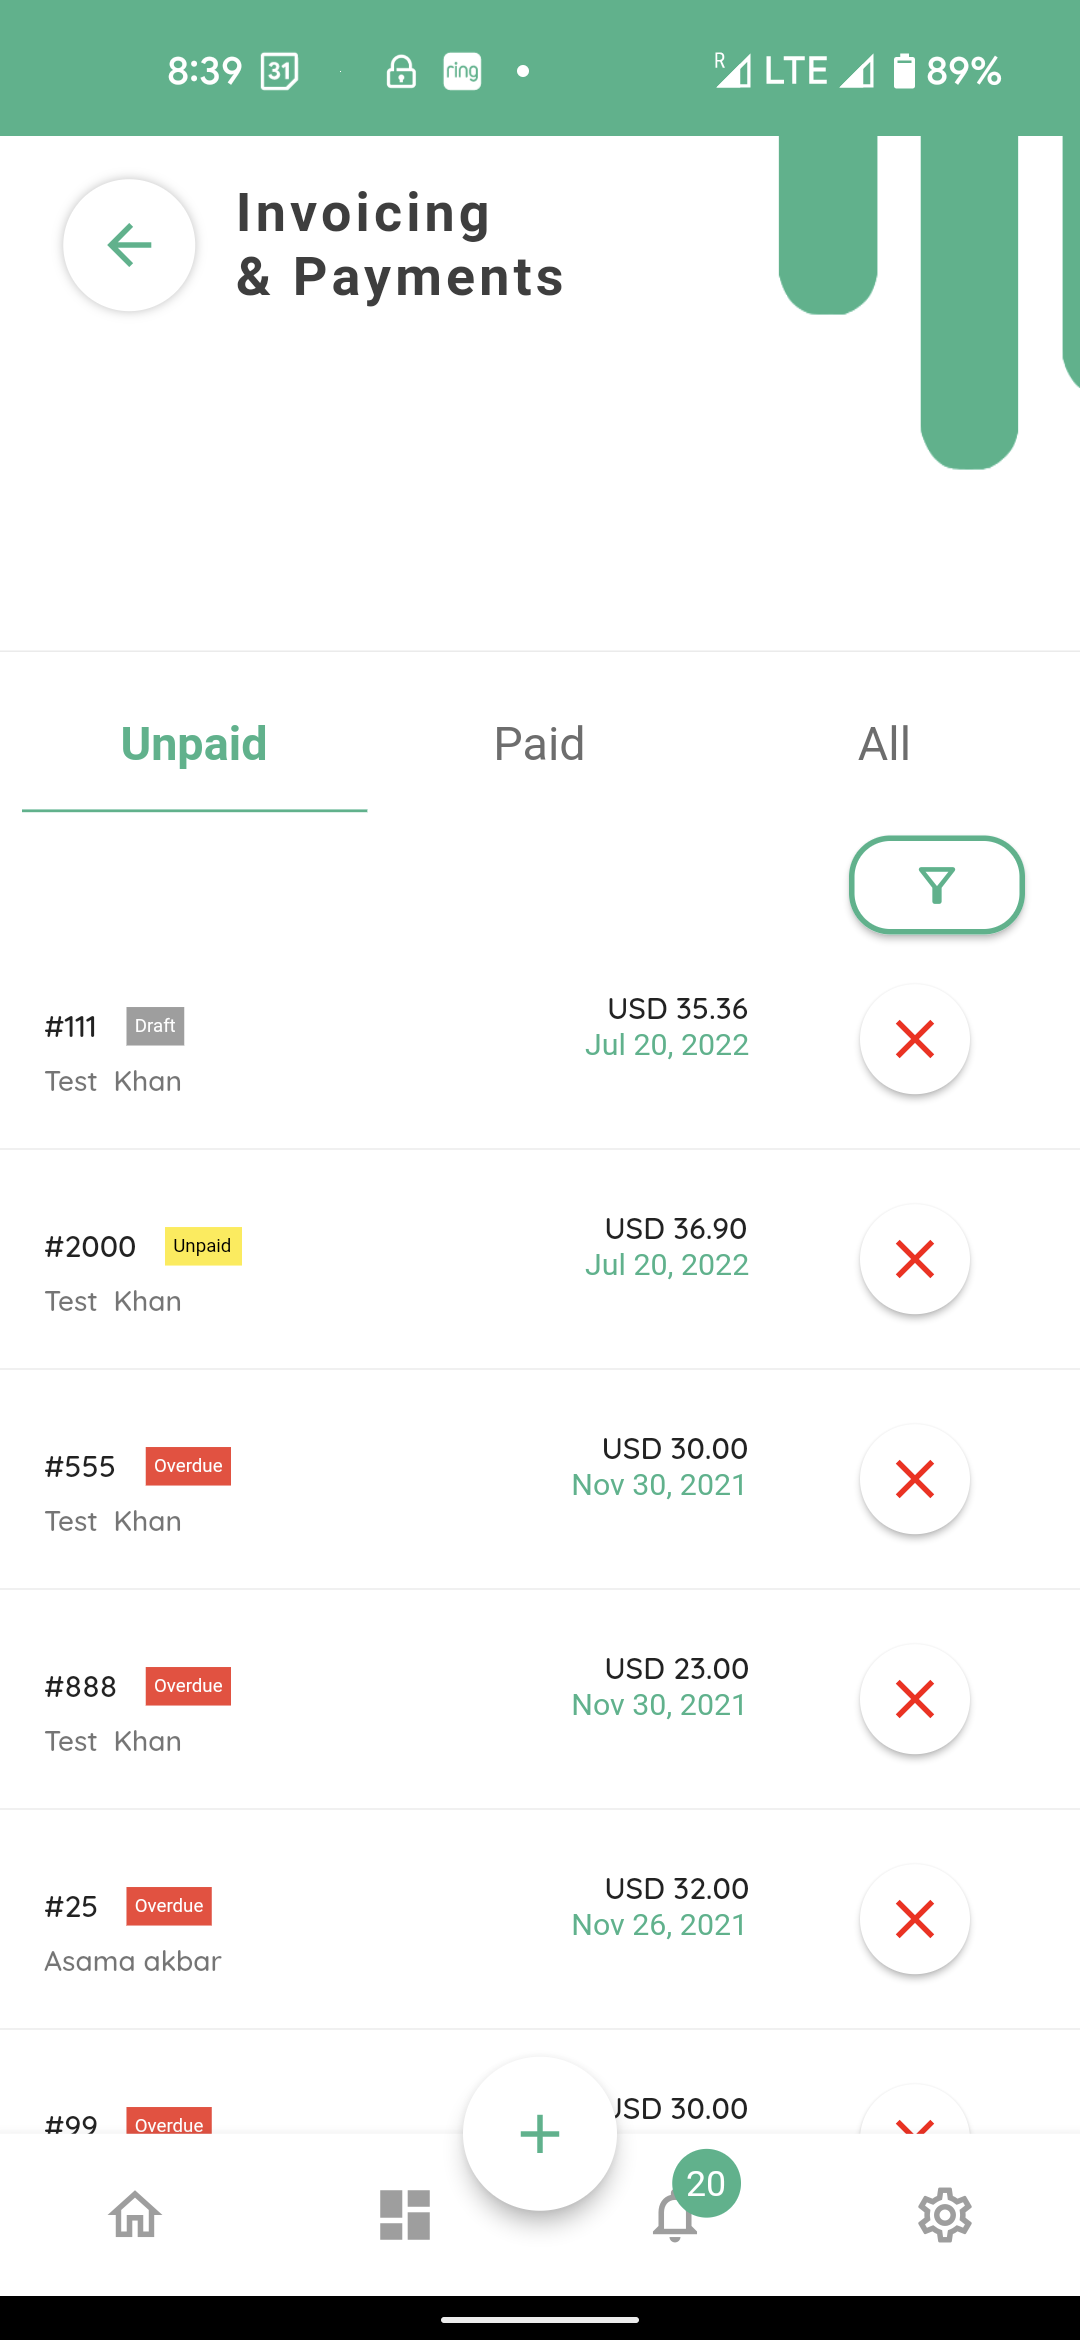
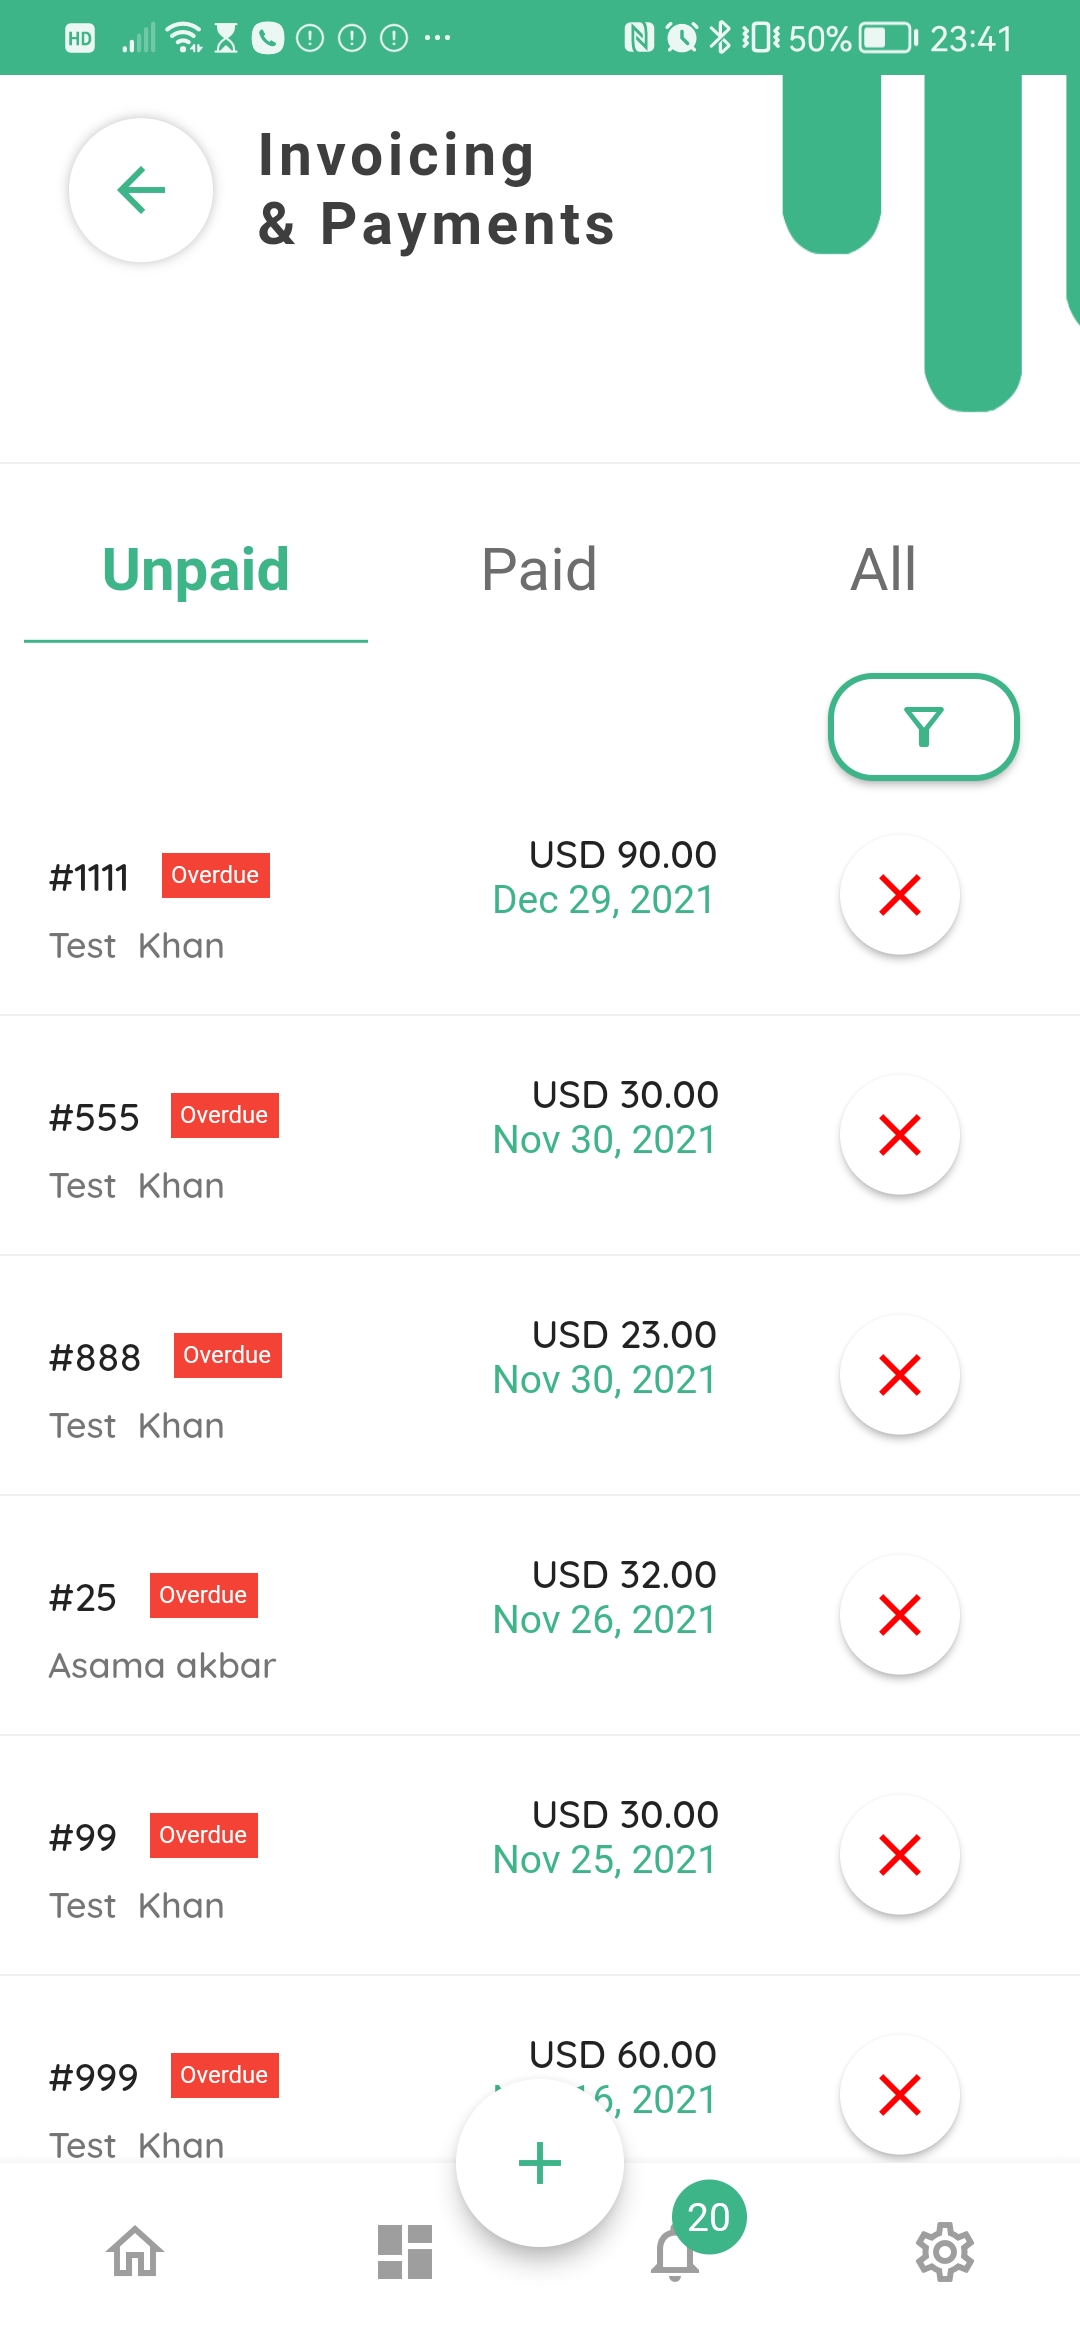
The invoicing module home screen will open up
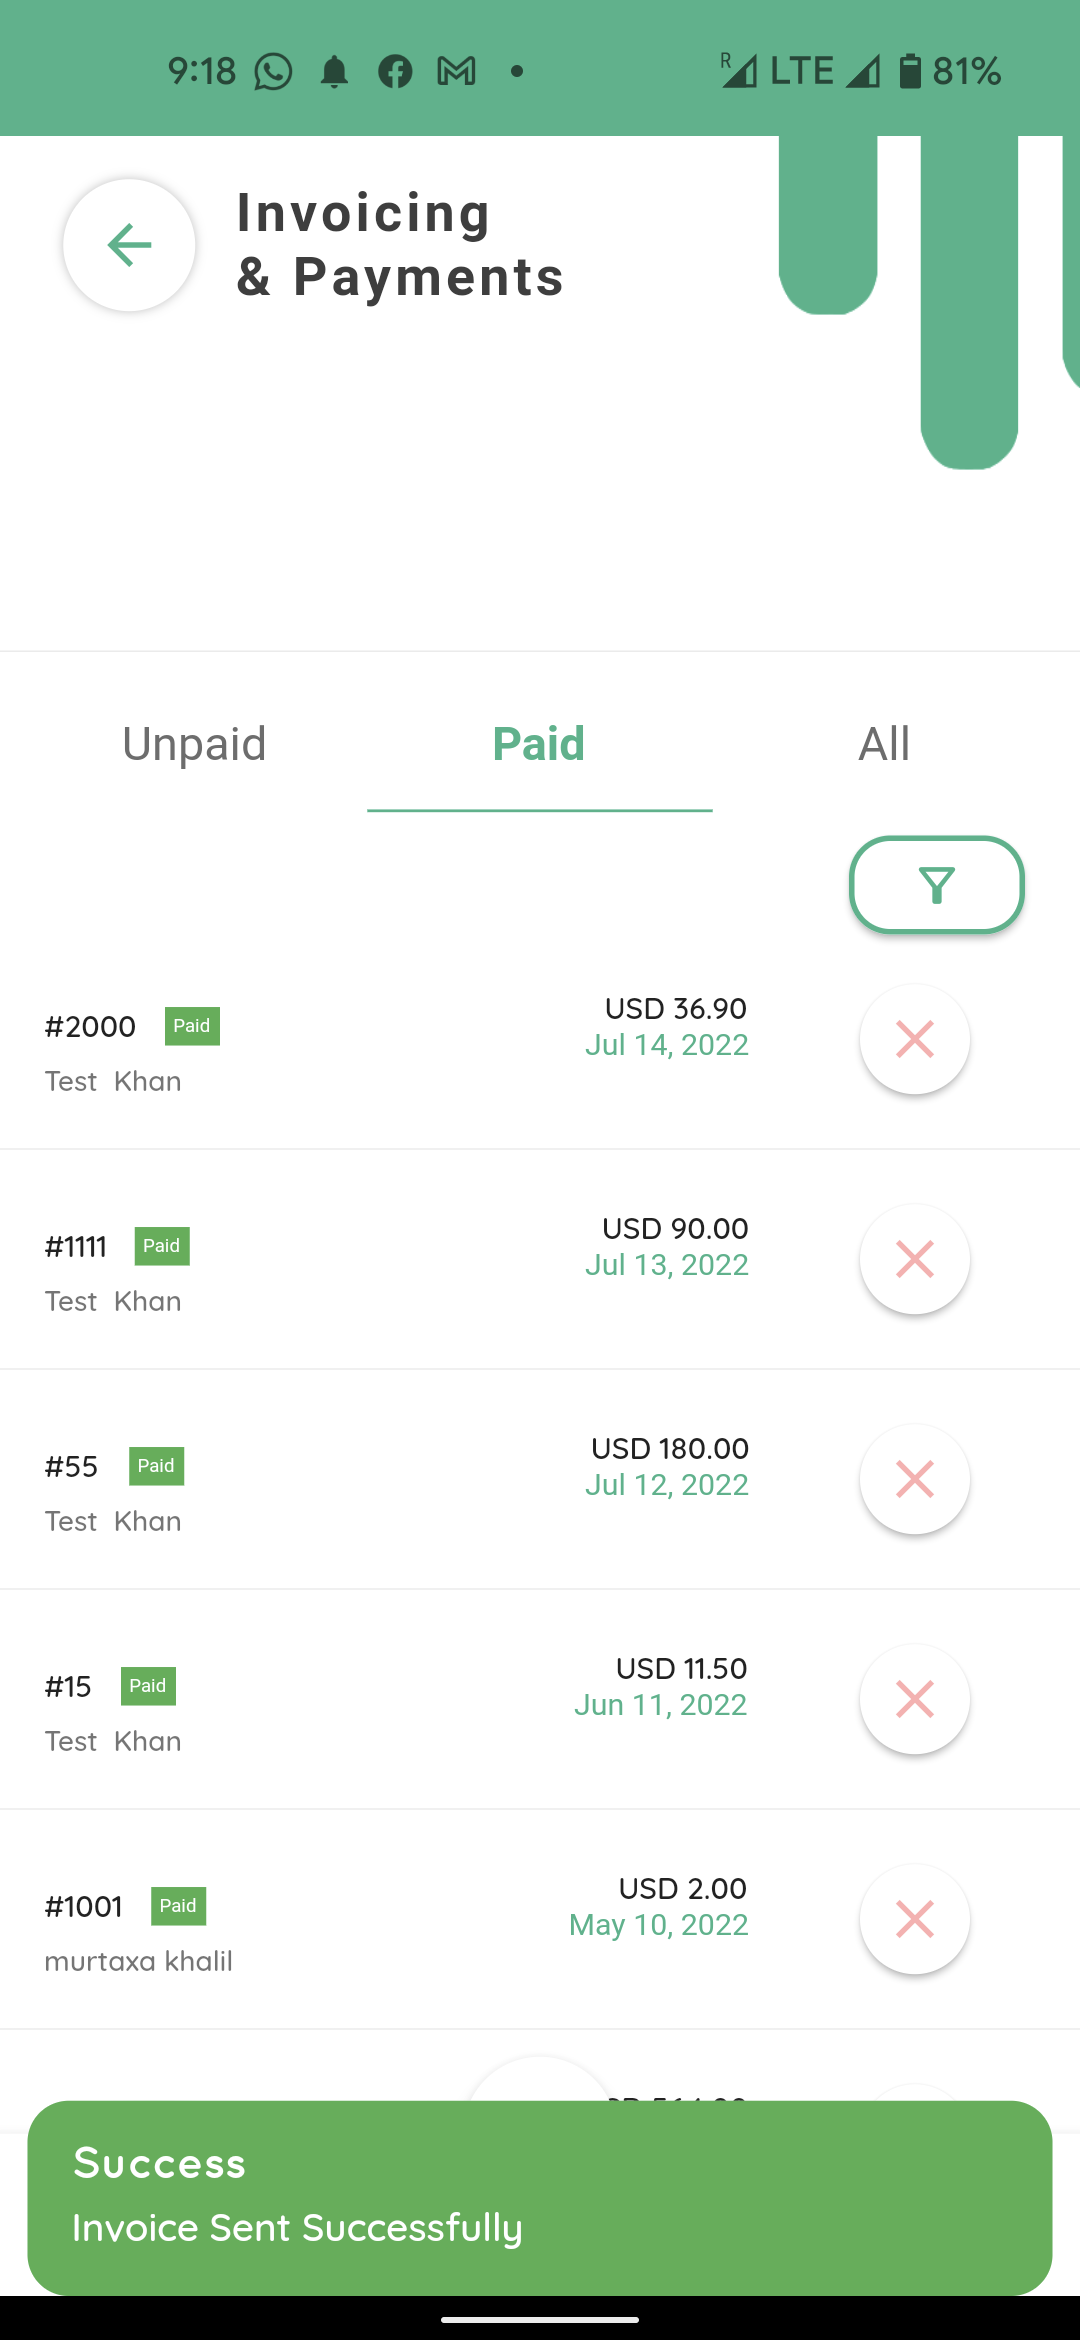
Here you will have three tabs on top. “Unpaid” showing the outstanding invoices.
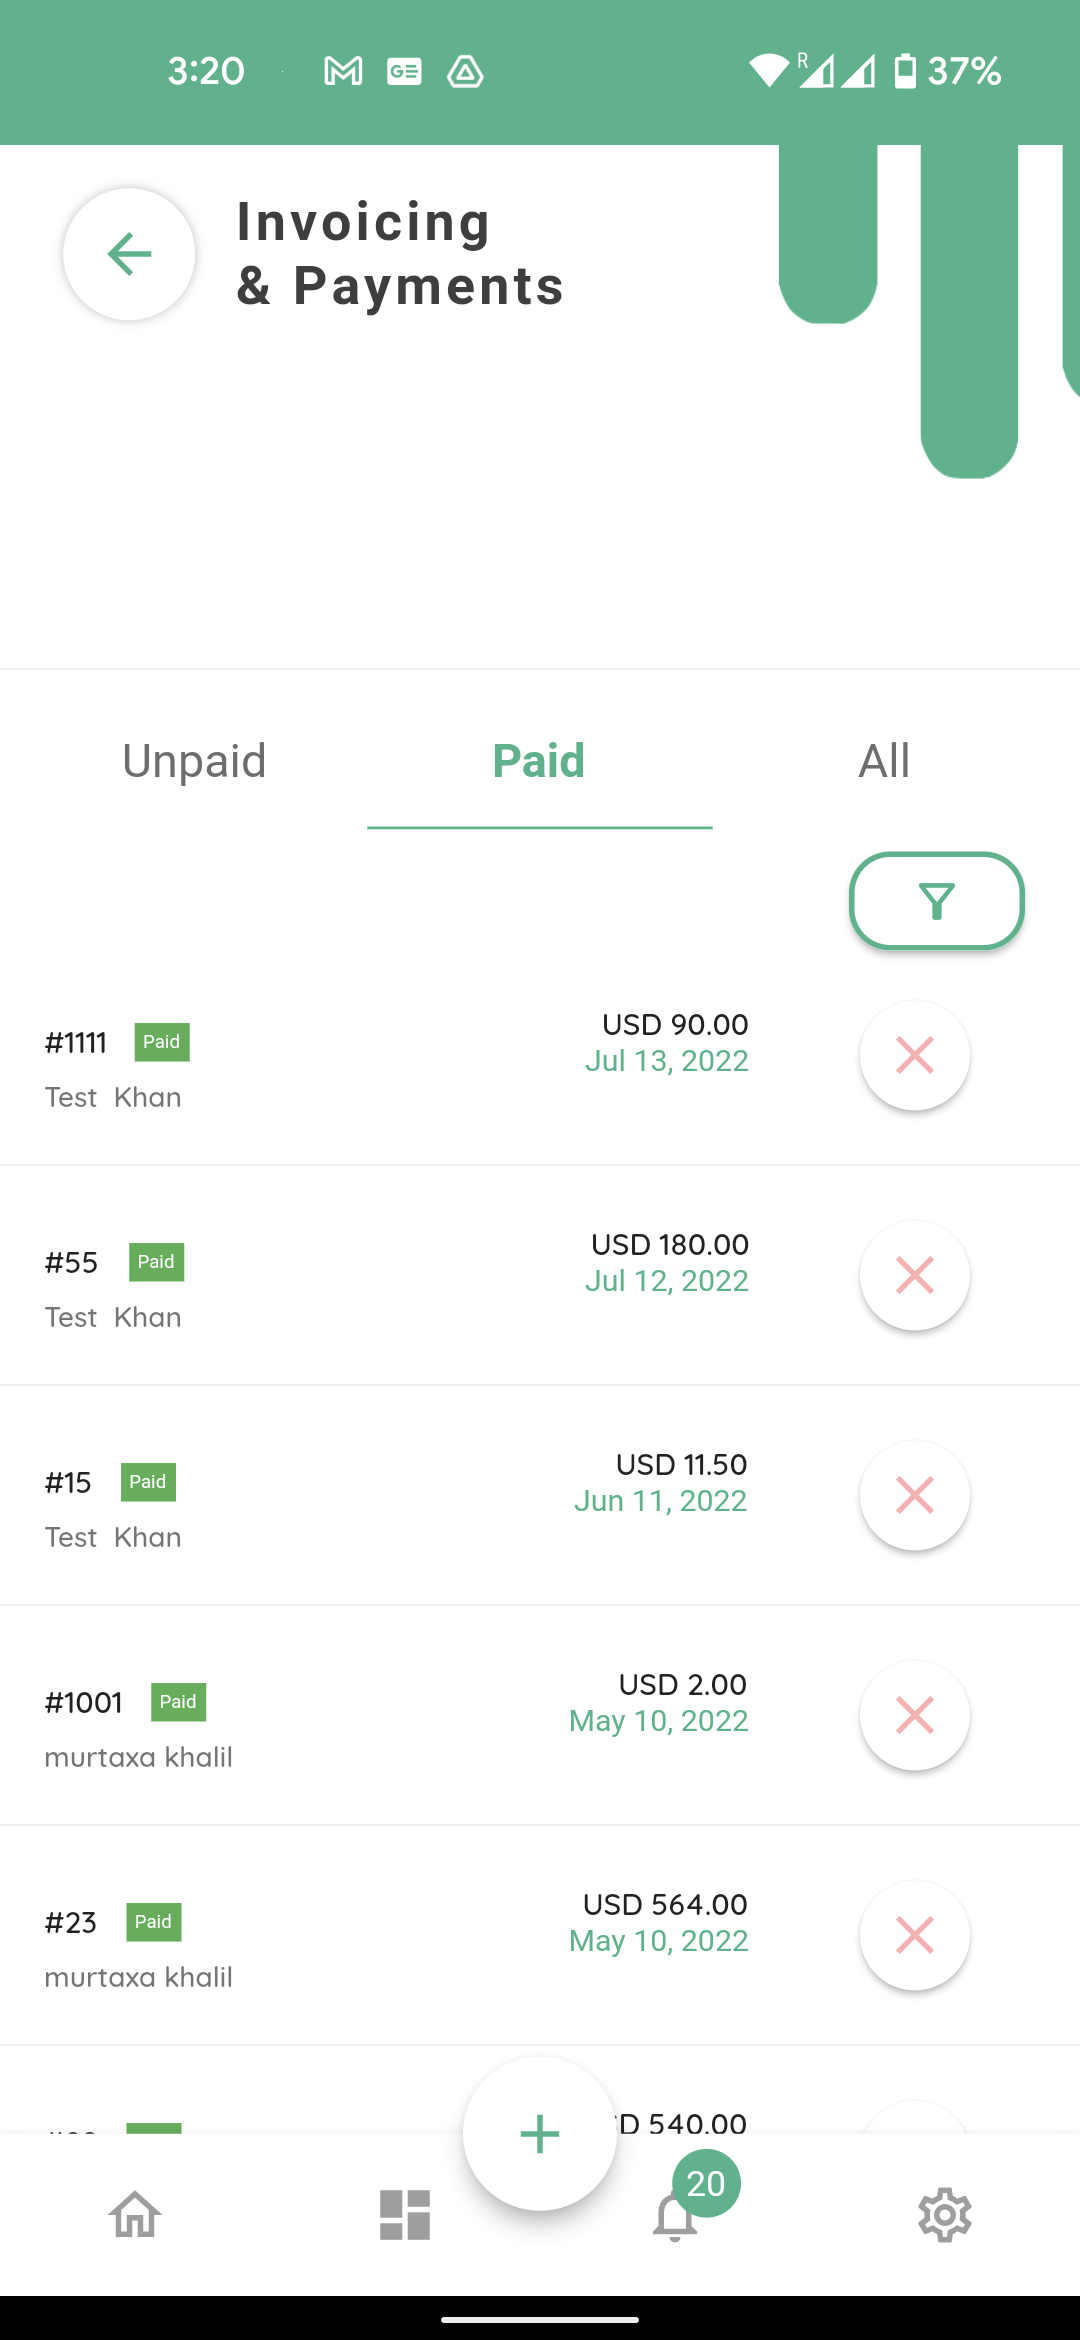
“Paid” showing the invoices that have been paid
and “all” showing every invoice your organization has created or sent.
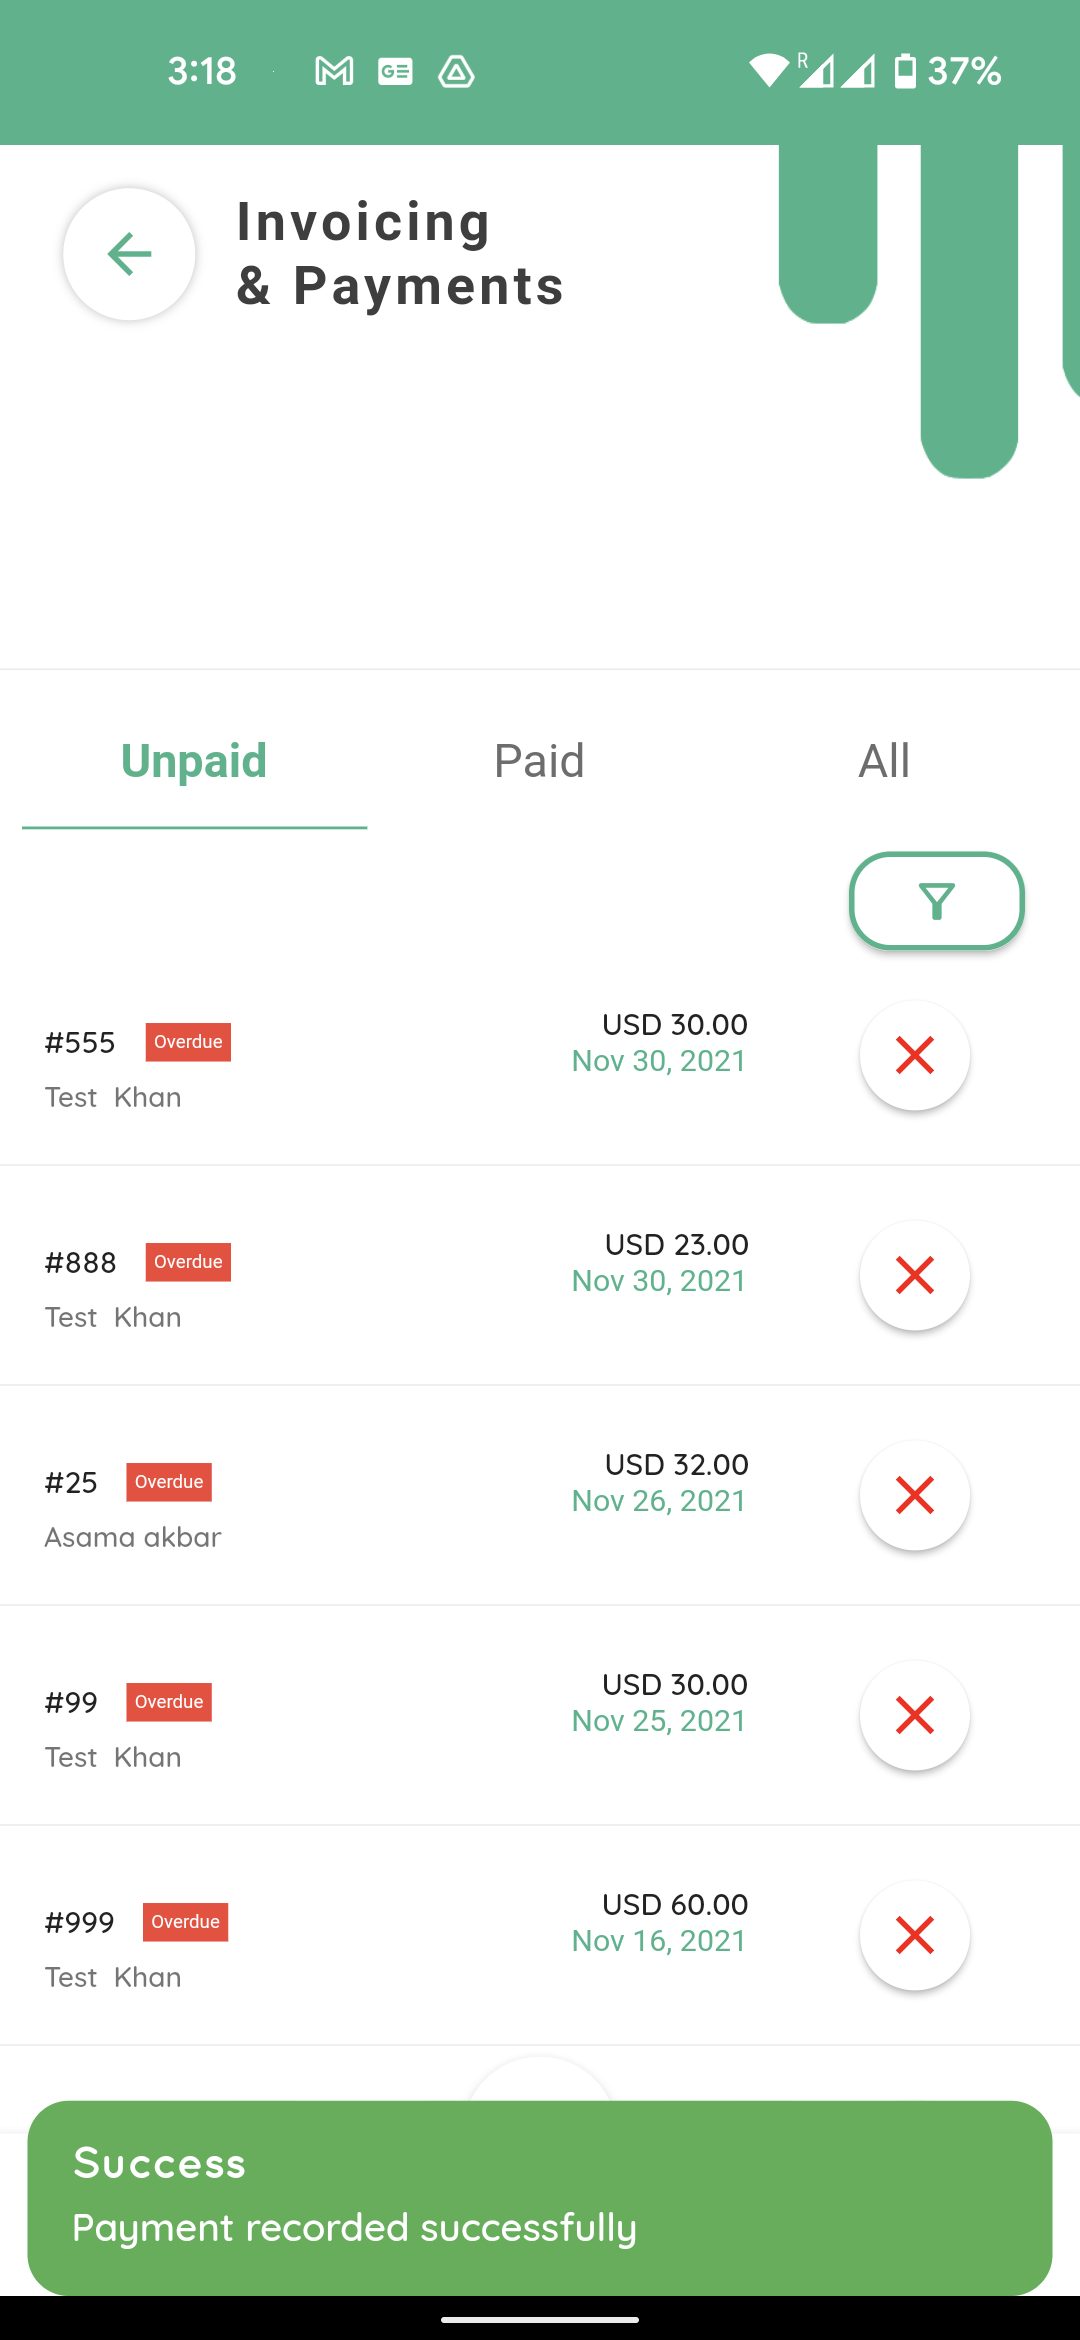
Invoices with red Overdue tag, indicate the invoice is outstanding and the deadline has passed. Clicking on any overdue invoice will open up this menu.
From here, you can either preview the invoice , send a reminder or record a payment manually.
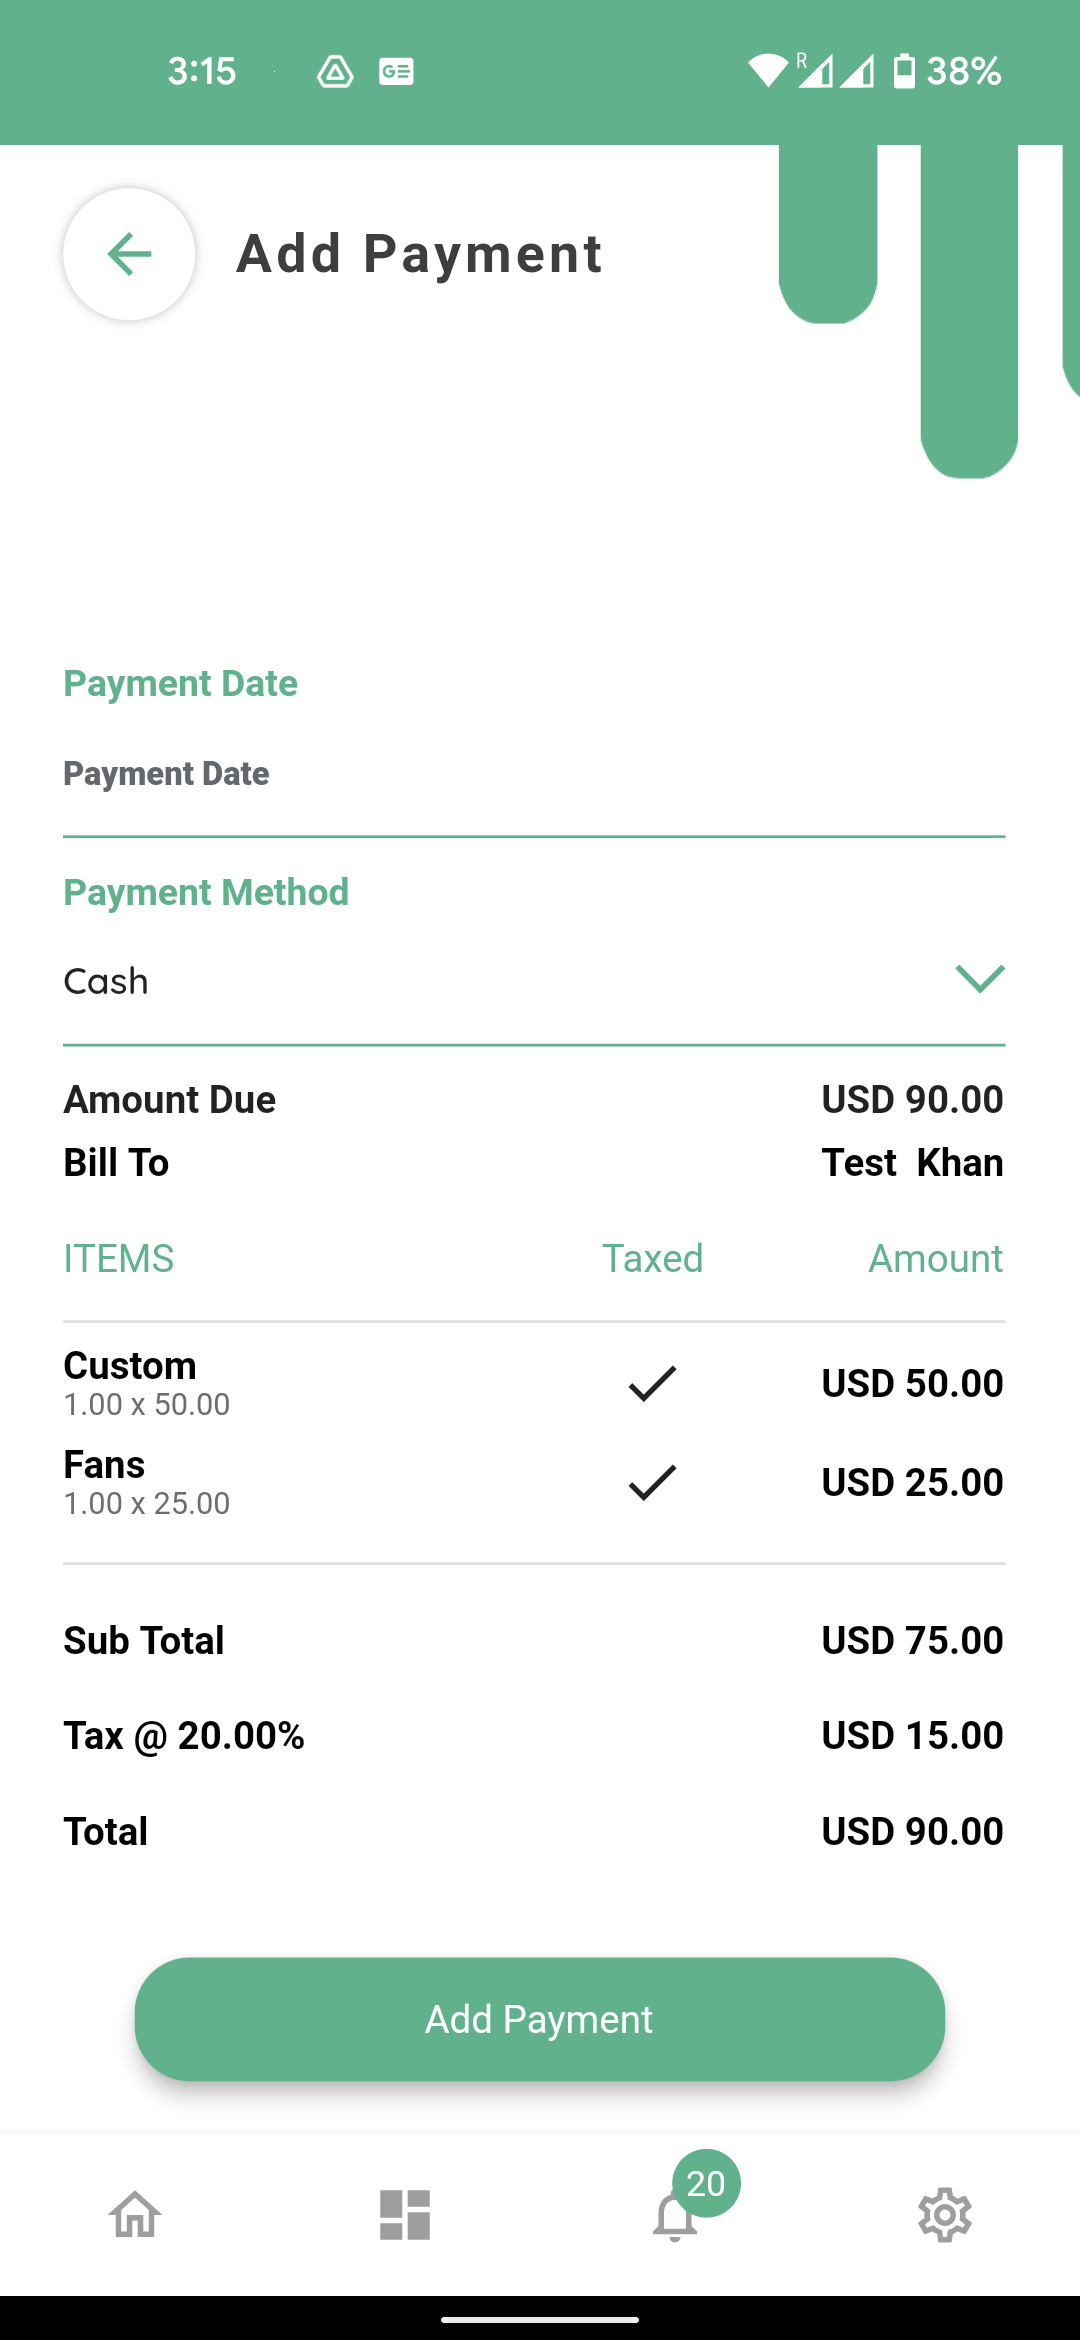
Clicking record payment will open the next screen.
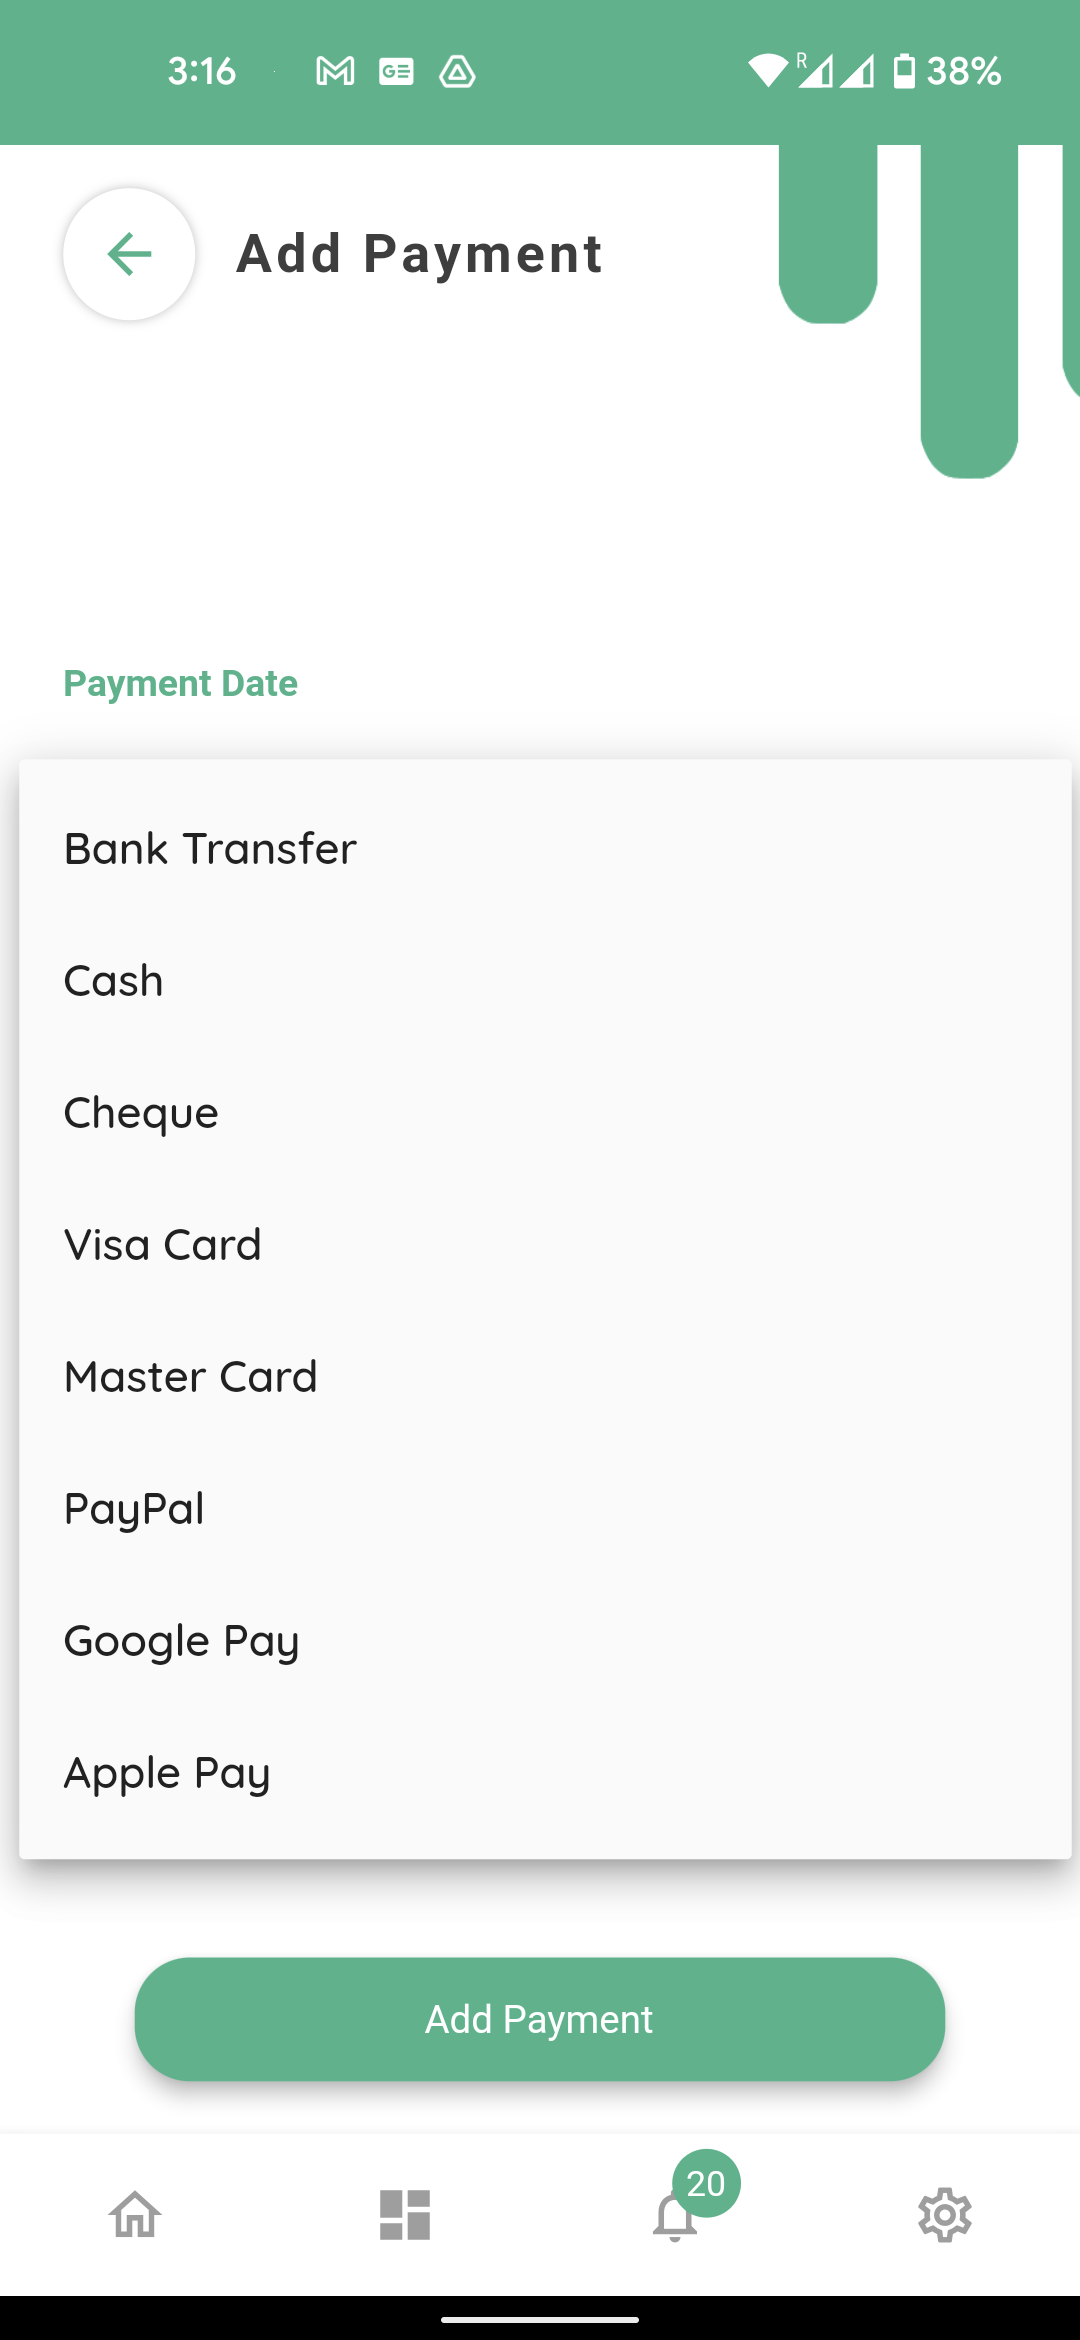
You can record the date of payment.
And then select how the payment was made by selecting payment method.

Clicking add payment at the bottom will record the payment.

The invoice will be shown as paid under the paid tab with a green tag.
Clicking all tab at the top

will show all the invoices your organization has created or sent
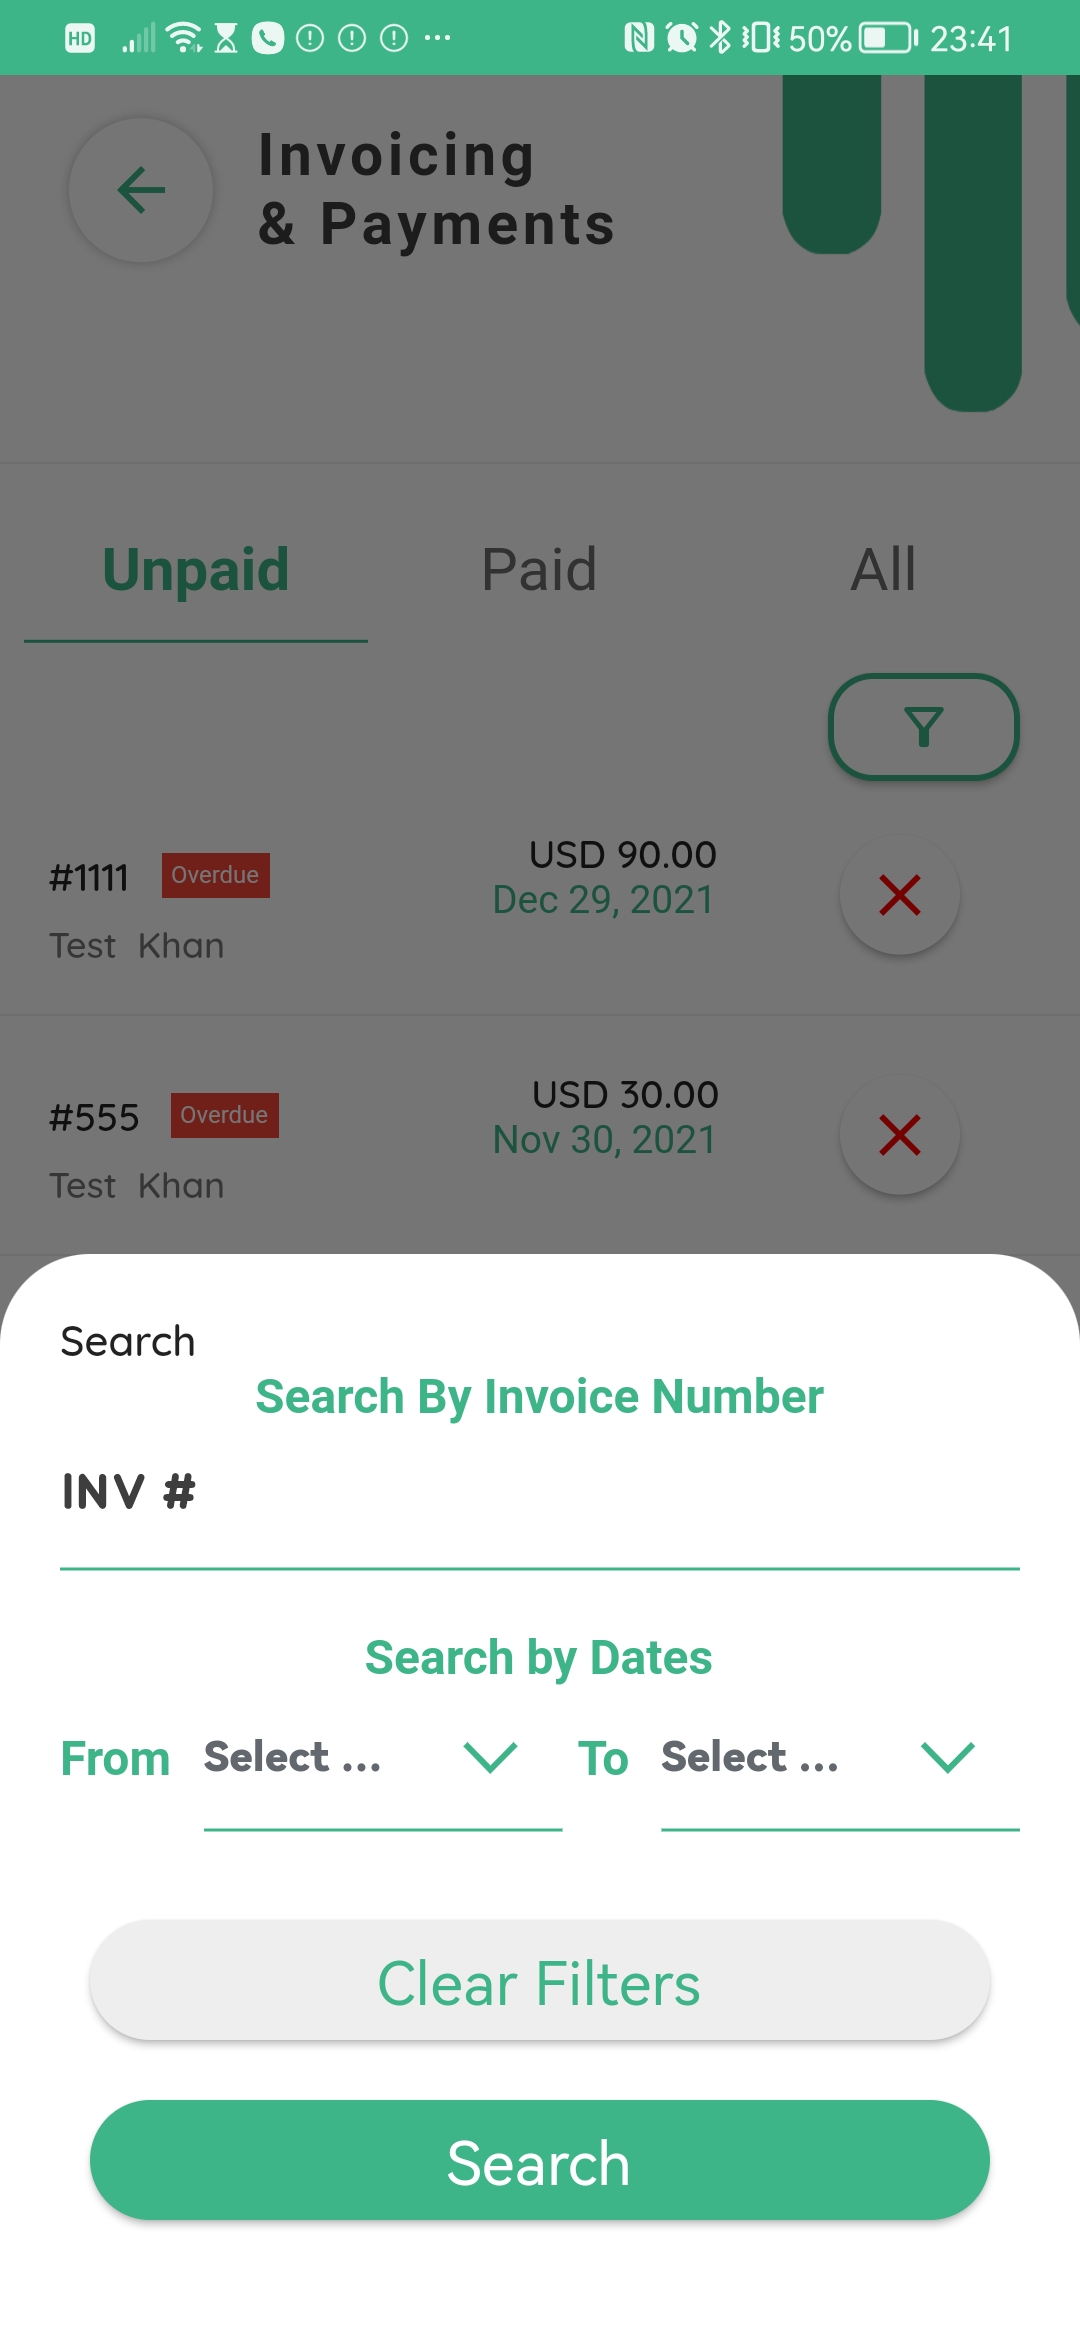
You can click on the filter button to search for a specific invoice by number or a date range.
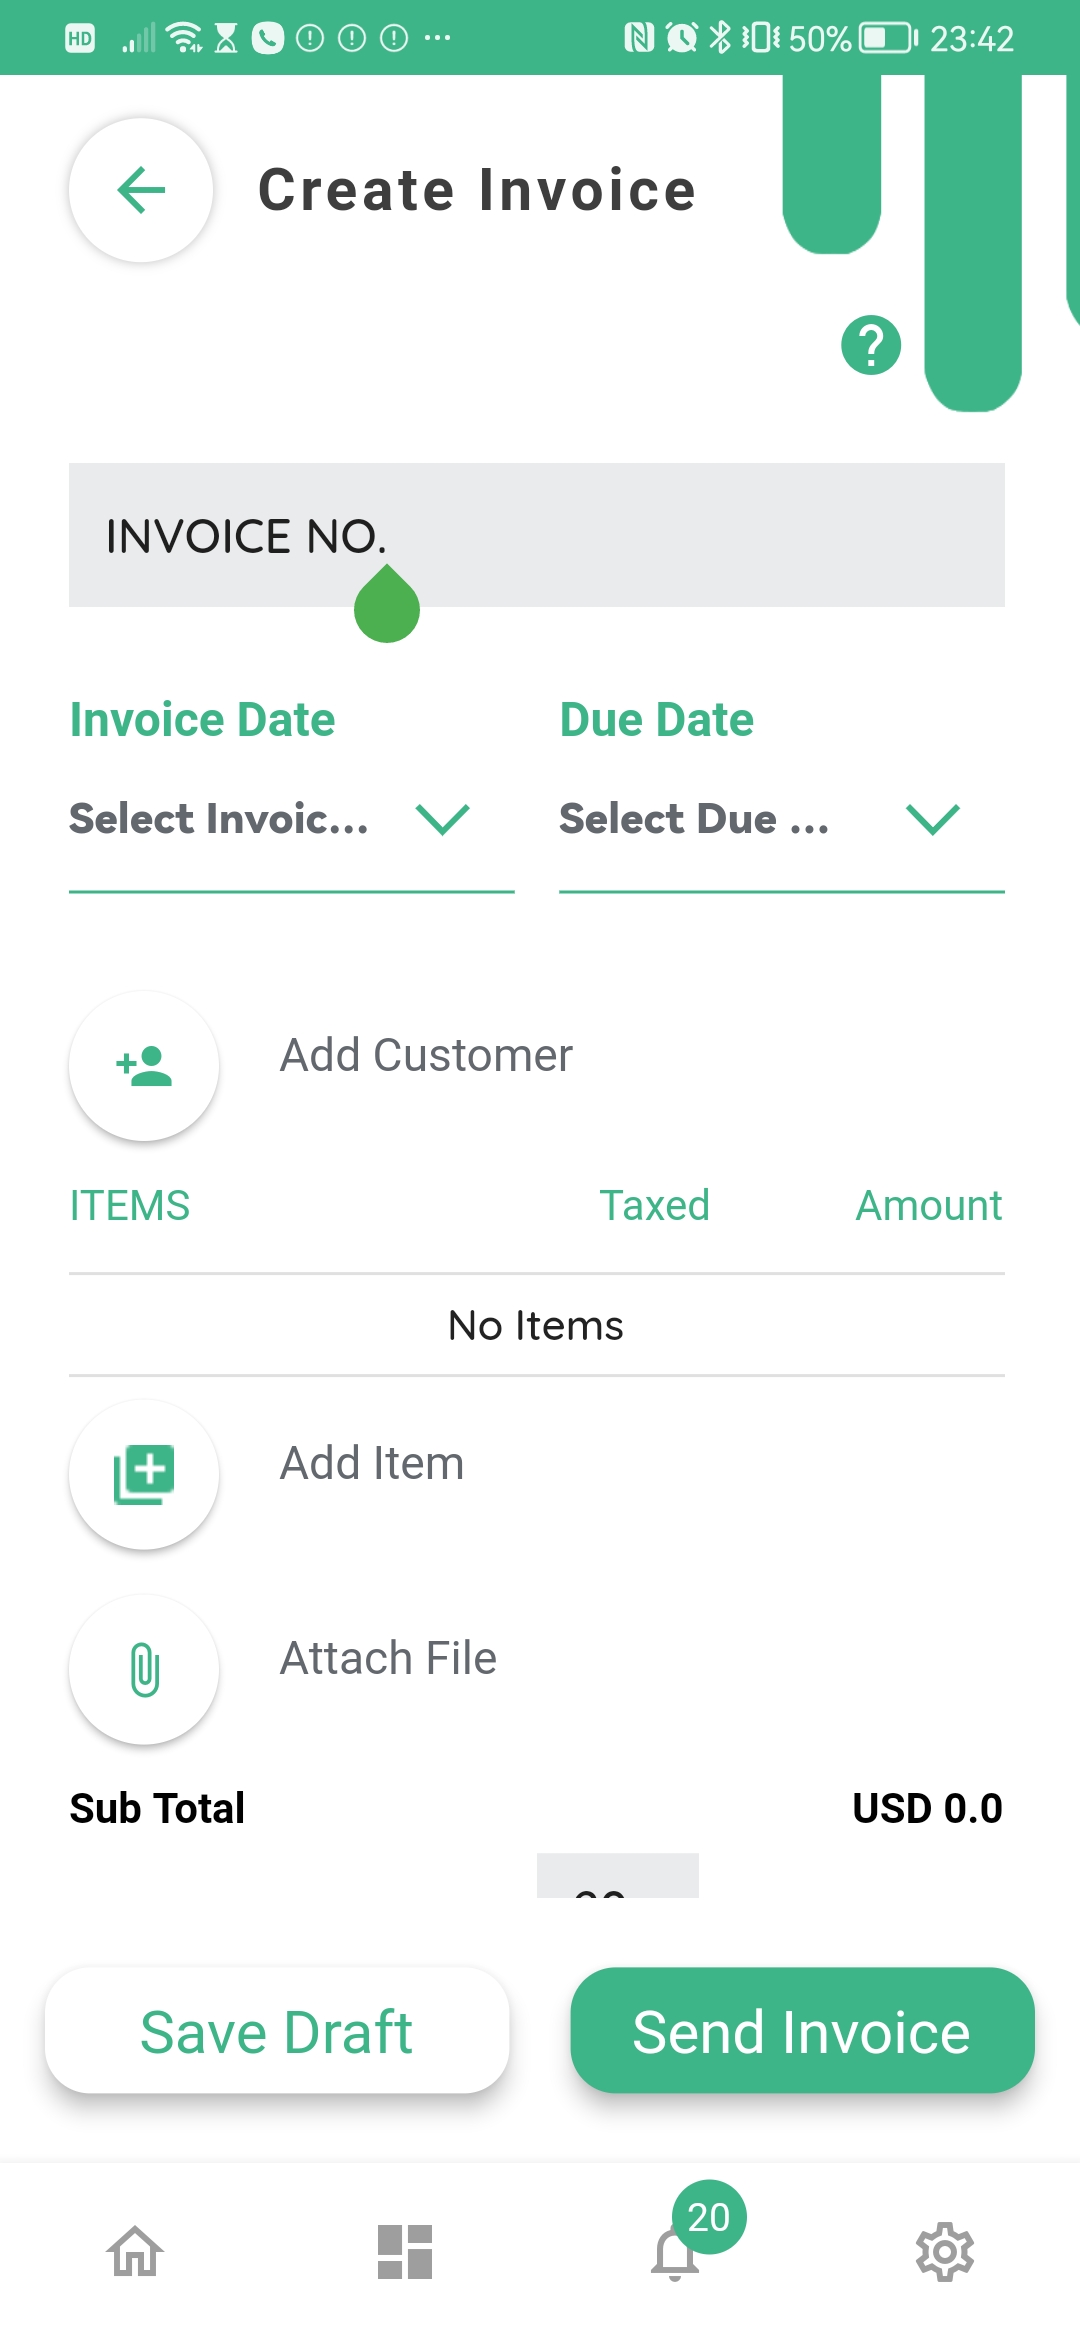
To create a new invoice, press the add button at the bottom of the invoice home screen
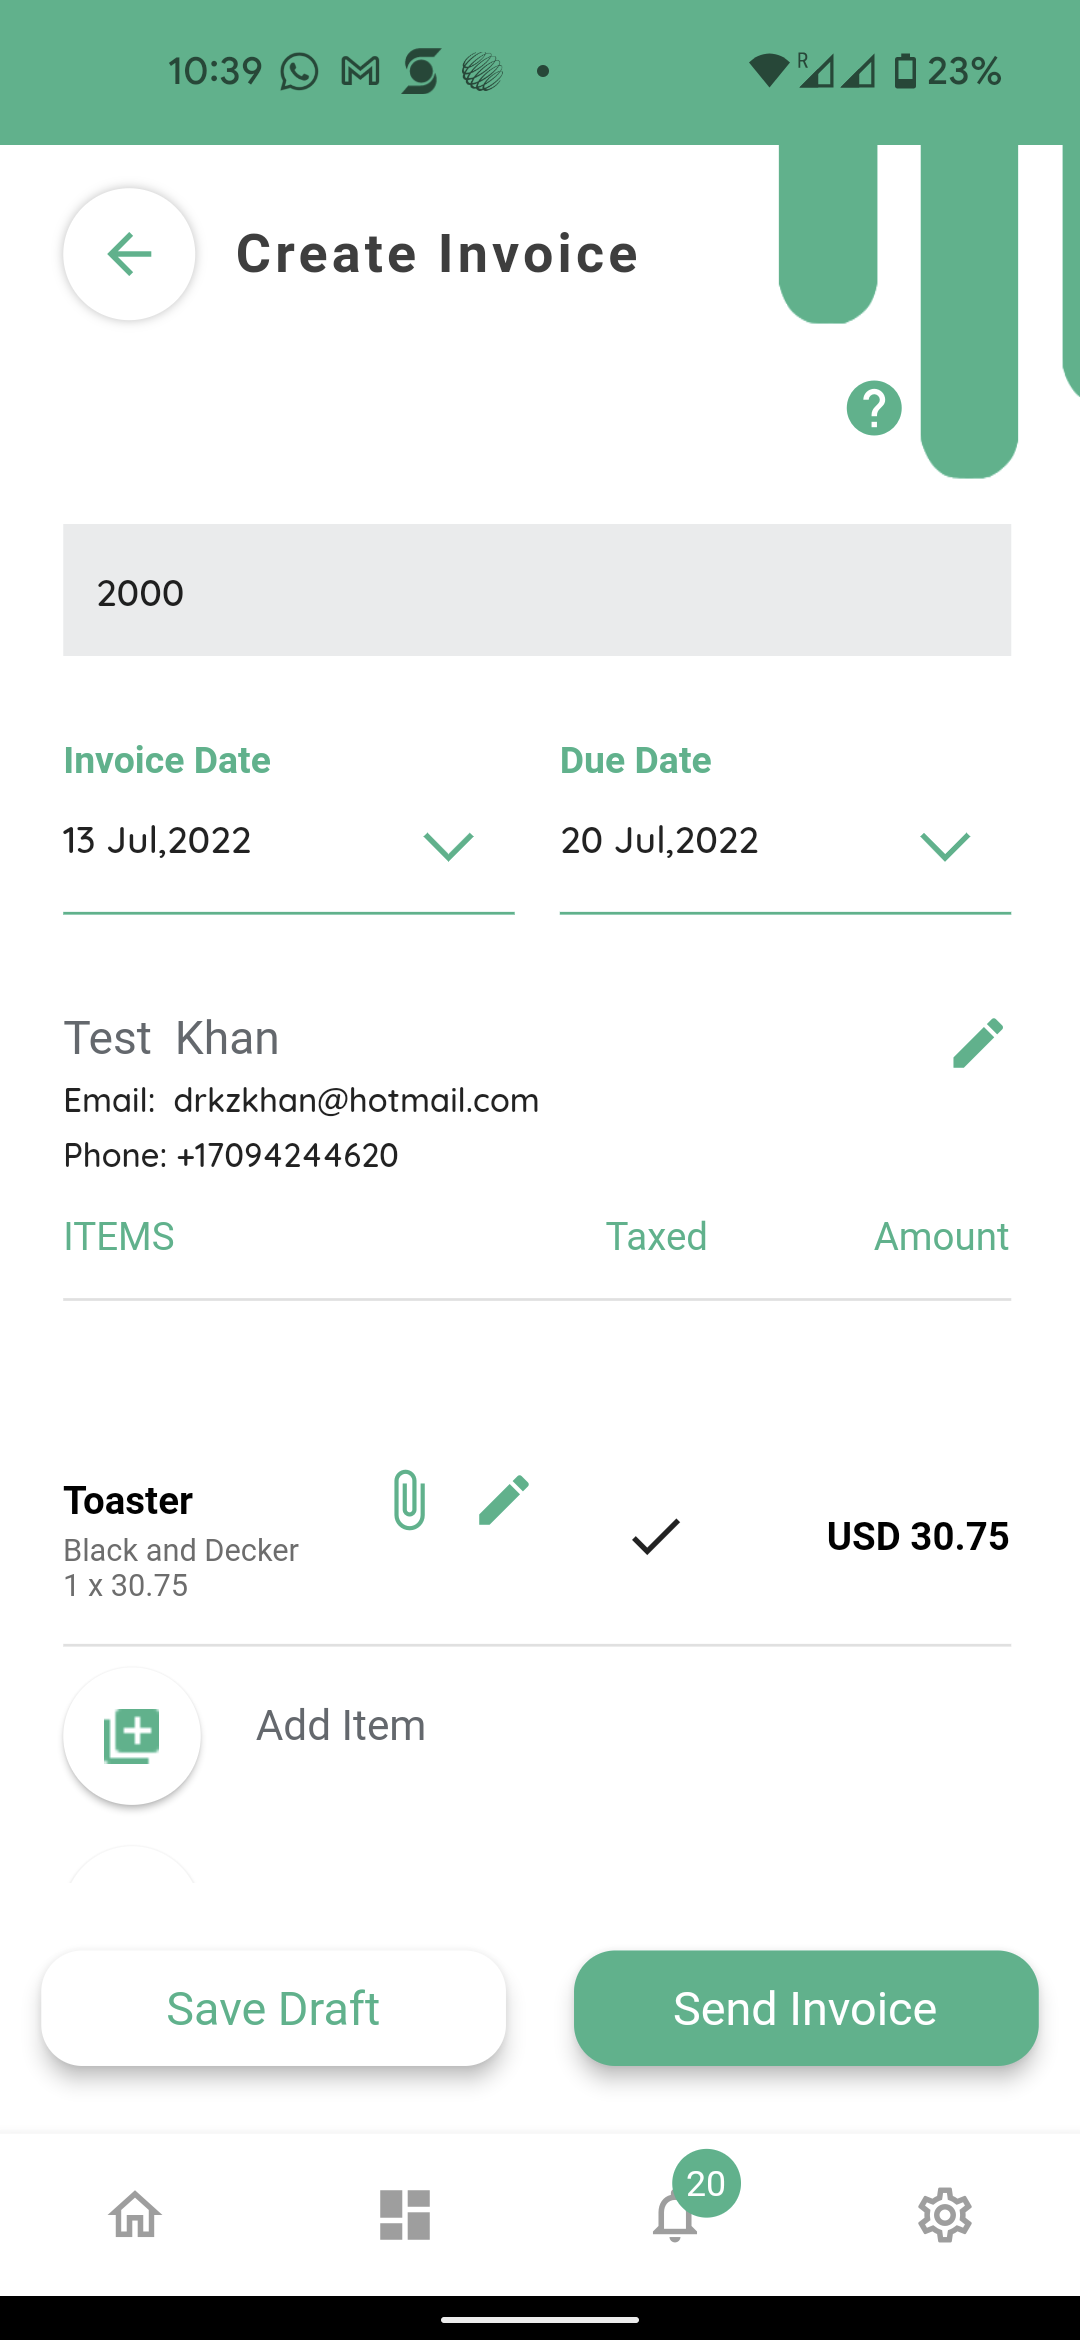
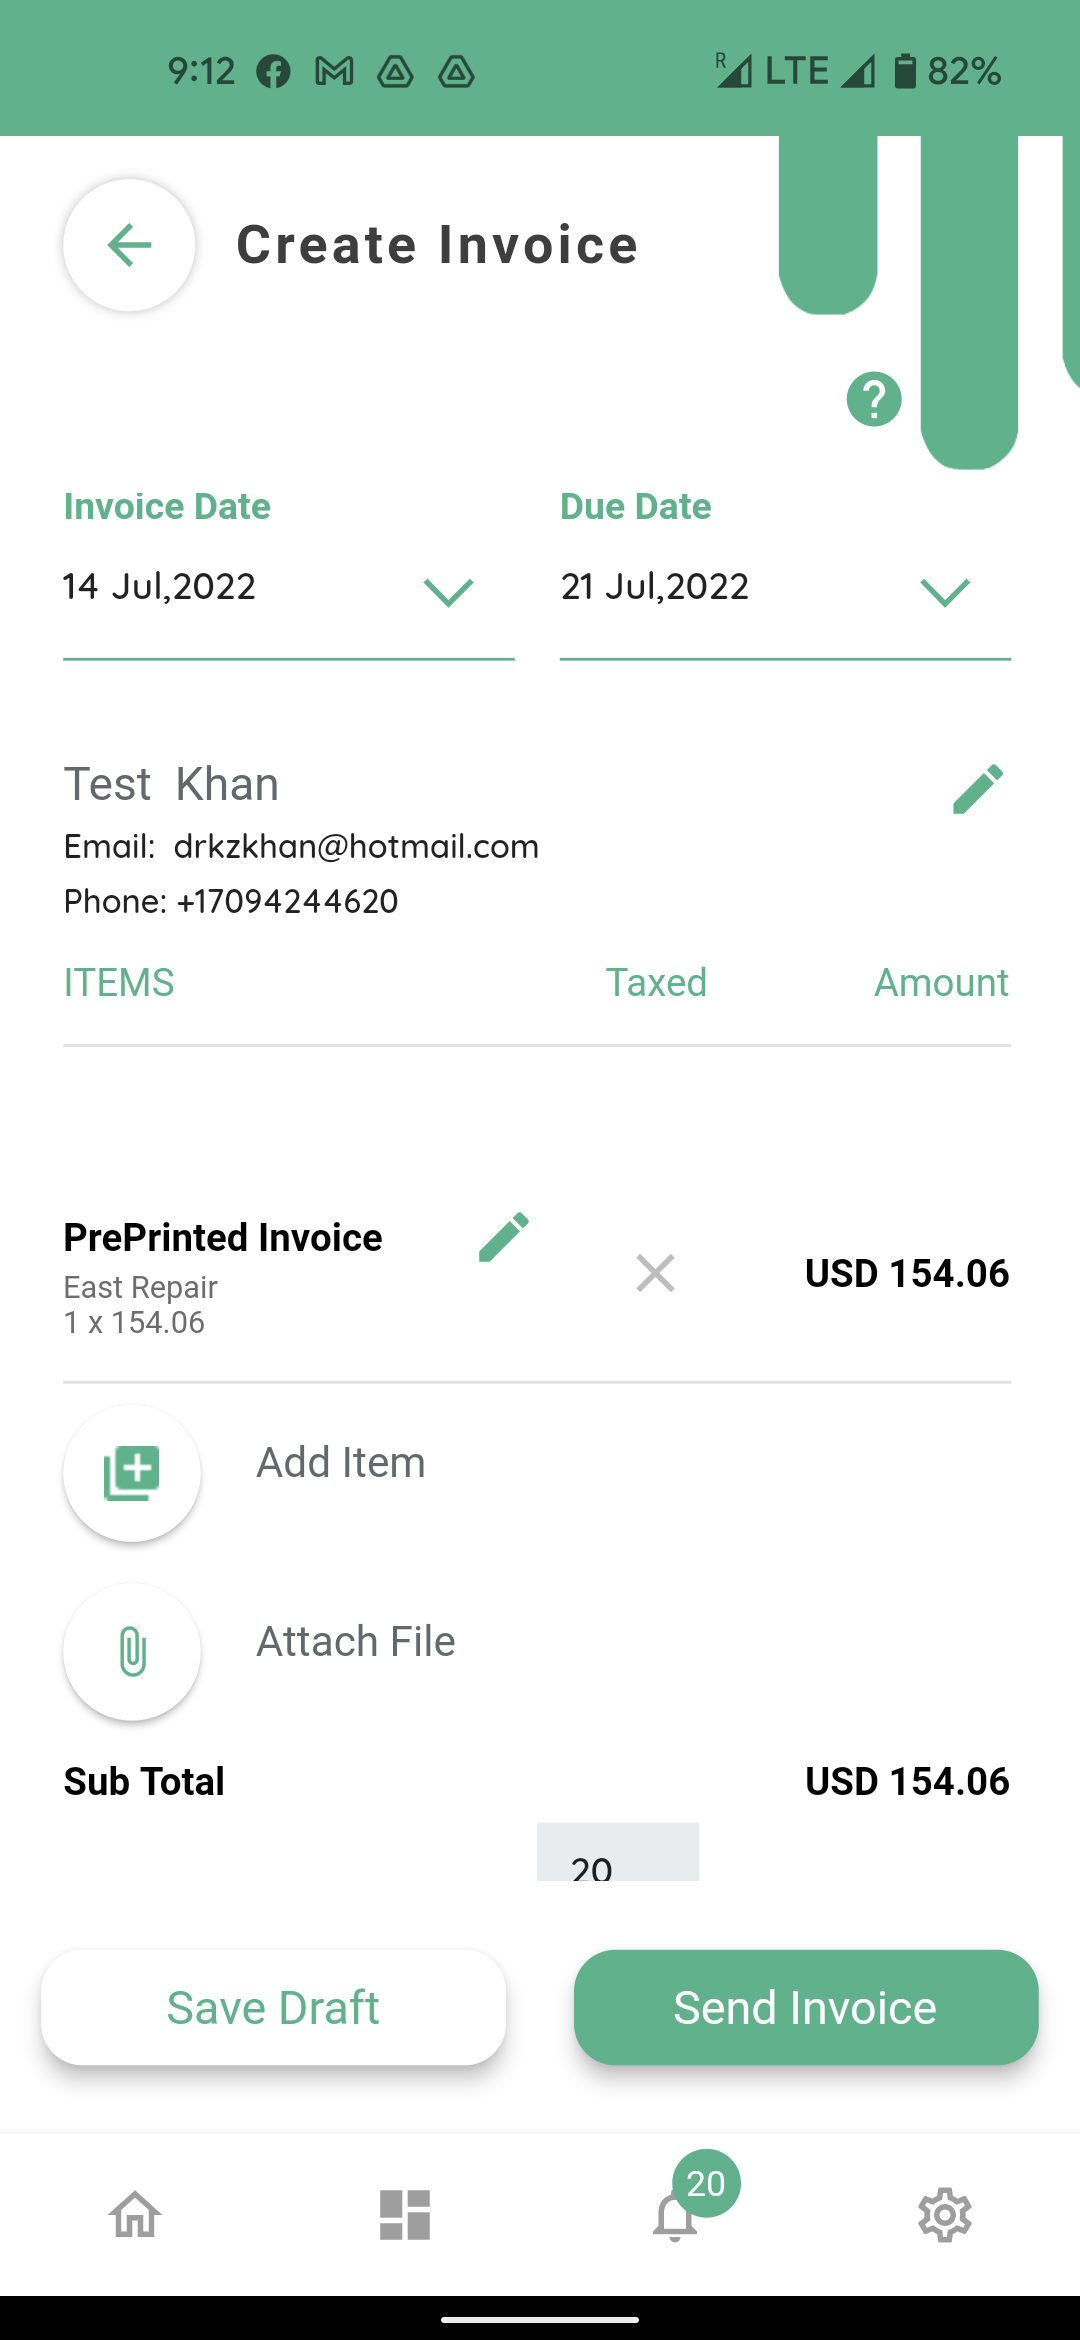
In the top box, enter your desired invoice number, if you don’t enter an invoice number an automatic invoice number will be generated by the app
Select the invoice and due dates to select when the invoice should be sent to the customer and the deadline for the customer to pay.
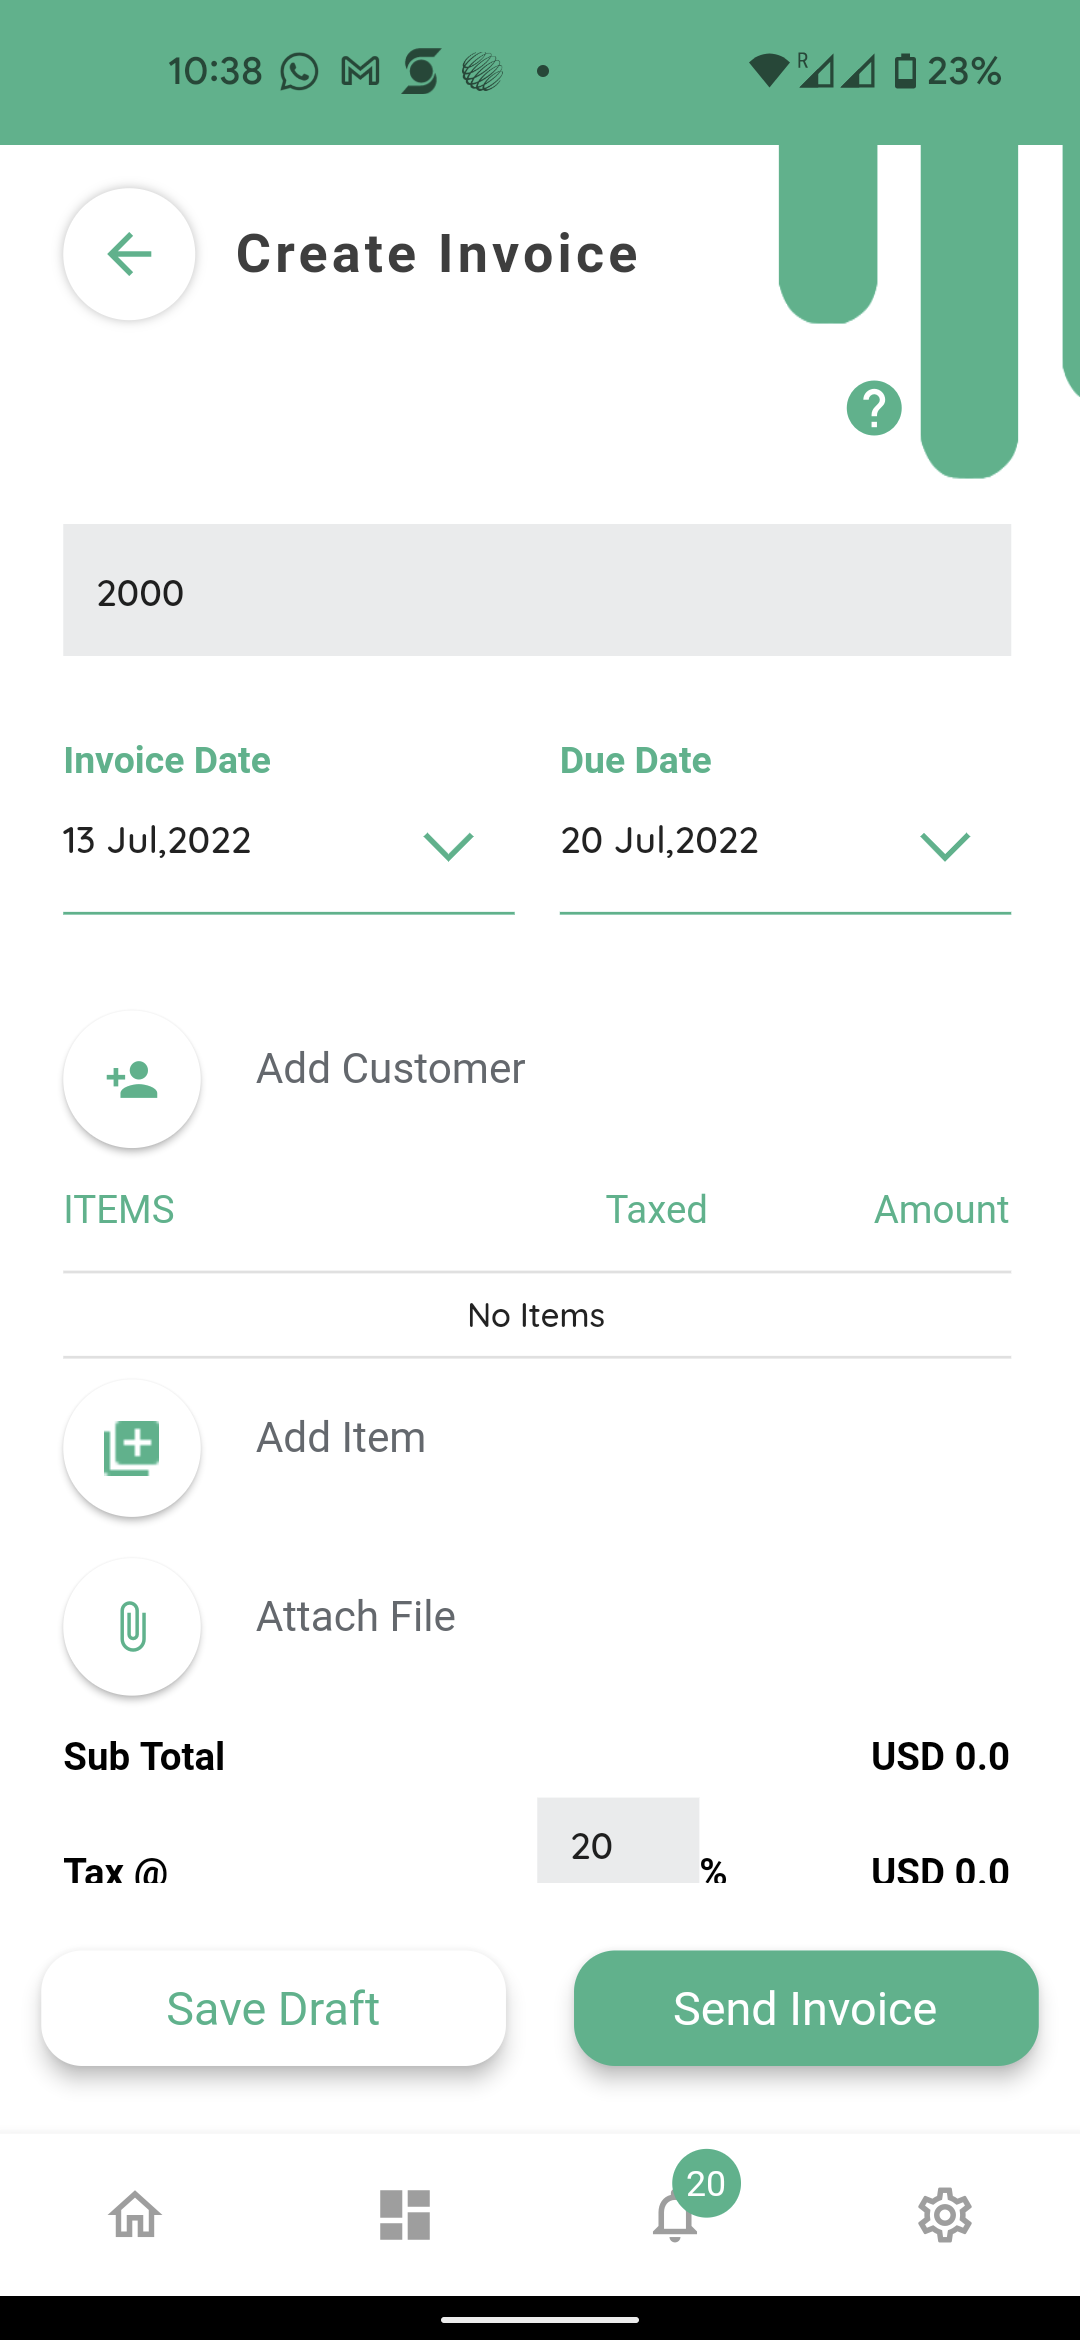
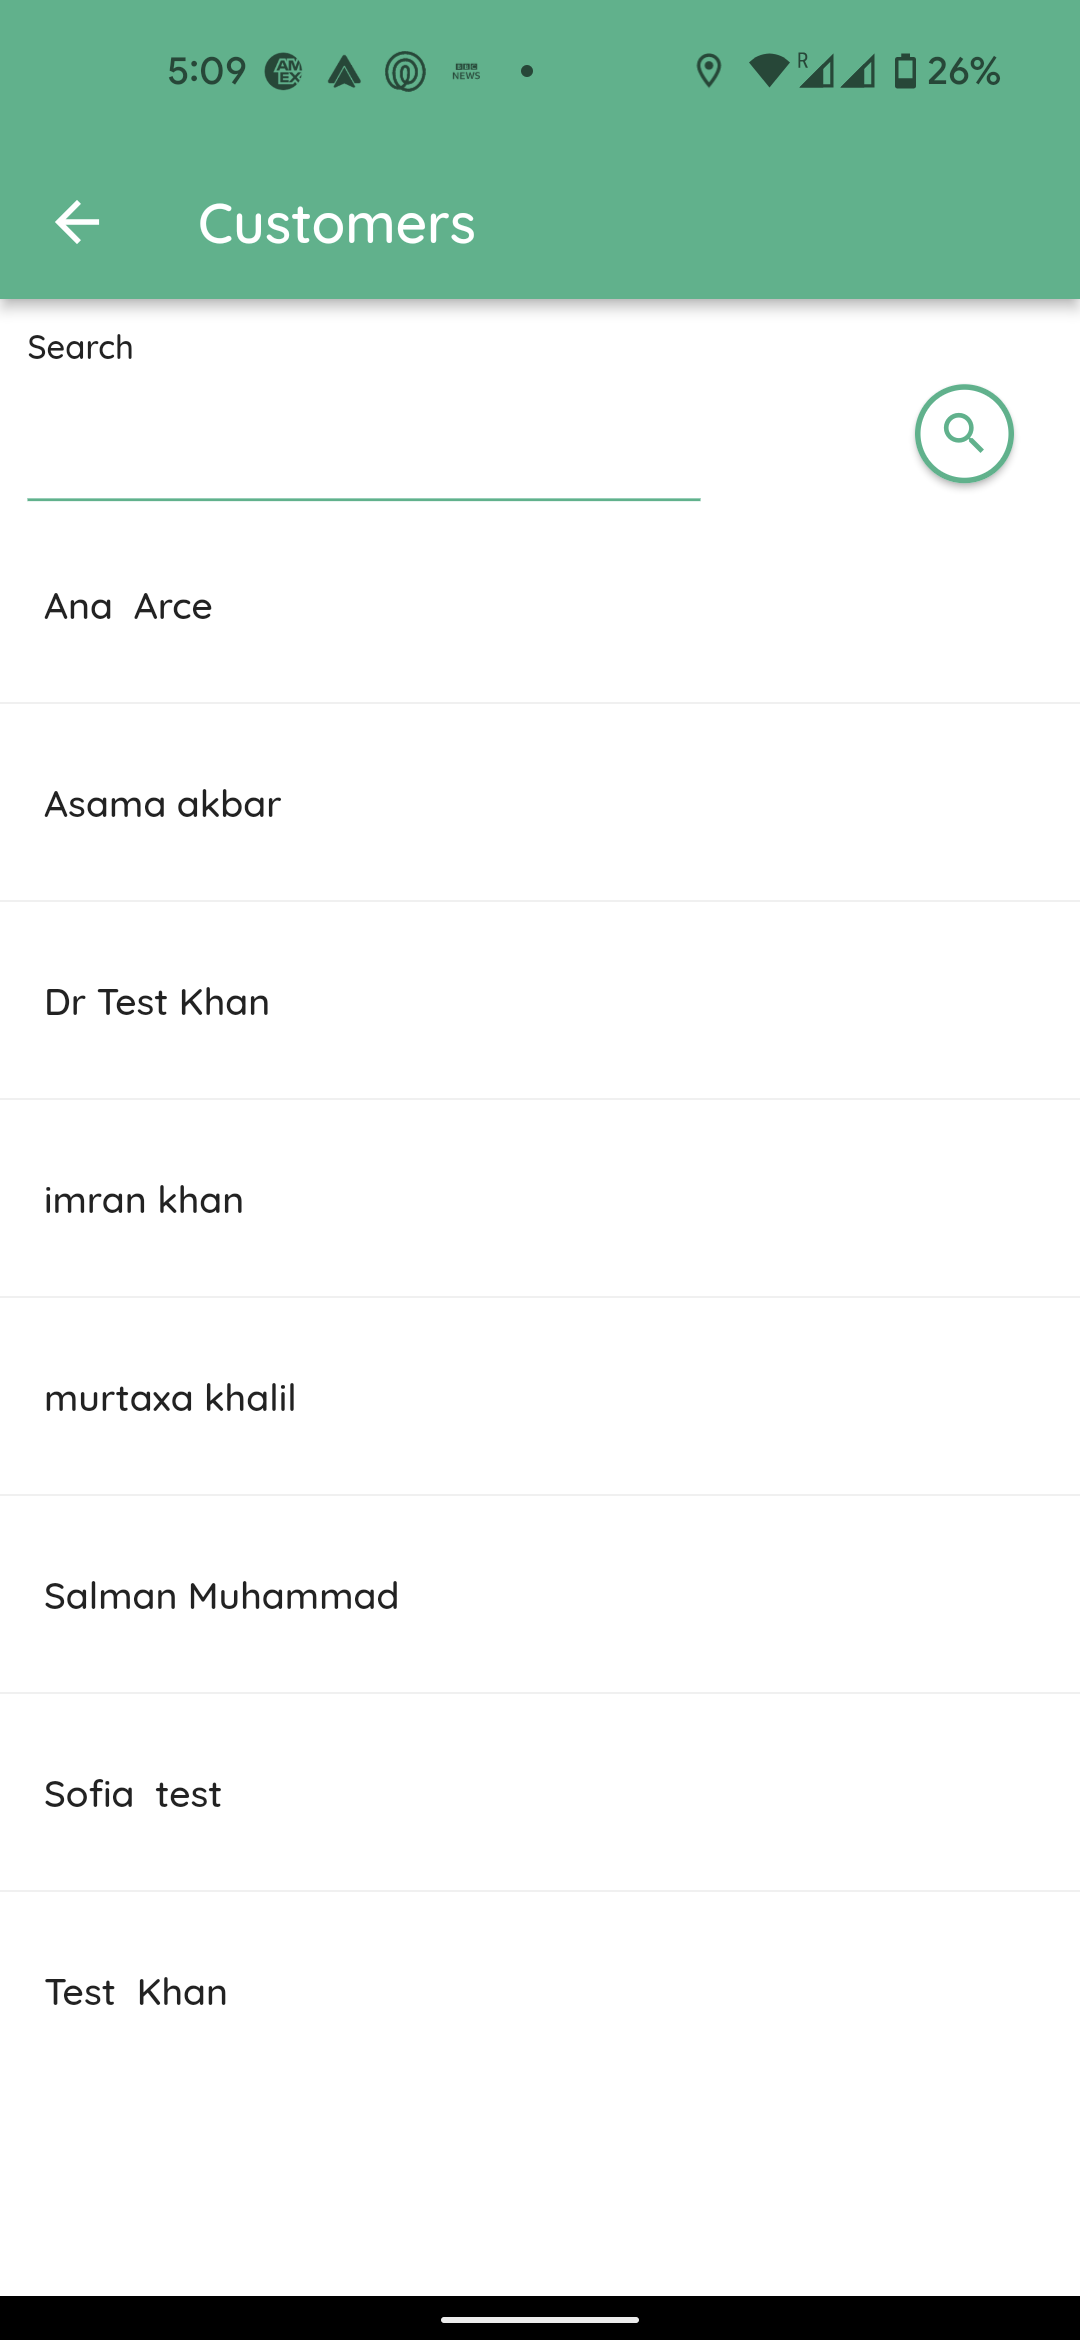
Please select add customer button to select the recipient for the invoice.
This will open the customer selection screen. The customers are sorted by alphabetical order. You will also be able to use the search bar on this screen to find and select the customer.
Selecting the customer takes you back you the invoice creation screen.
In the next step we need to add an item. This is done by selecting the add item button.
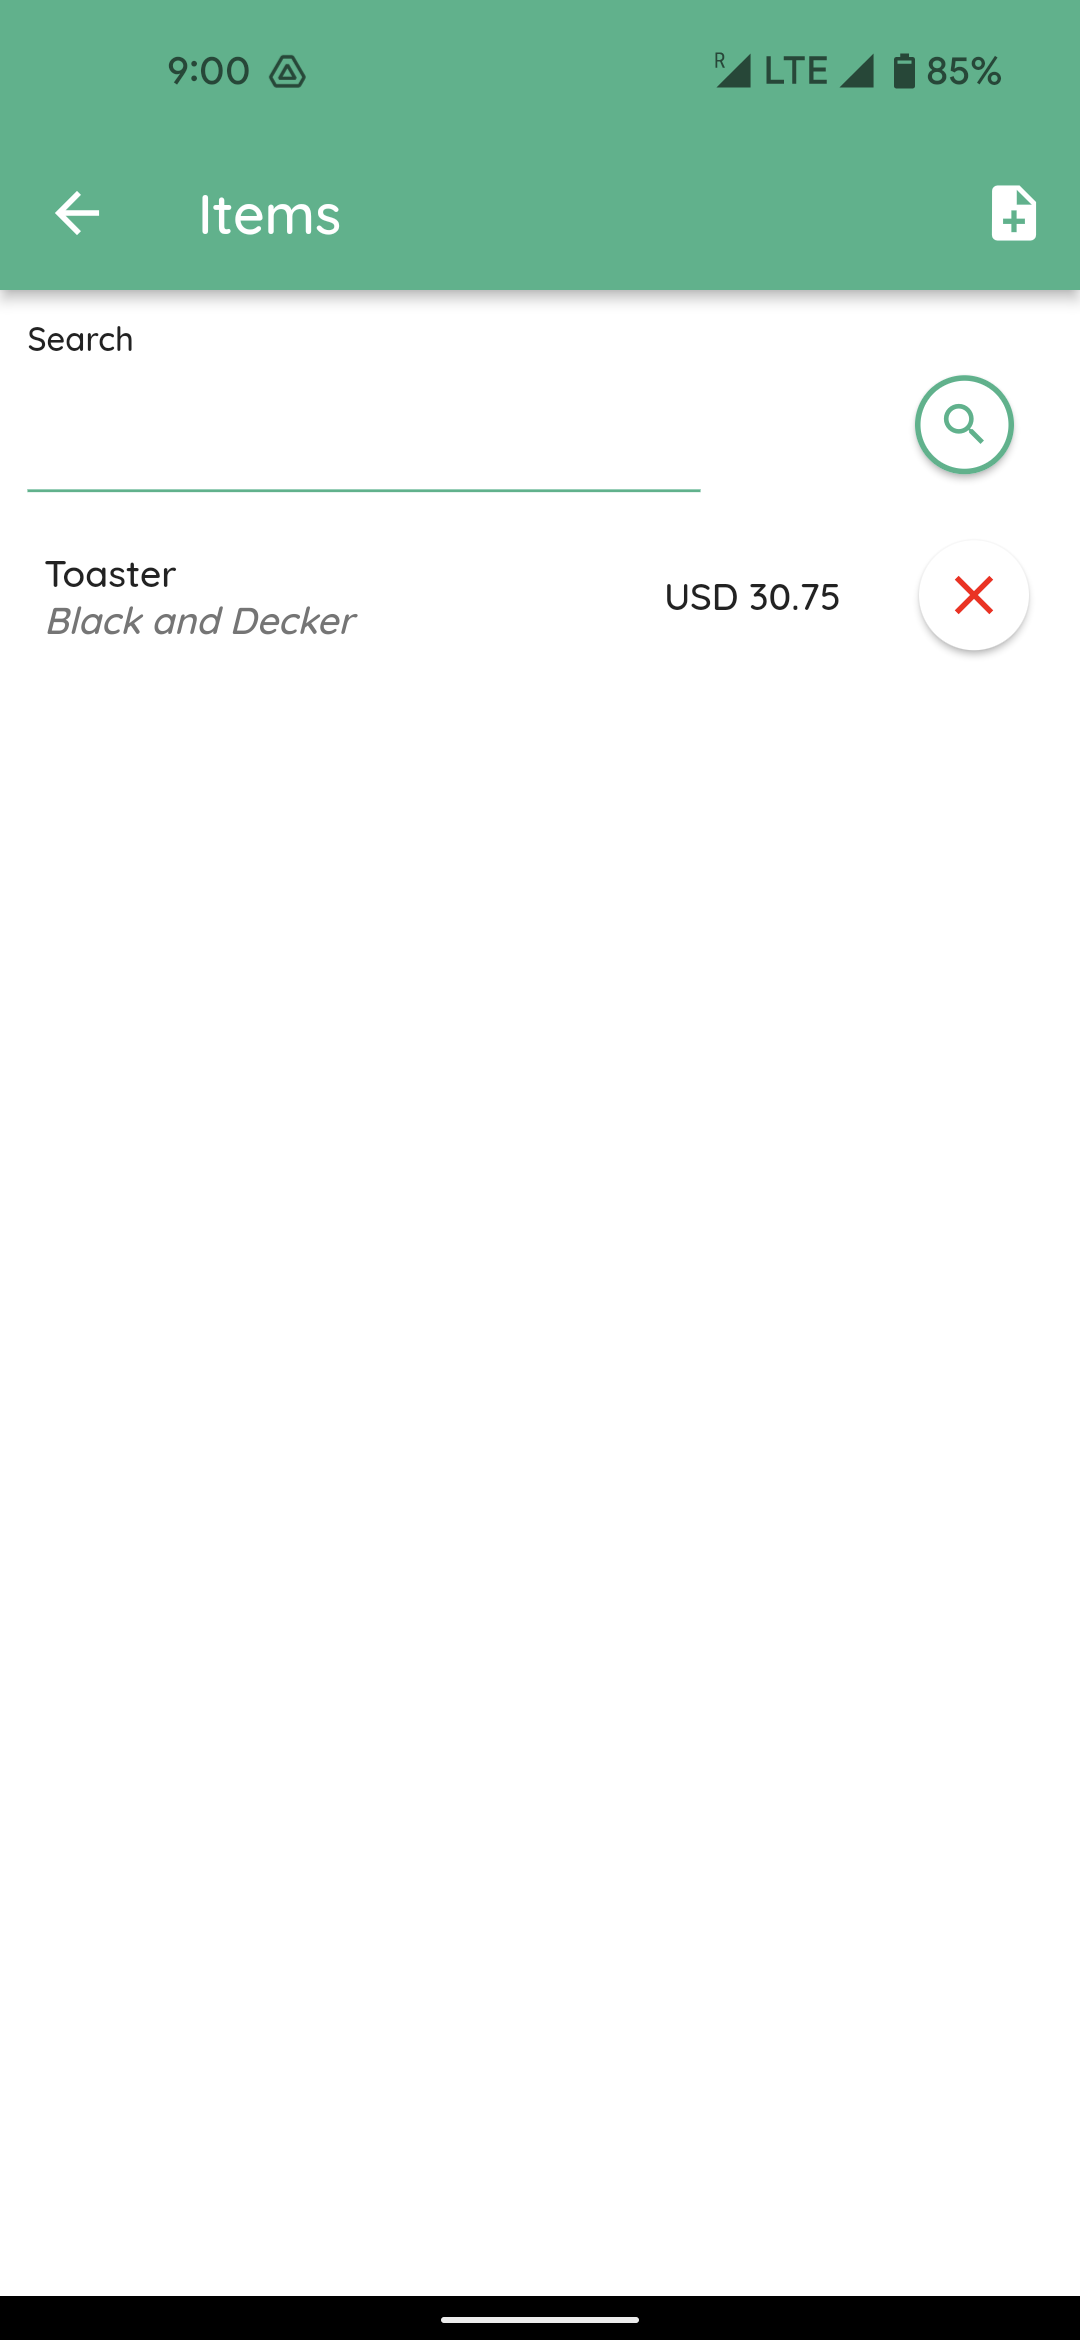
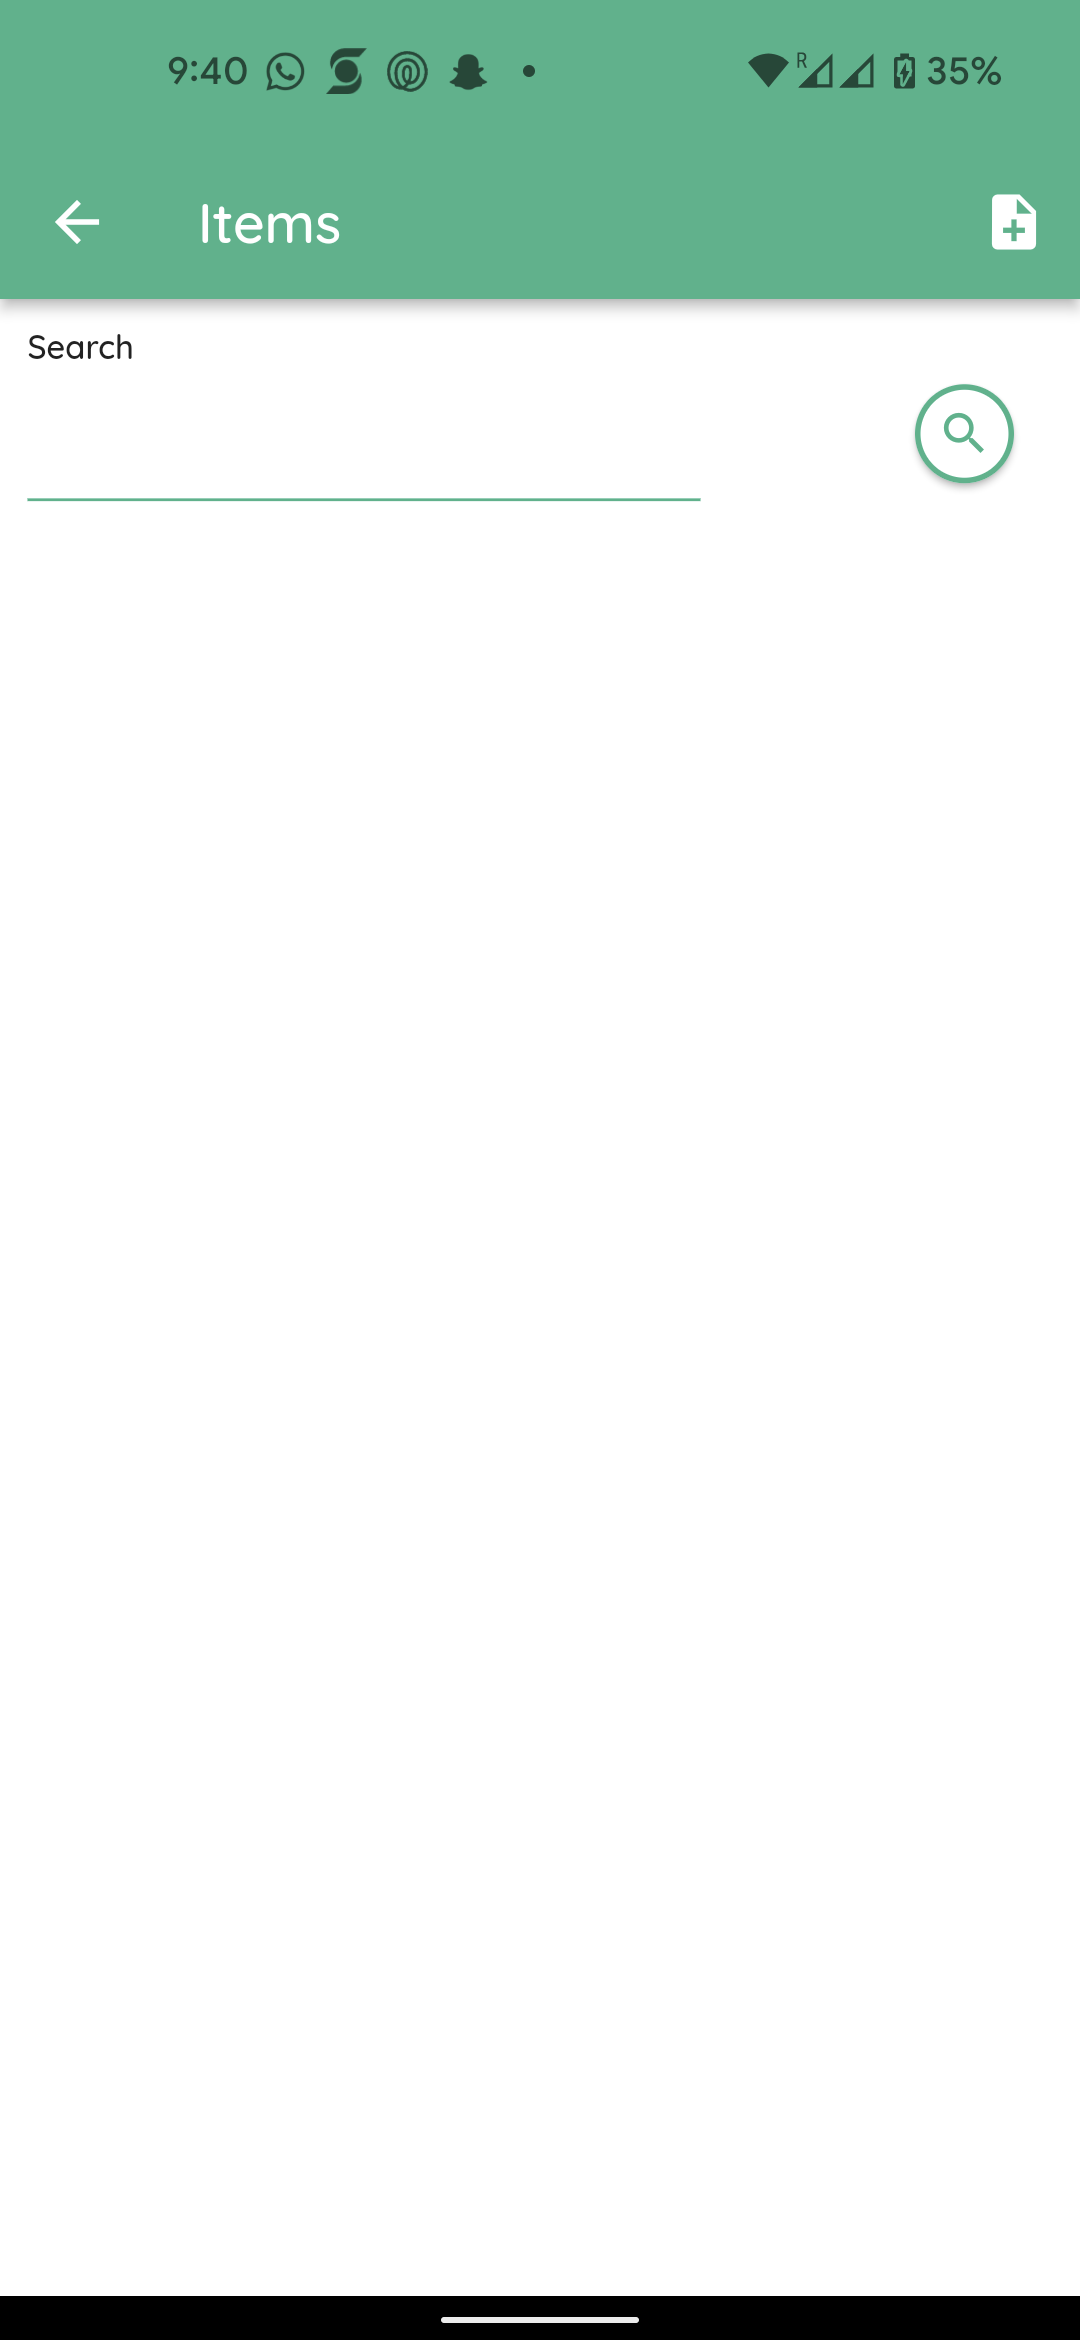
This will take you to the items screen.
You will see a blank screen like this with no items in the list for the first time you are using the invoicing module.
Click on the add icon in the top right hand corner of the screen.
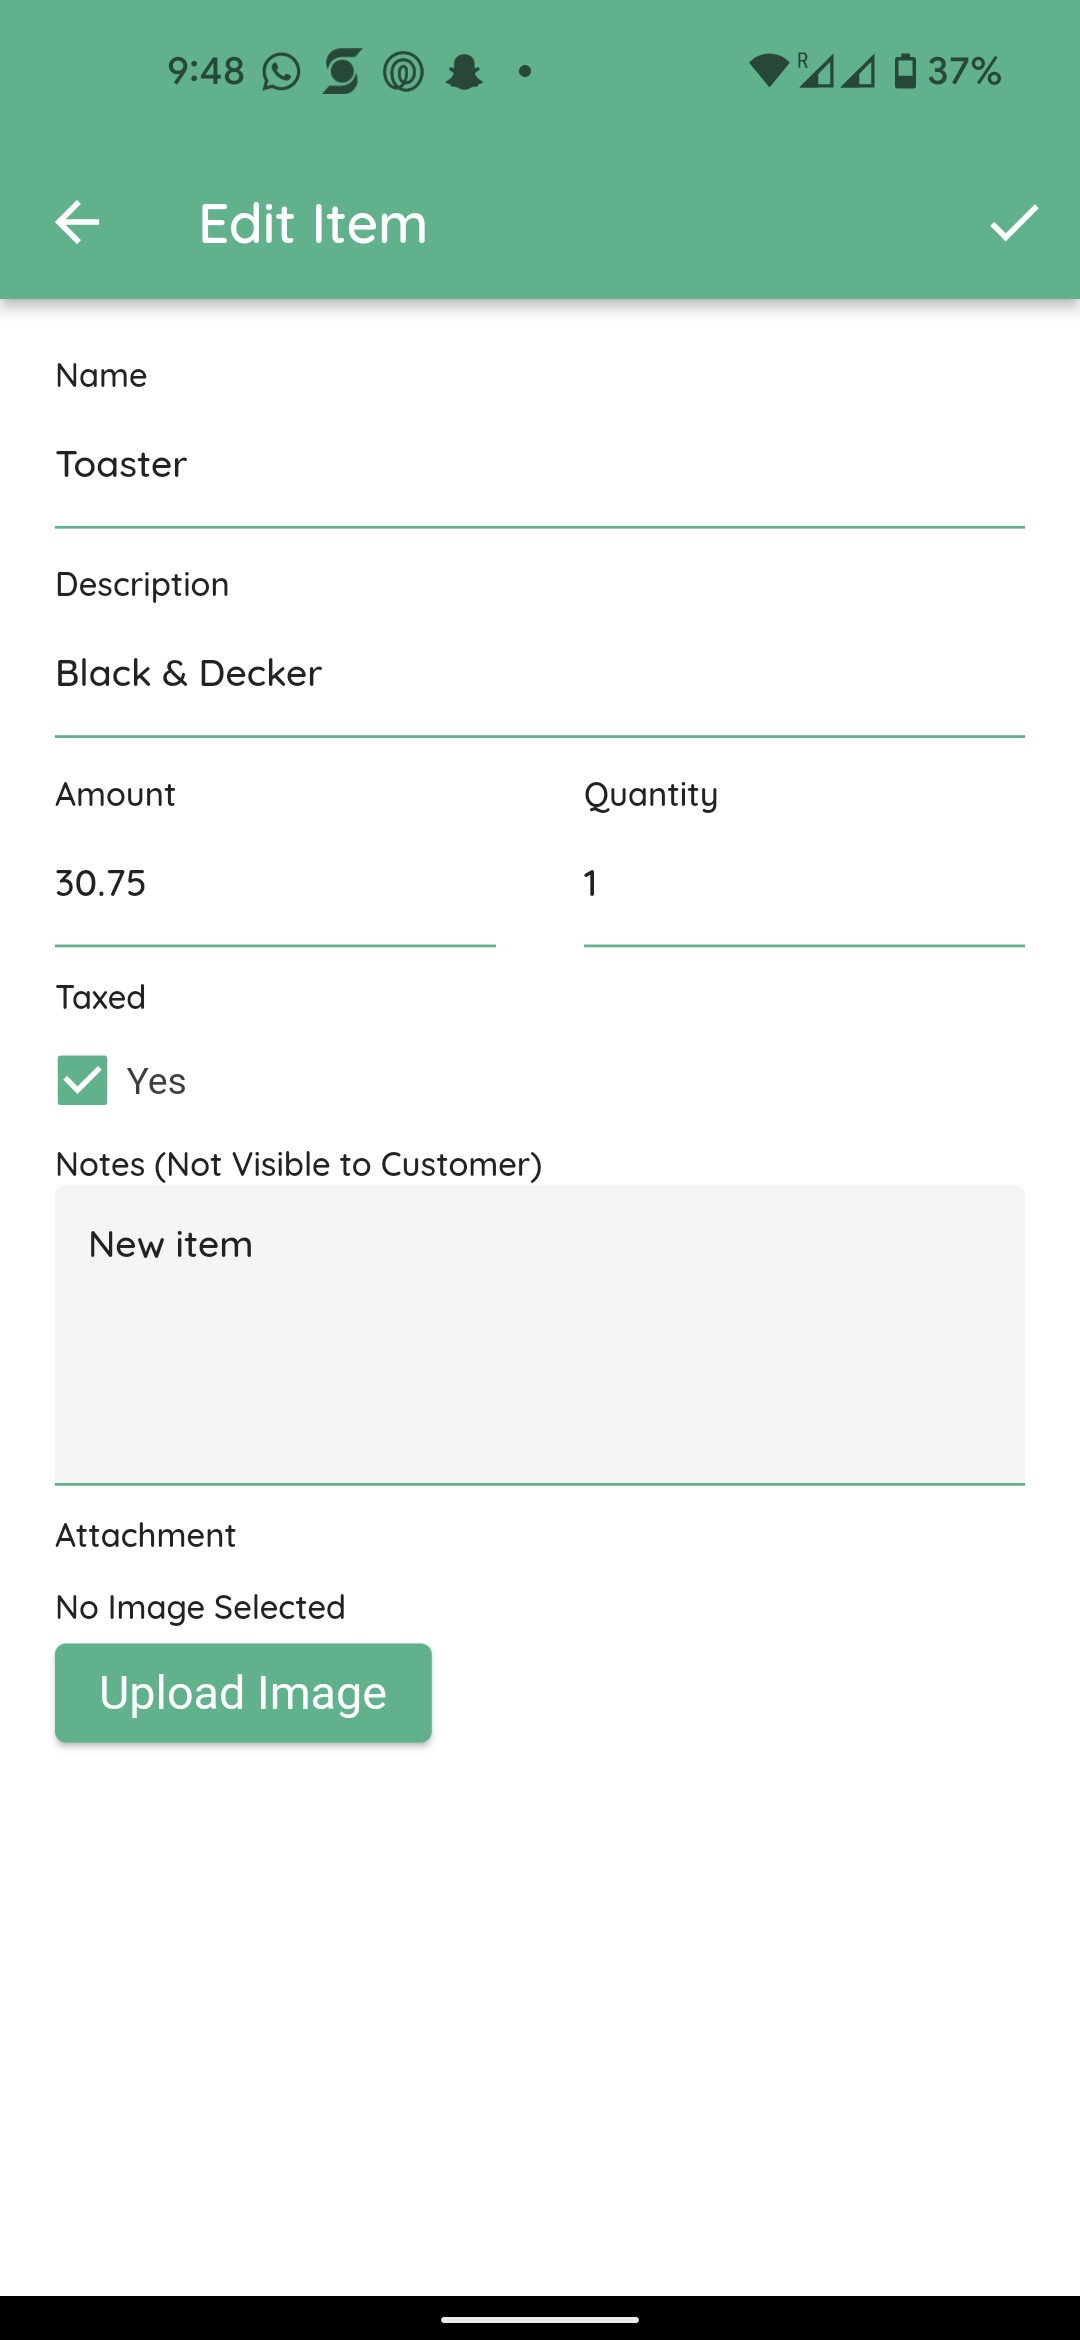
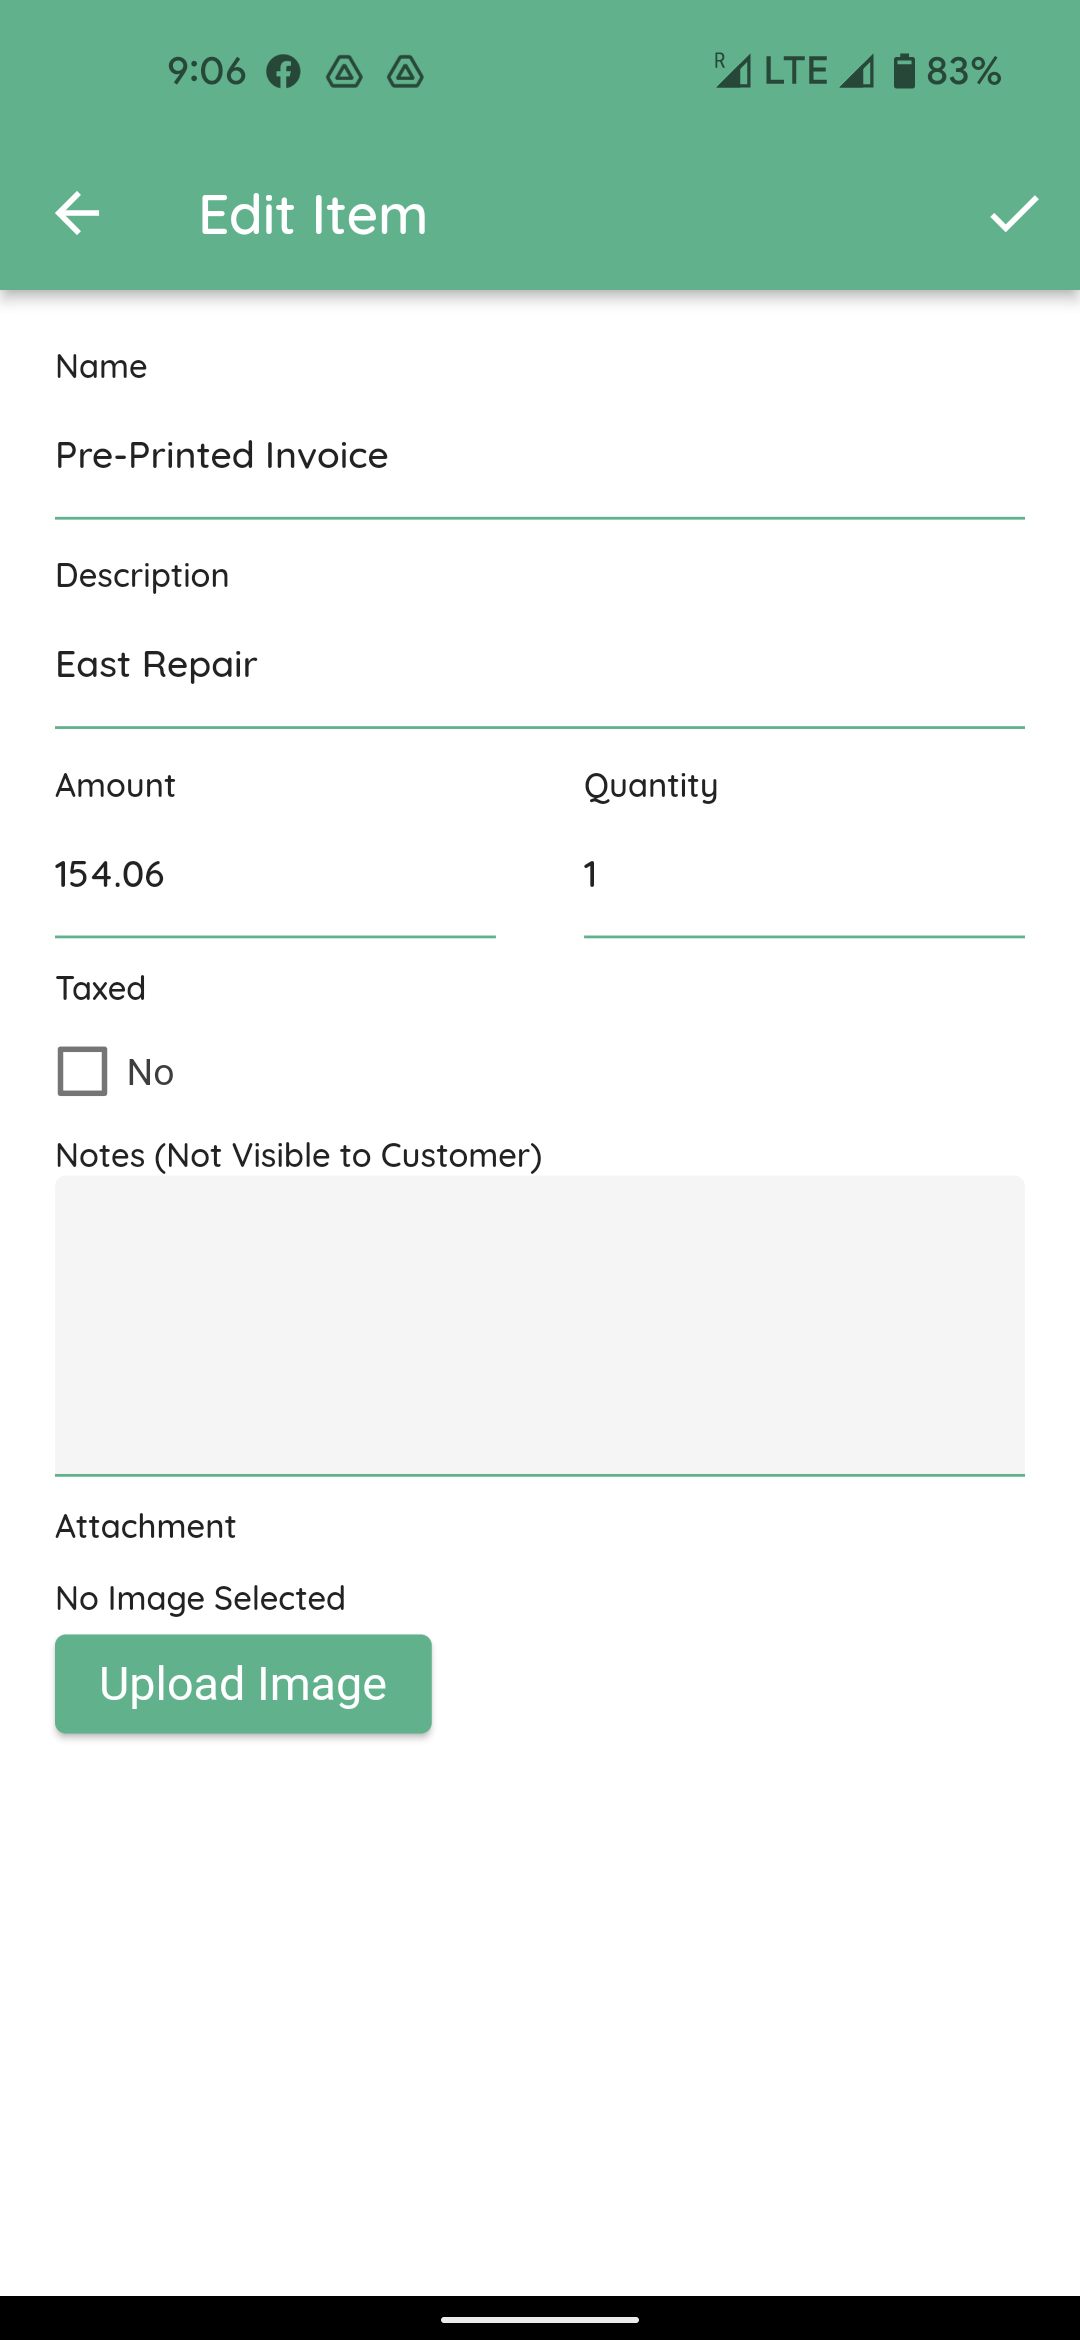
This will open the edit item screen

You can fill the respective fields accordingly. If an item is not exempt from the VAT or Tax please select the taxed box . If you unselect the taxed box the item’s price will not be taken into account at the checkout for calculating the VAT or tax.
You can attach an image here for reference as well after allowing the connect app permission to access files on your device.
If you want to replace the image click on upload image again at the bottom of the image and choose a new one.
Clicking on the tick sign in the top right hand corner of the screen will add the item to the invoice.
If you need to add another item selecting add item one more time will take you to the items screen again.
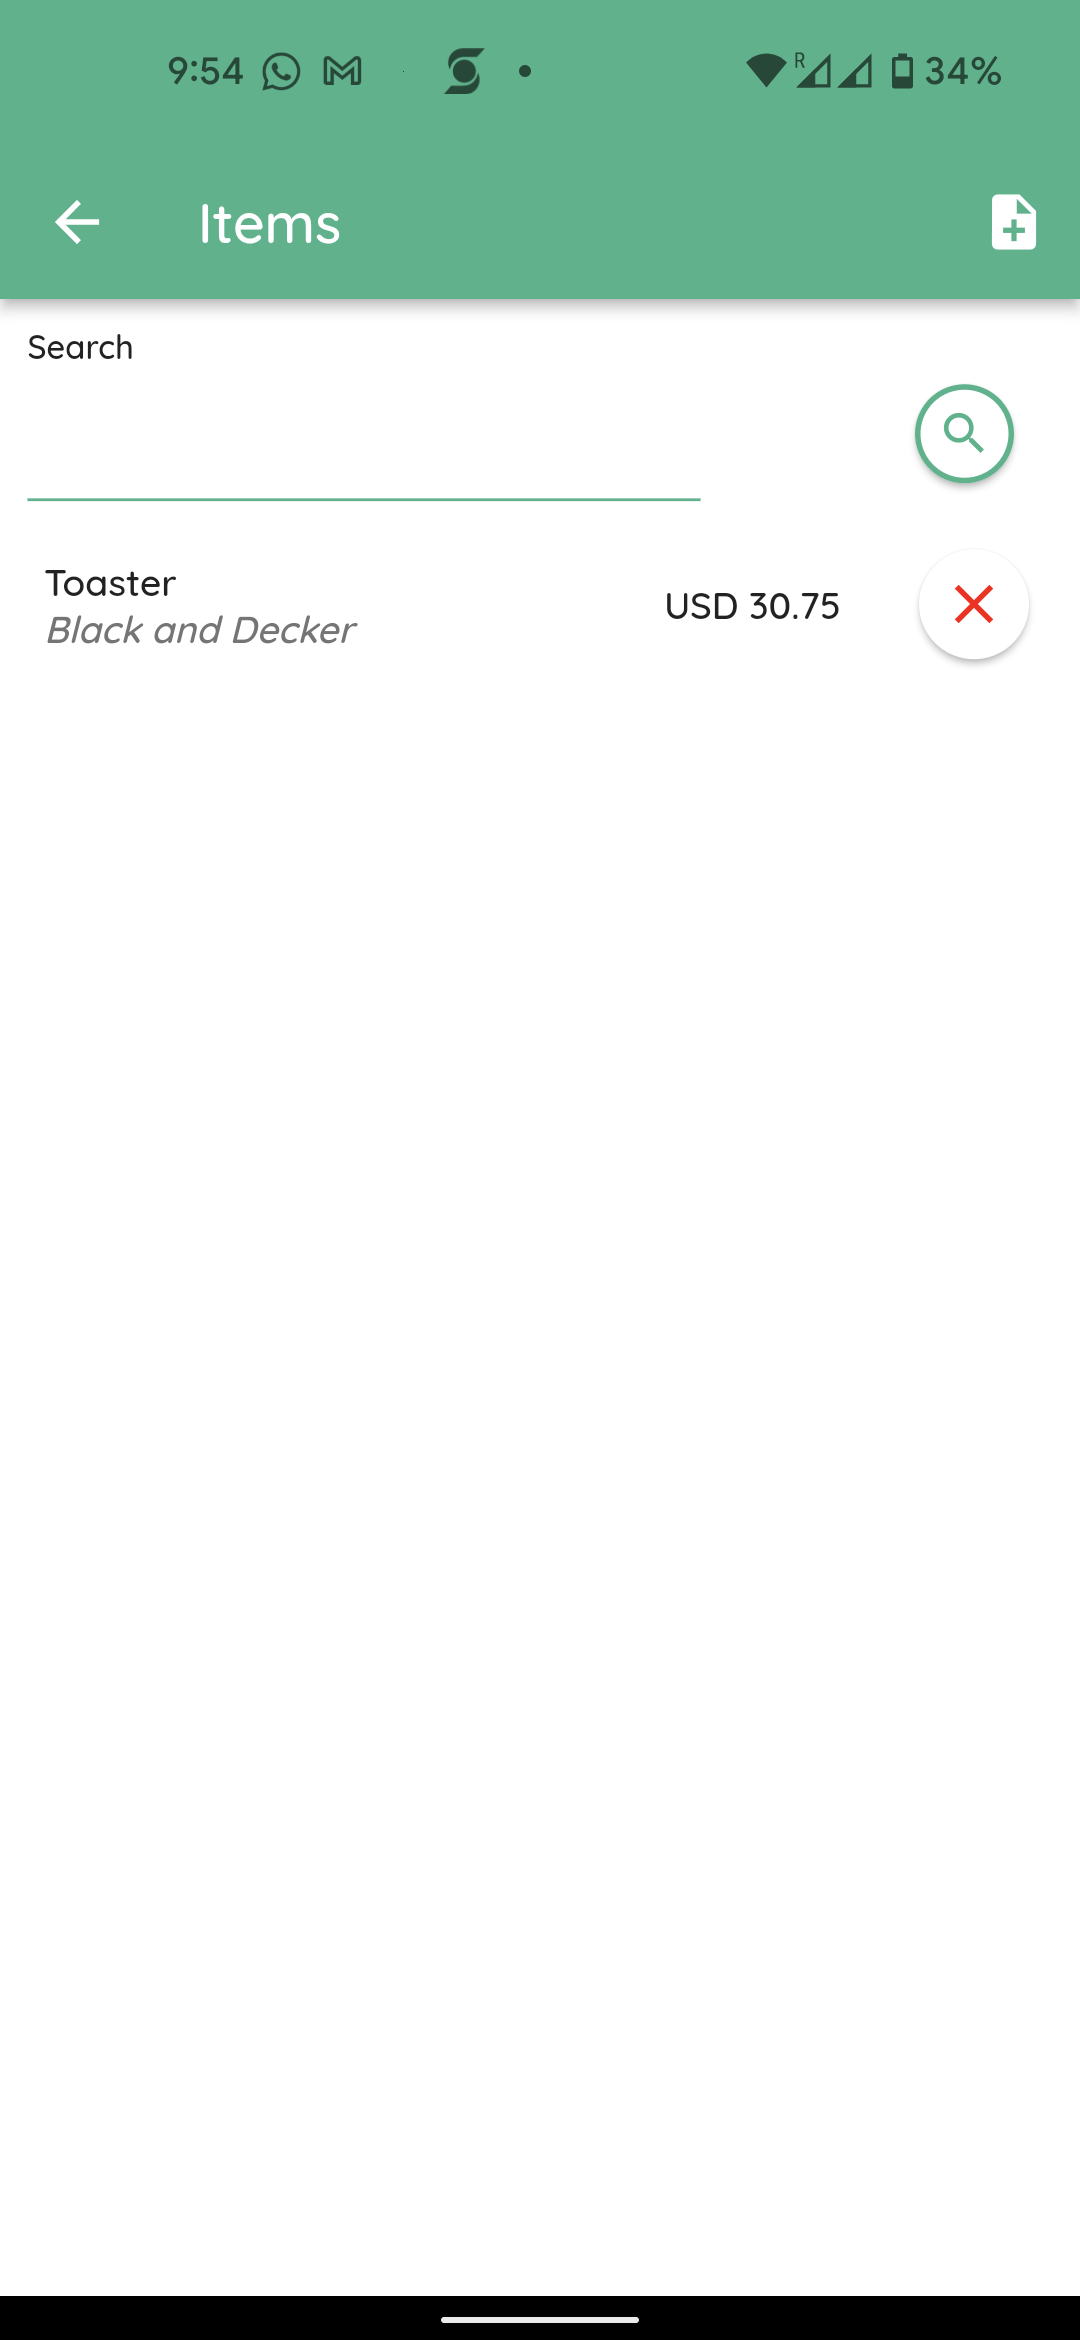
You will note that the Toaster item you have created has populated this screen. If you wish you can create another item by repeating the me steps as explained earlier.
For future reference once any item has been created it will be visible on this screen and you can simply select the item by clicking on it and add it to another invoice. You can come back to the me screen to add more items as needed. Previously created items can be deleted from this screen by clicking the red cross button across from any individual items.
Clicking back on the top left will take you back to the invoice creation page.

If you are sending a pre-printed invoice from your own separate invoicing system using the connect app please create an item for the pre-printed invoice, by selecting add item as before. This is essential step for the connect app to create an entry for the pre-printed invoice and it’s amount on the connect database for record, tracking and sending reminders at a later date.
For this purpose click the add item button

and then select the add button on the top right of the items screen.

Please fill the fields
Put the total invoice amount in the amount field. Please make sure you unselect taxed box , if the pre-printed invoice included the tax amount.
Kindly DO NOT attach the pre-printed invoice to this item, as those attachment here will not be visible to the customer.
Click the tick sign at the top right hand corner of the items screen.
On the invoice creation page attach the pre-printed invoice file by clicking on the corresponding button
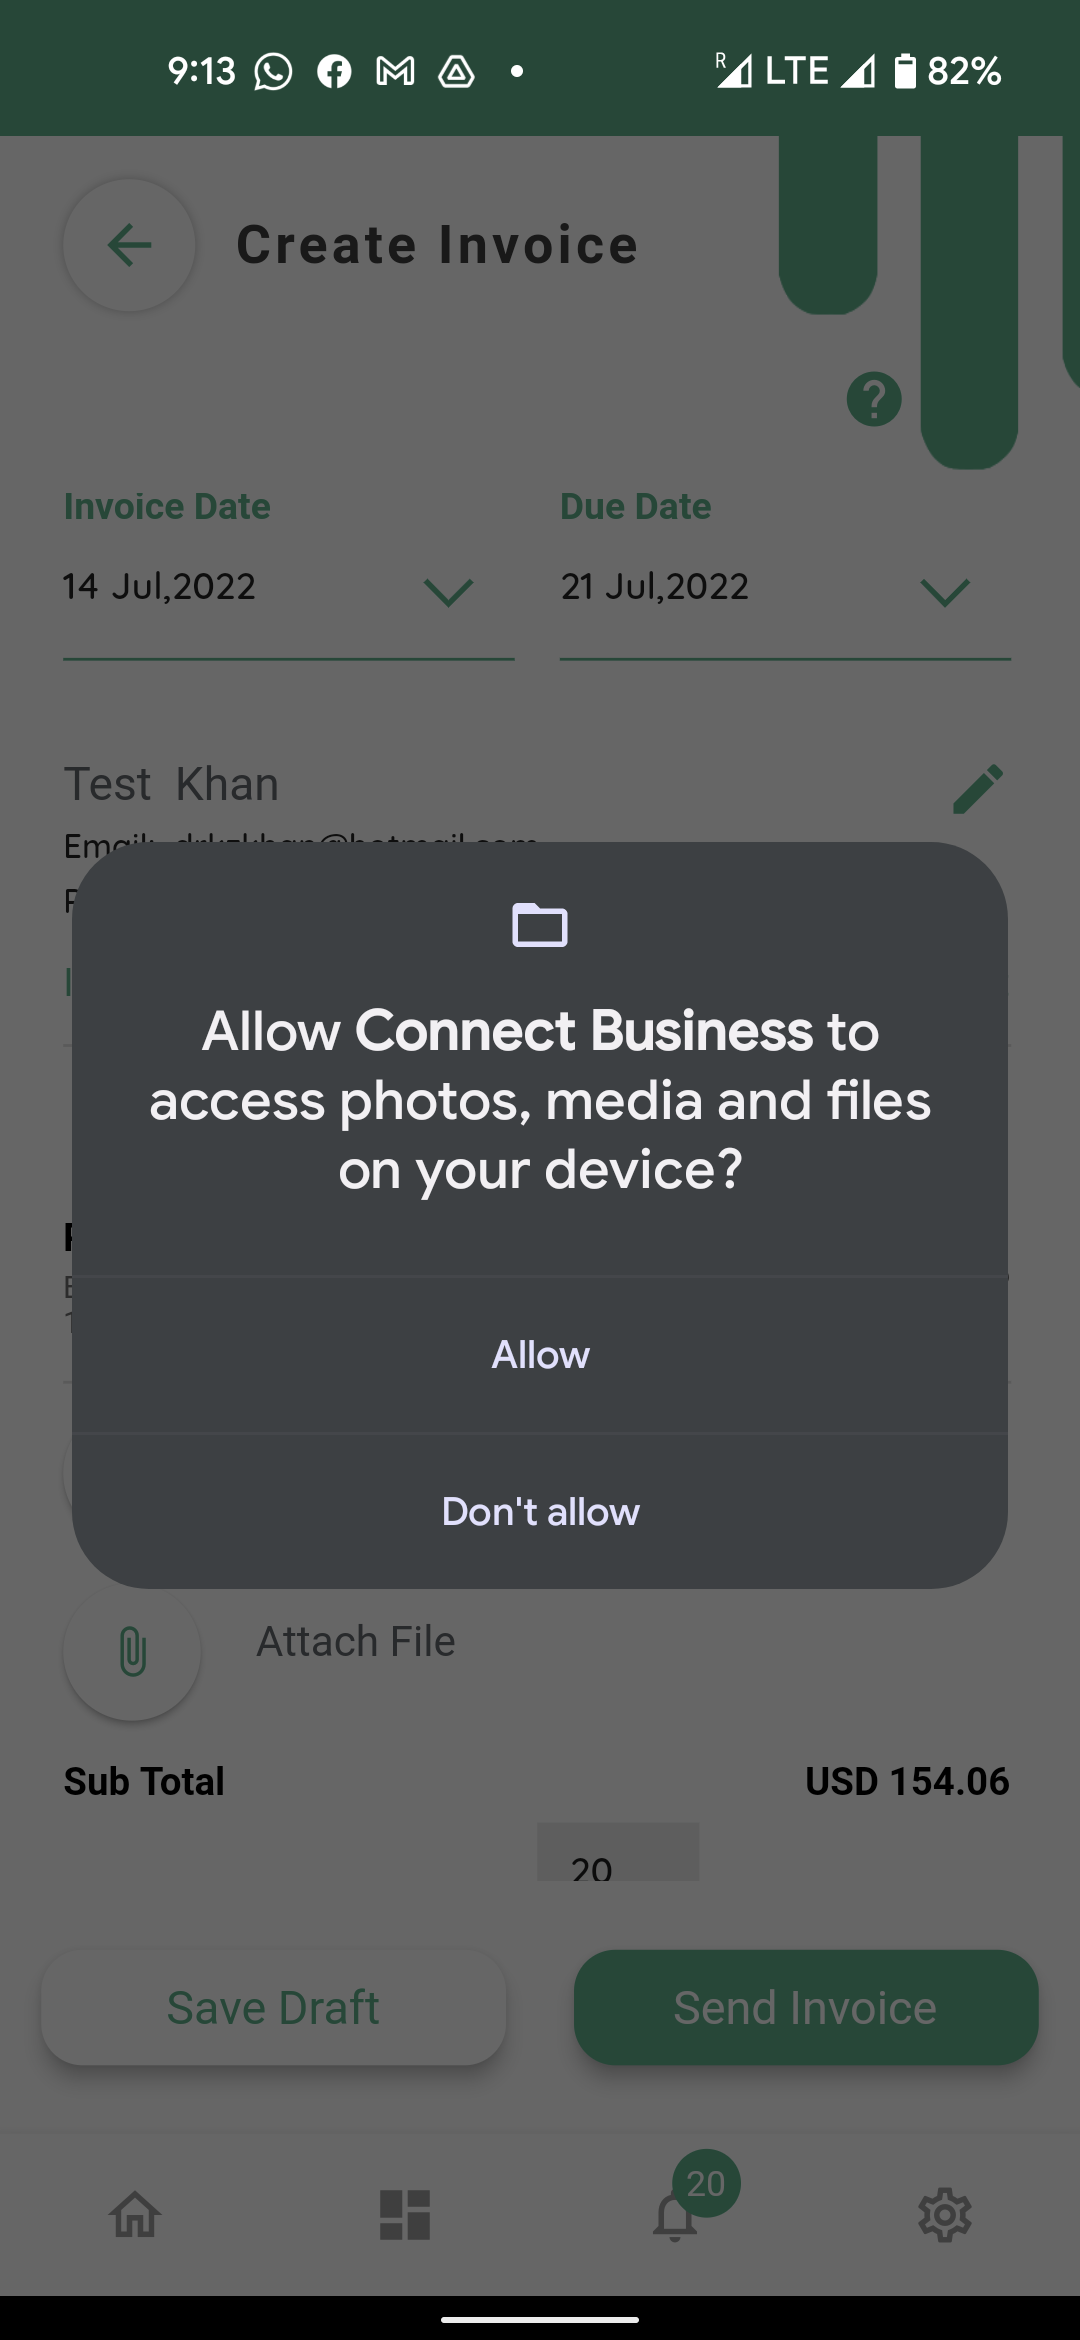
Allow connect to access your files, if this permission had not been granted before.
Attach the image or pdf file from your storage or Camera.

and confirm
Clicking send at the bottom of the screen will send the invoice to the customer.

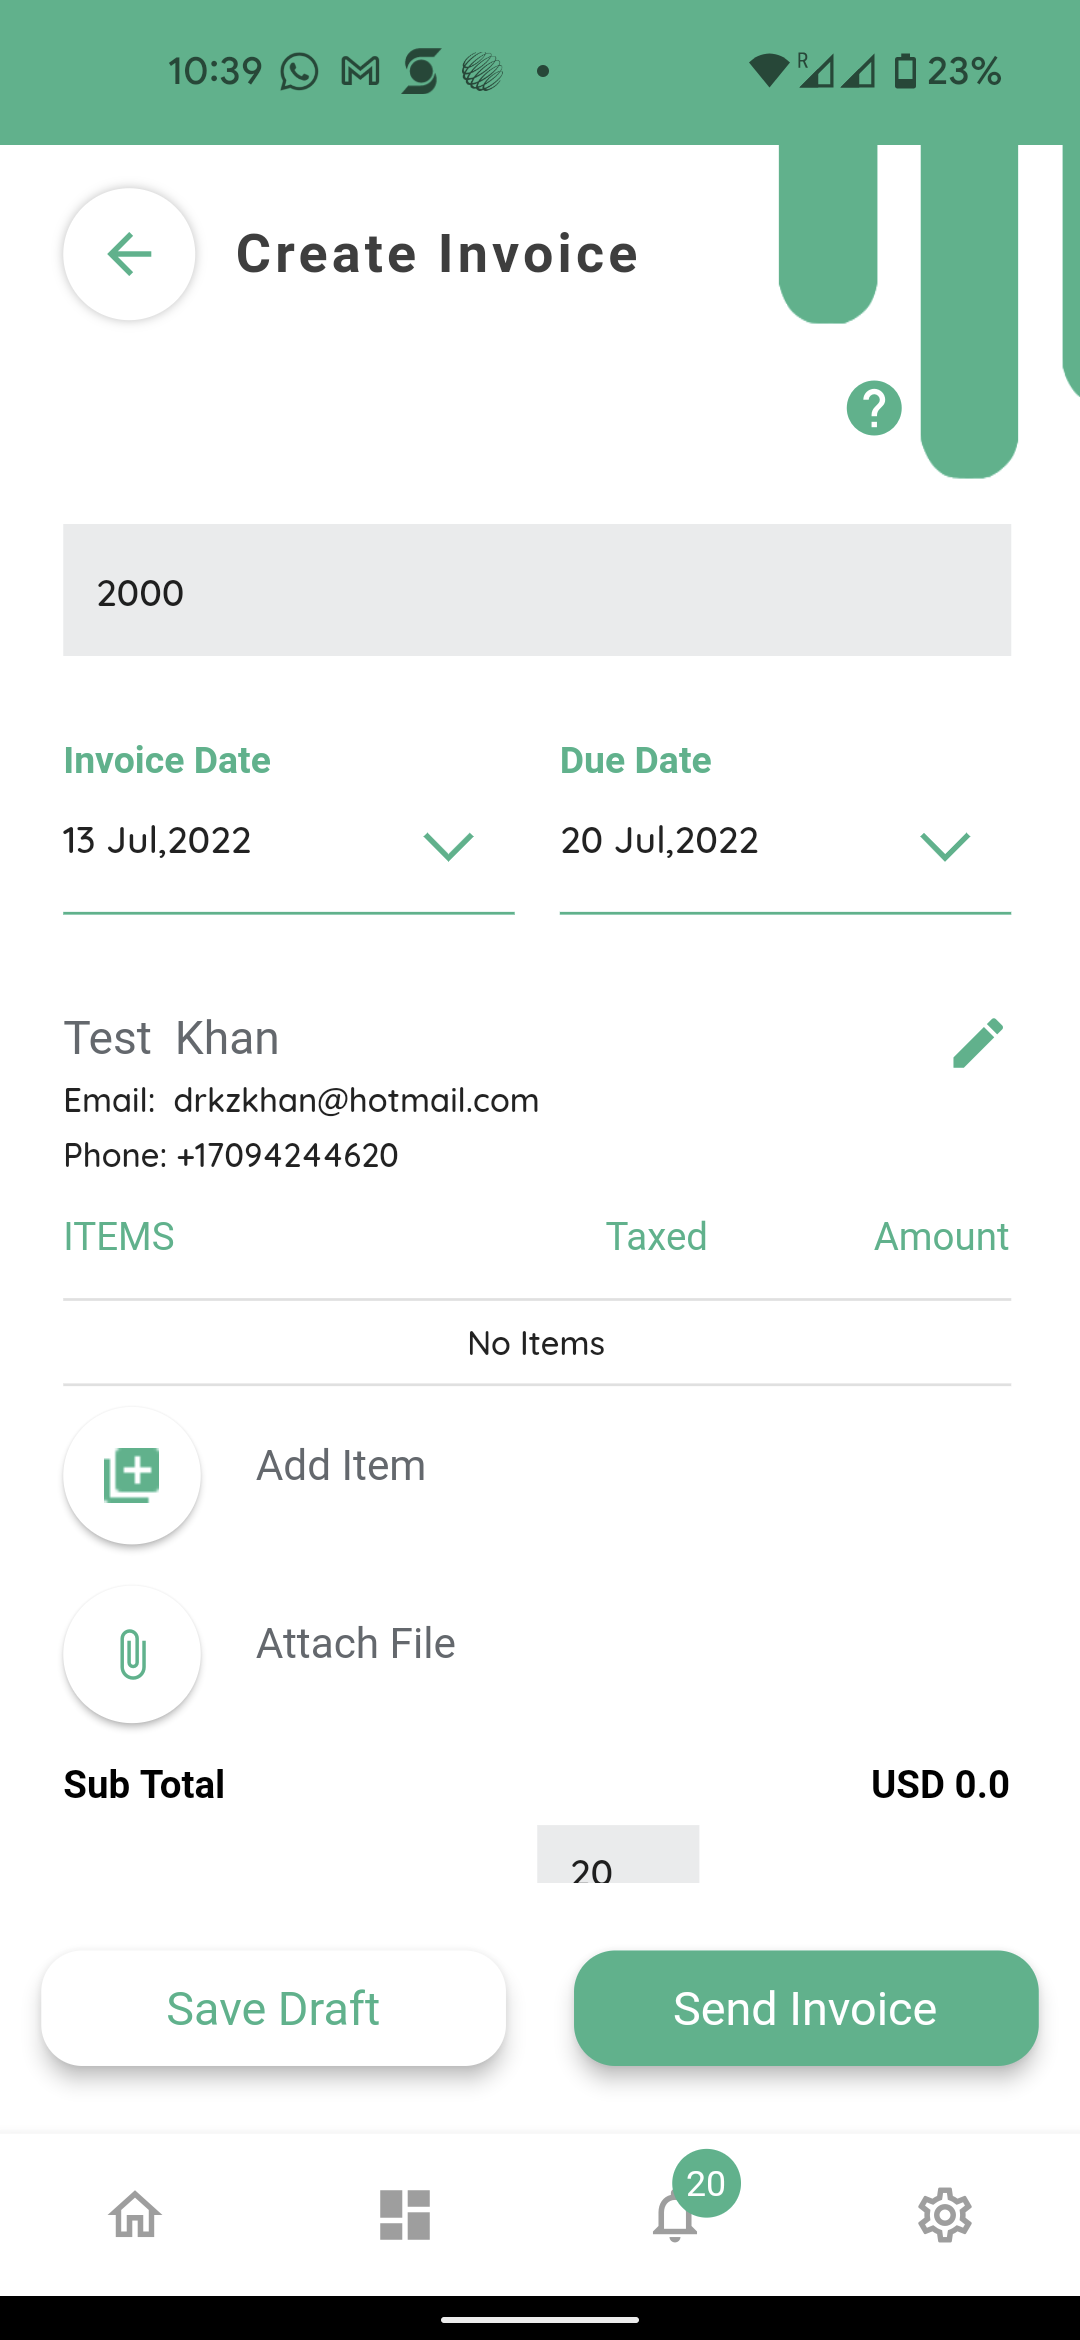
Going back to the invoice we were creating for the toaster through the app.
You can edit the tax rate here. It will apply to all items eligible for tax when the item was created. The tax will not be added to any items which were tax exempt when created.
If you wish to enter any notes you can enter them in the last field.
If you are happy with the invoice you can either save it as draft or Send to the customer.
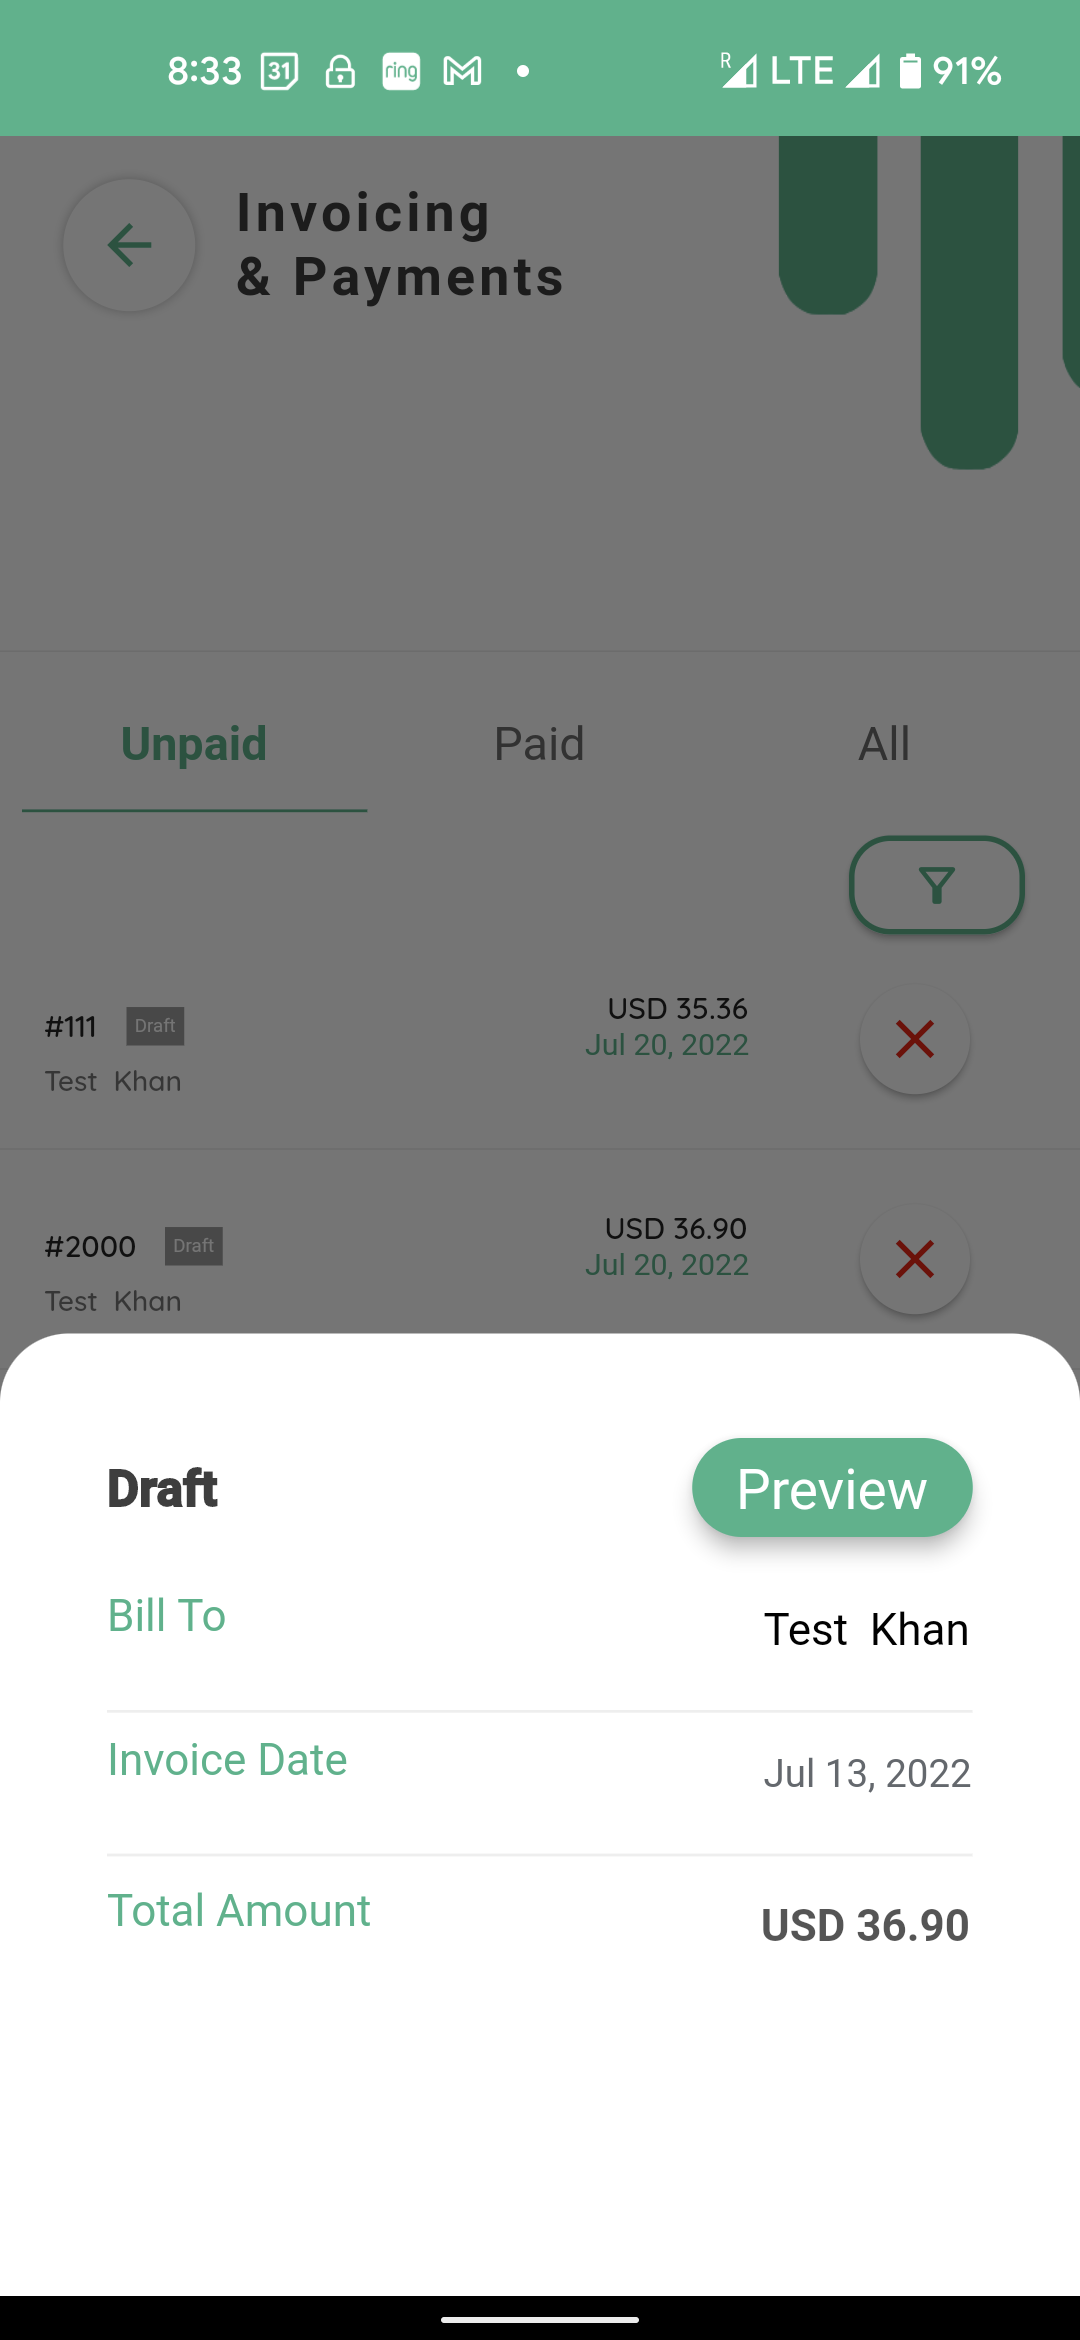
Clicking on Save Draft will Save the invoice under unpaid in a draft format.

To go back to the me invoice please select the invoice from the invoices home screen under unpaid.
It will open up the following menu

Selecting preview will open up the preview screen.
Clicking edit invoice at the bottom of the screen will open up the invoice.
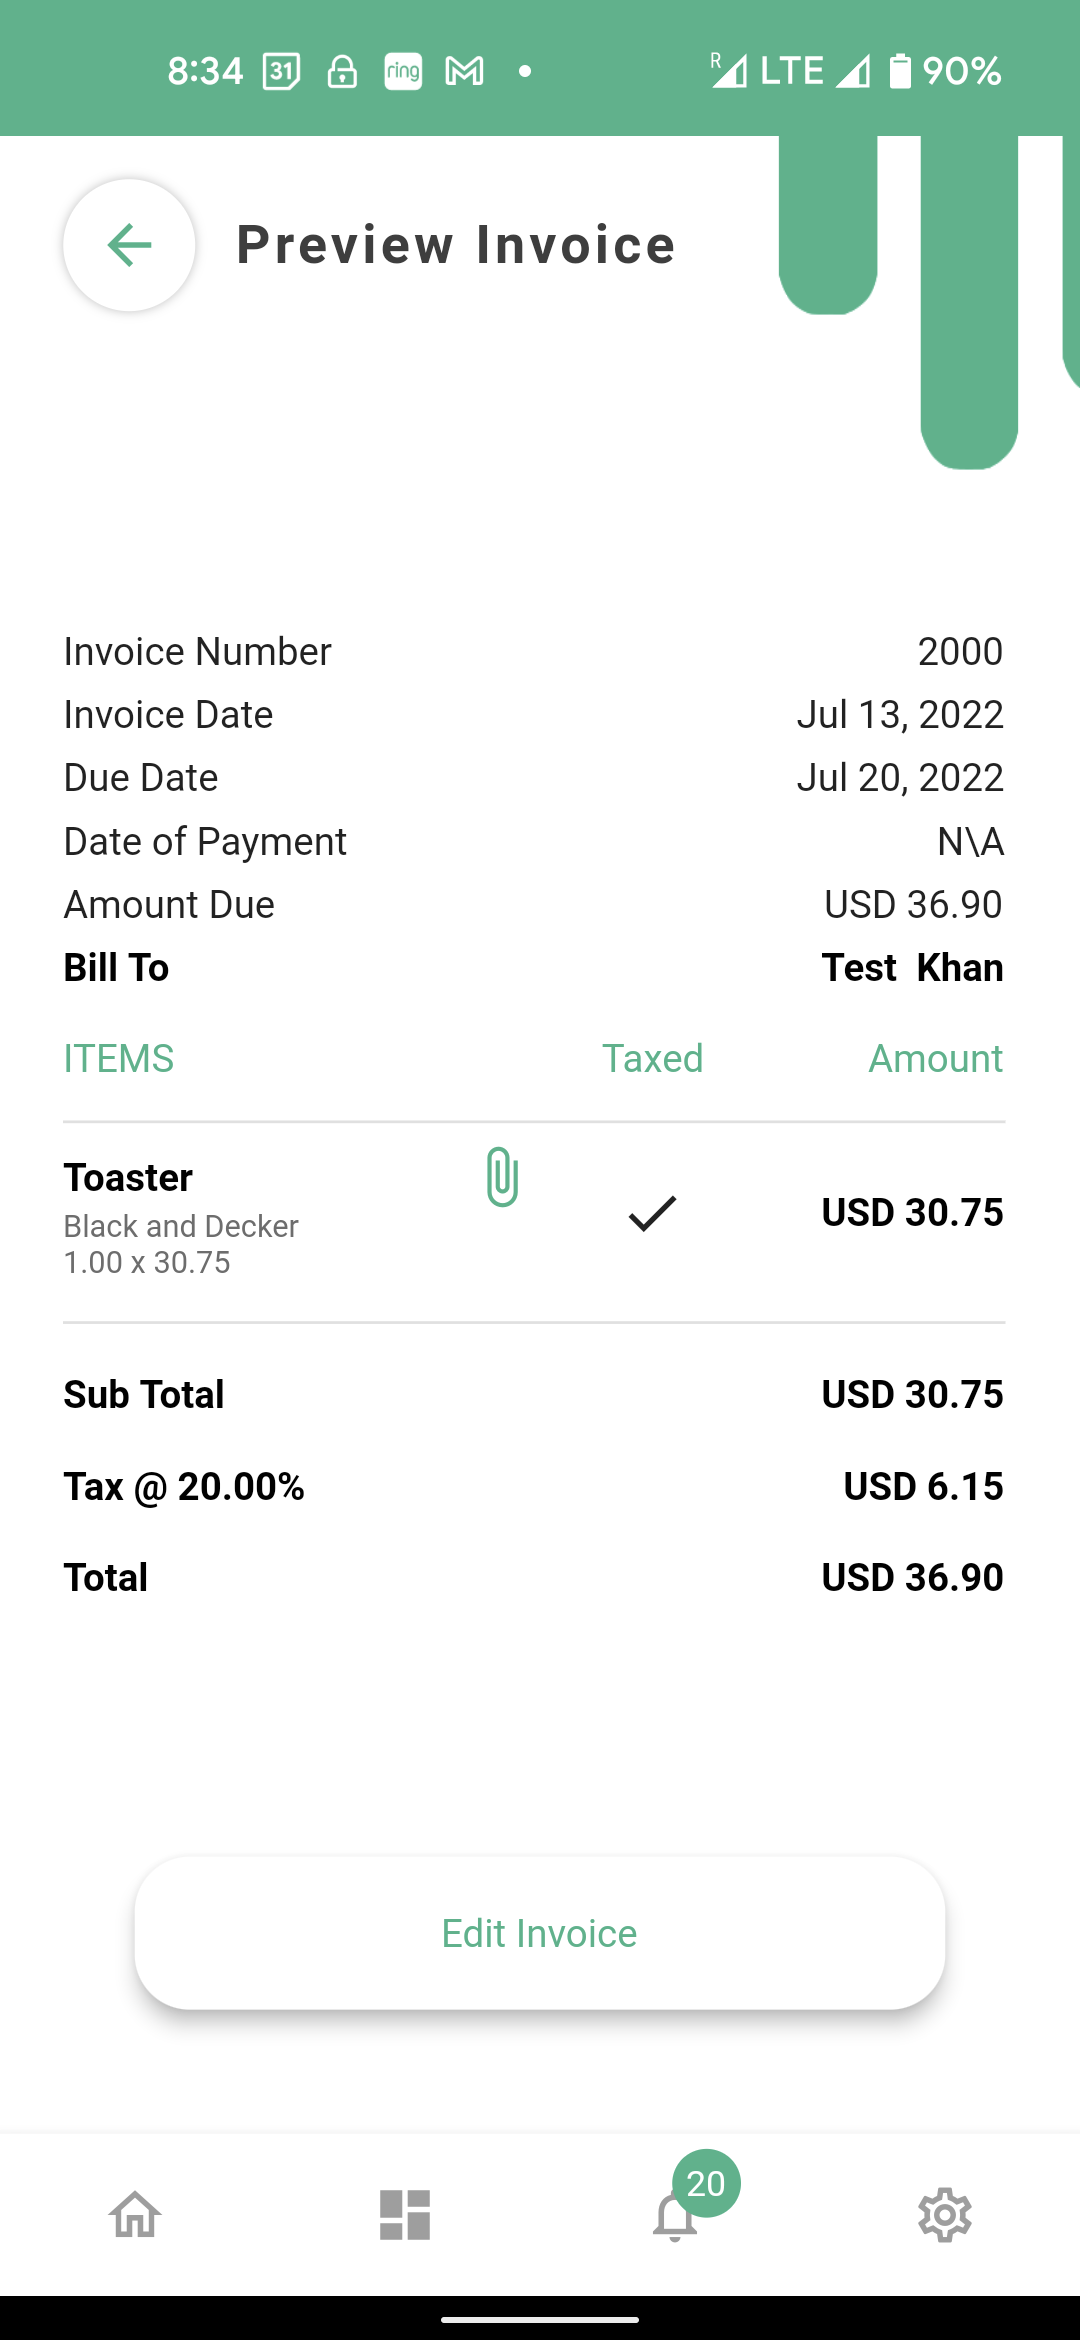
You can make changes if you wanted or send it as it is by selecting update and send at the bottom of the screen.

The invoice sent confirmation will be shown and the invoice will be sent.

The status of the invoice will change from Draft to unpaid with a yellow tag the invoices module’s home screen.
Once the client pays the invoice using the connect app.